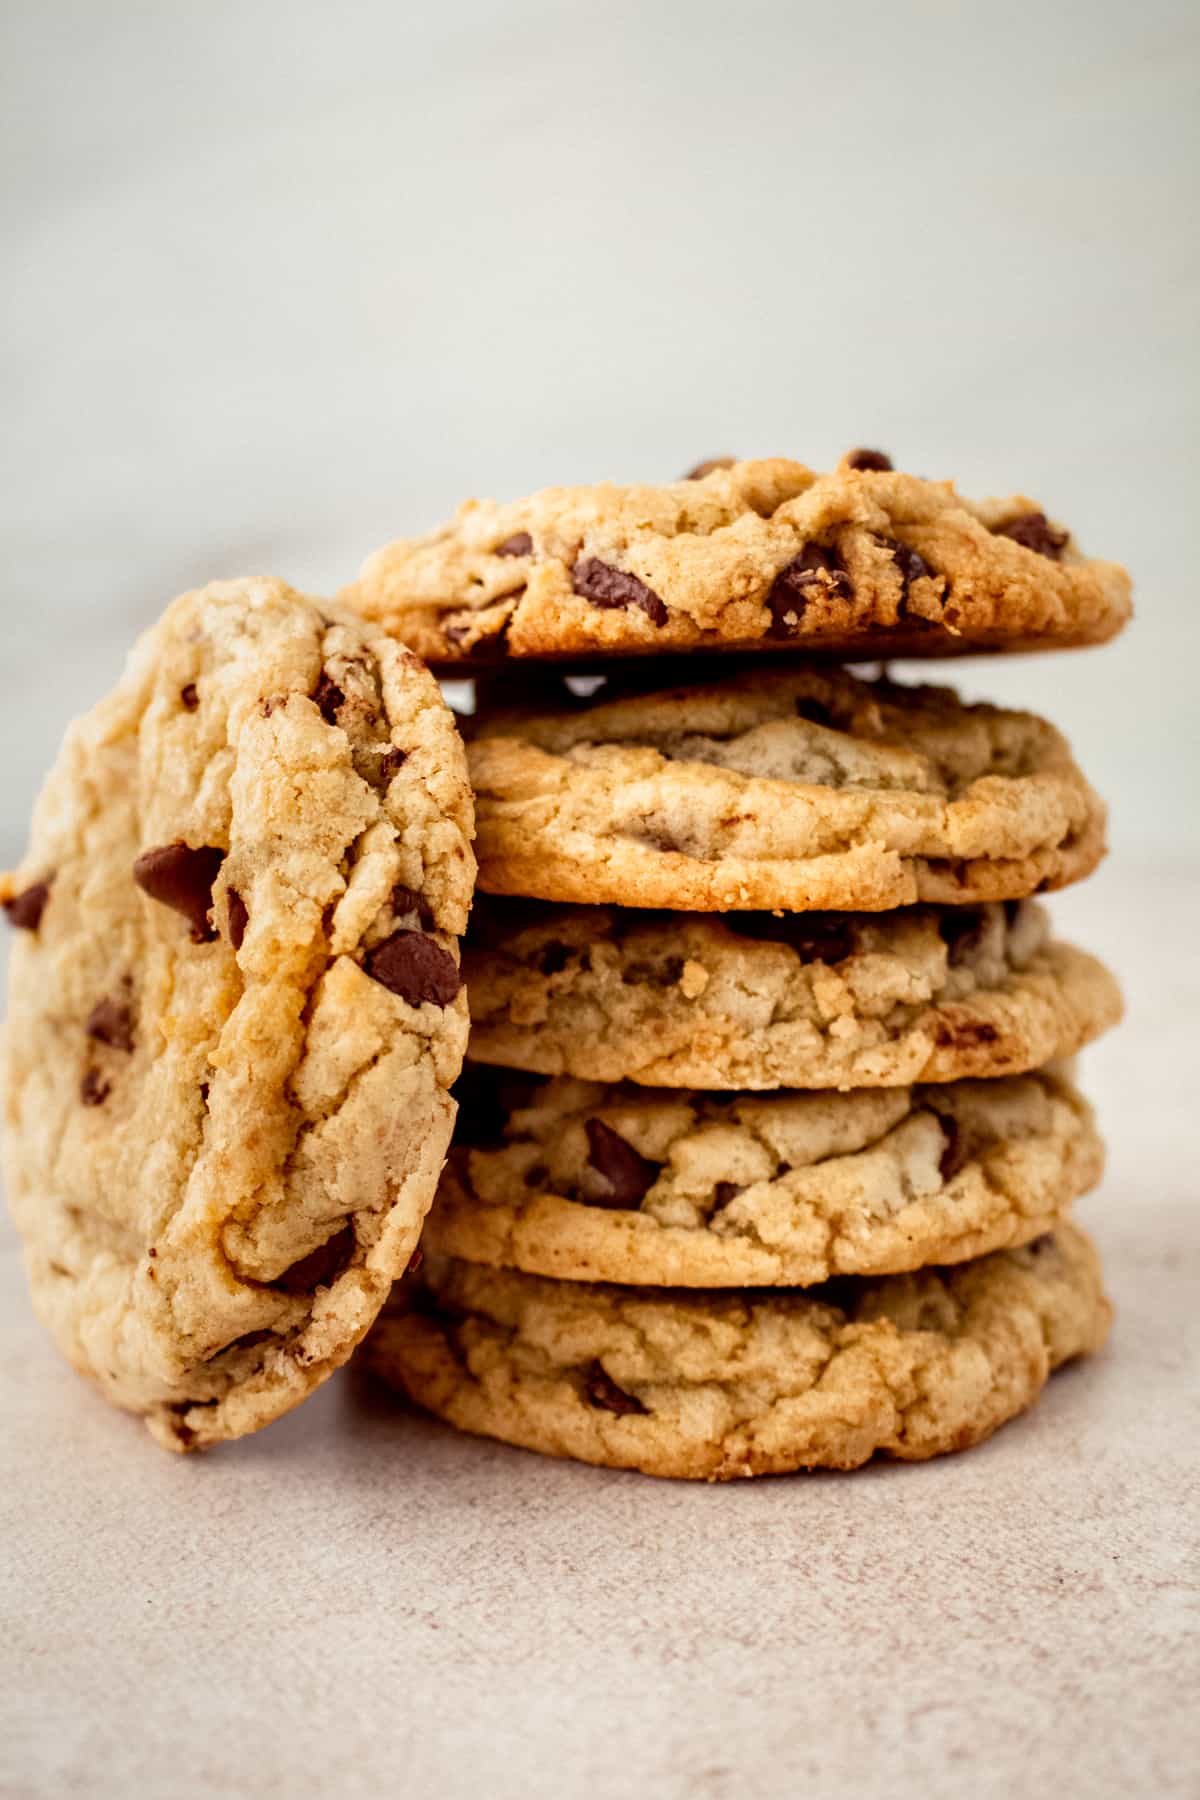
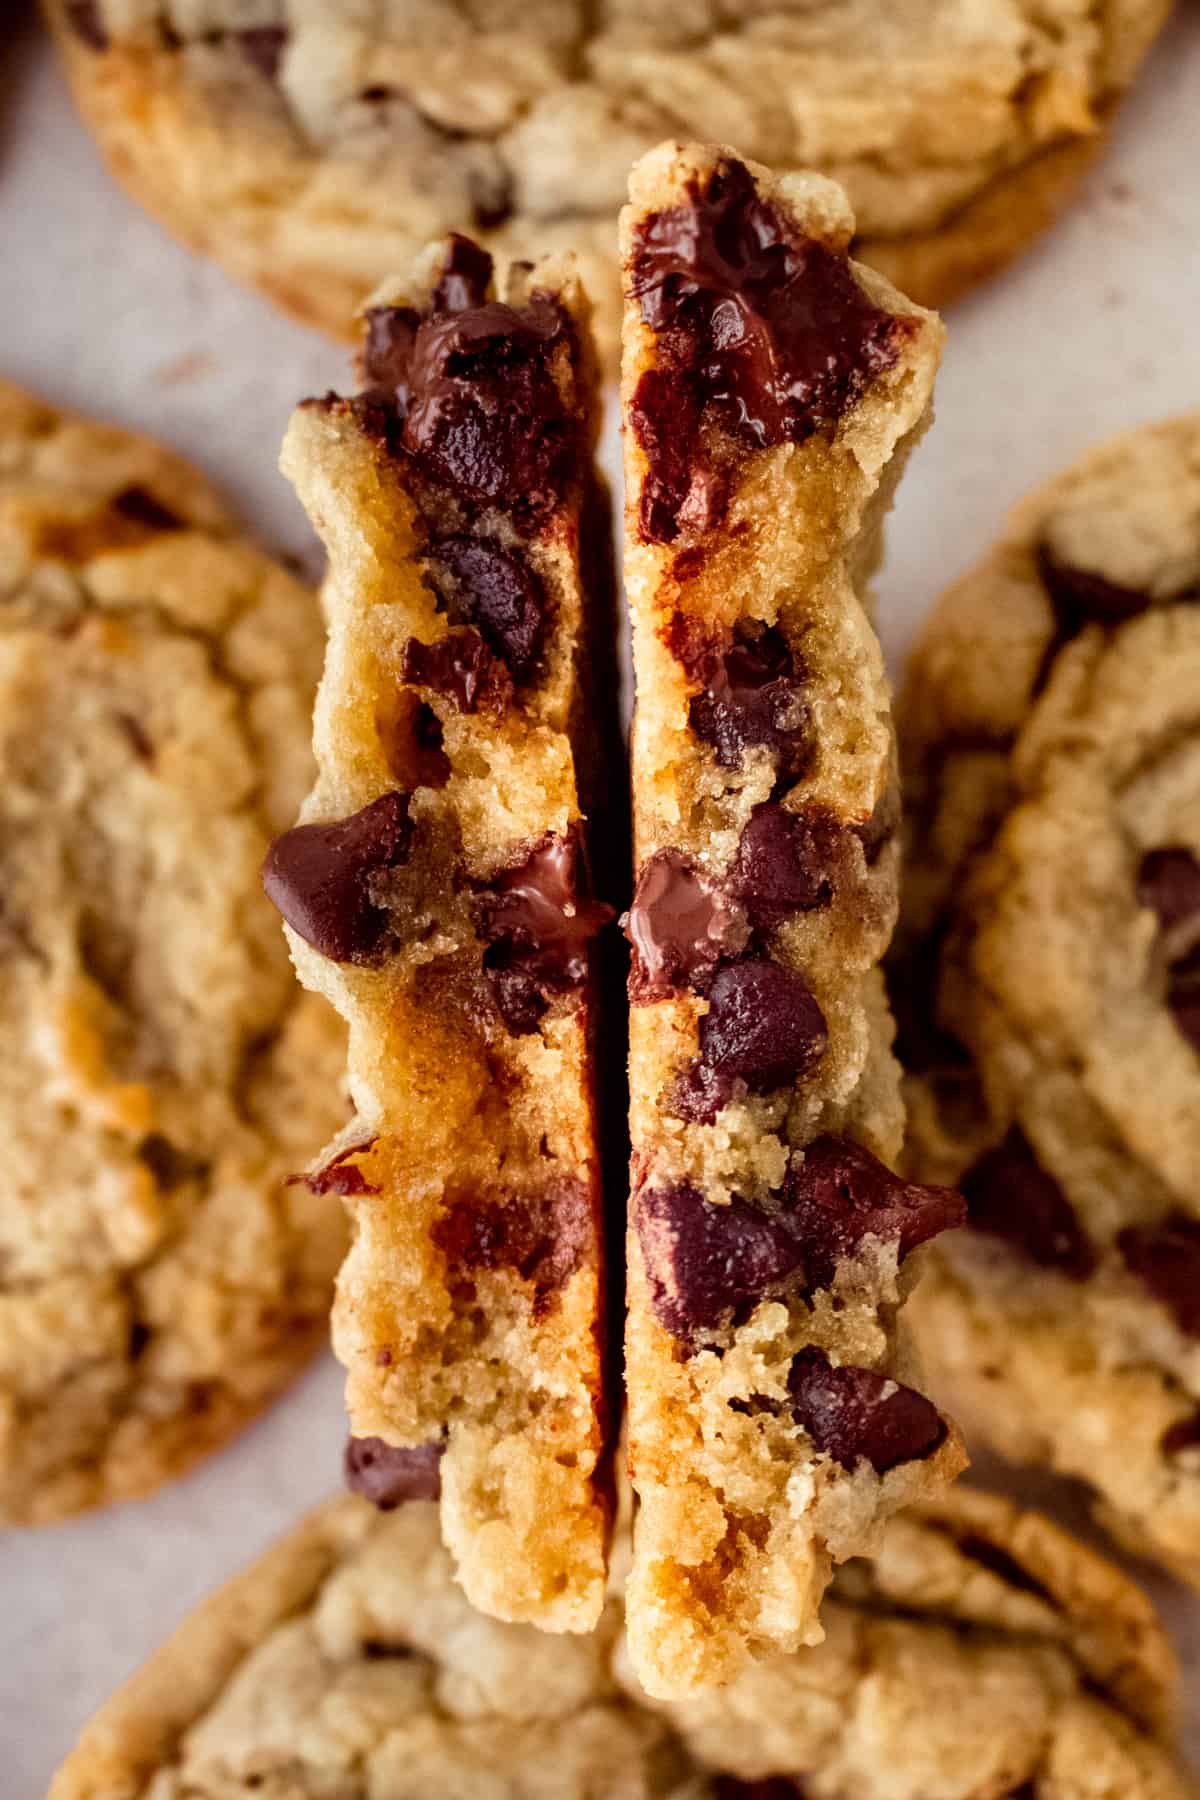
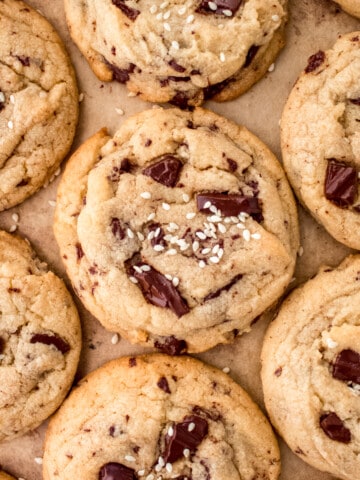
These bakery style chocolate chip cookies are an essential staple in my house. They’re big, thick and chewy with pockets of melty chocolate – they never stick around for long. The dough can also be made in advance, scooped and frozen to always have a supply in the freezer.
Jump to:
Why You Will Love These Cookies
- Less than 10 minutes to make the cookie dough.
- These are everything bakery style chocolate chip cookies should be. Thick, chewy, soft interiors with crisp edges, buttery, caramel-ly and full of ooey-gooey chocolate chips.
- No mixer required. I chose to use a mixer when taking photos but I've made these cookies countless times without a mixer and the results are the same.
- Easy to follow recipe with step by step photo instructions.

Recipe Ingredients
Unsalted butter - Melted butter is used, instead of softened butter, which results in chewier cookies and less spreading when baked.
All purpose flour
Baking soda
Fine sea salt
Granulated sugar
Brown sugar
Eggs - egg and egg yolk
Vanilla
Semi-sweet chocolate chips - Any brand works, but choosing a higher quality brand will result in the best cookies. I like to use Ghirardelli, Guittard or Trader Joe's brand.
Recipe Instructions
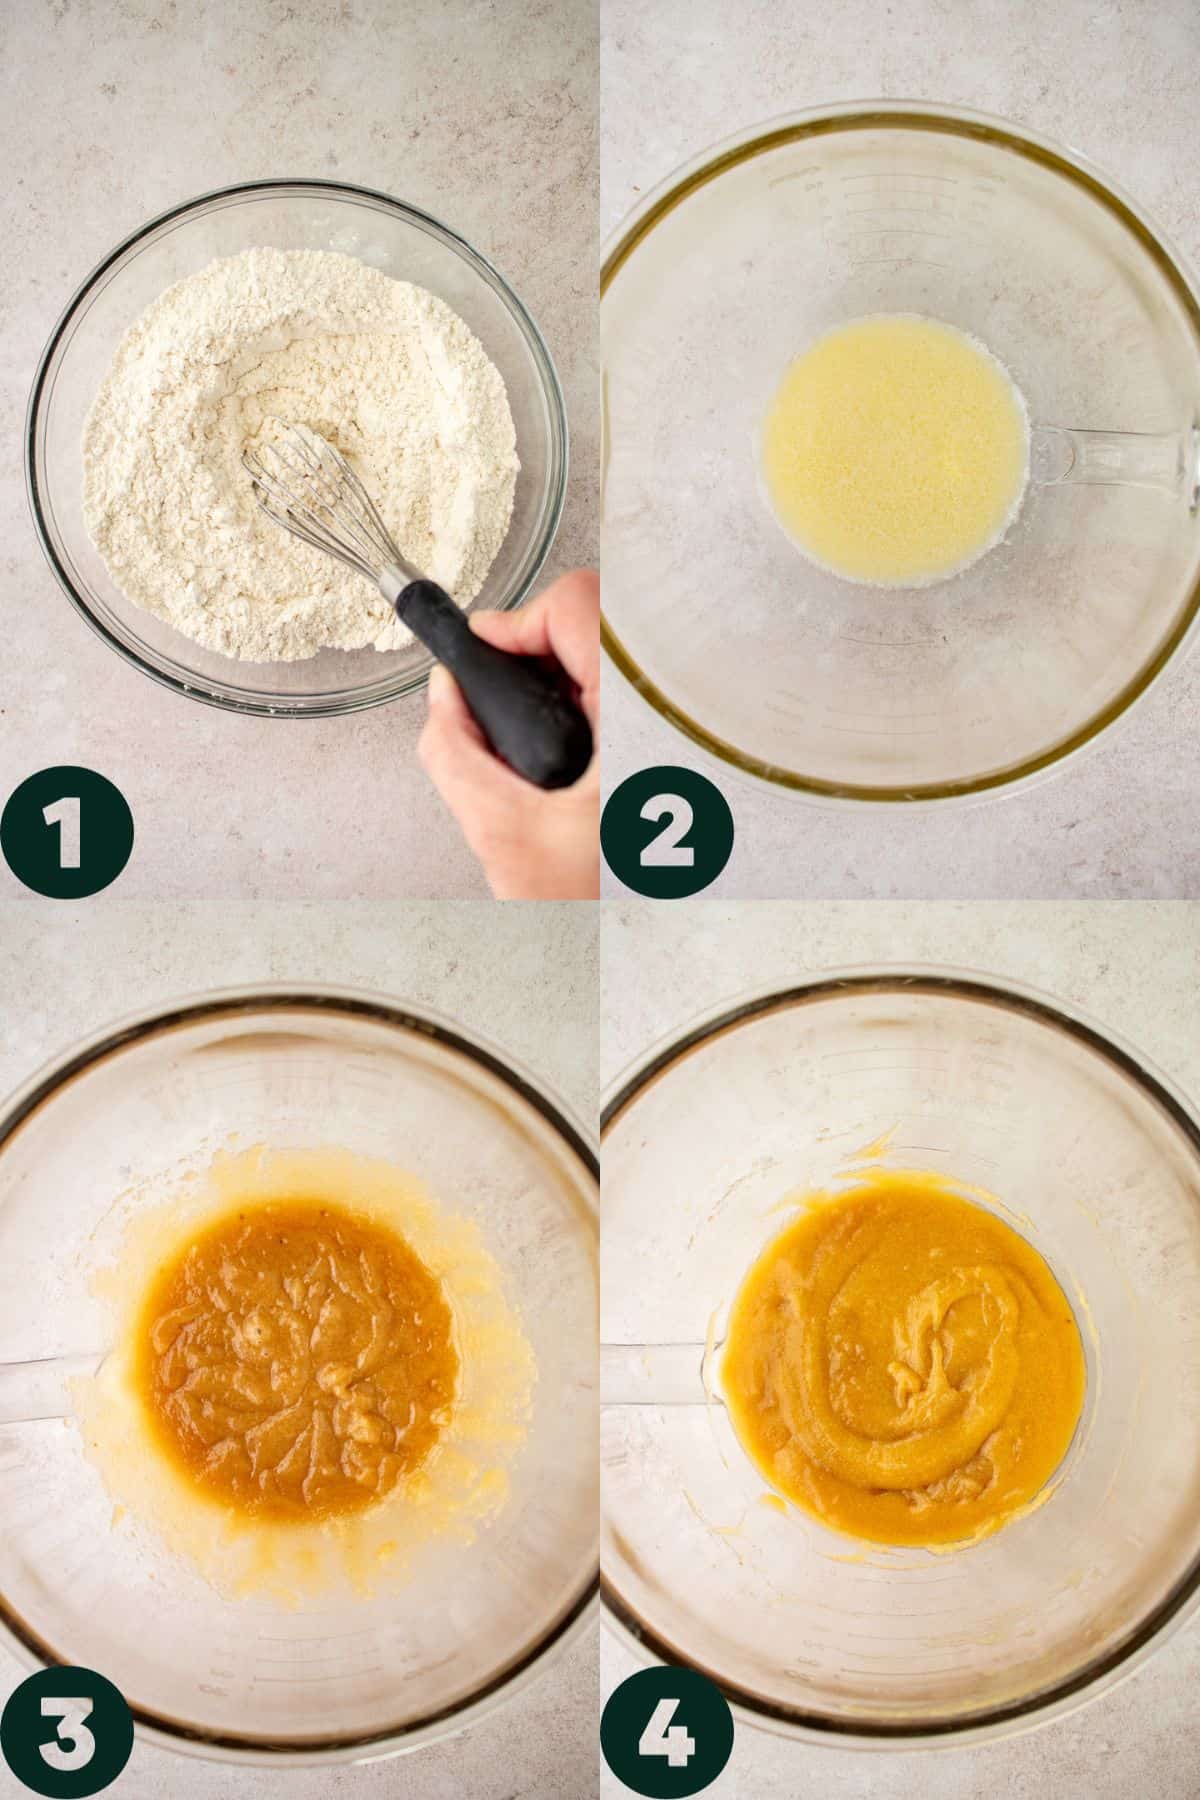
- Whisk together the flour, baking soda and salt.
- Microwave the butter until just melted It shouldn’t be hot but it should be liquid. Cool to room temperature.
- Beat together the butter, granulated sugar and brown sugar.
- Beat in the egg, egg yolk and vanilla.
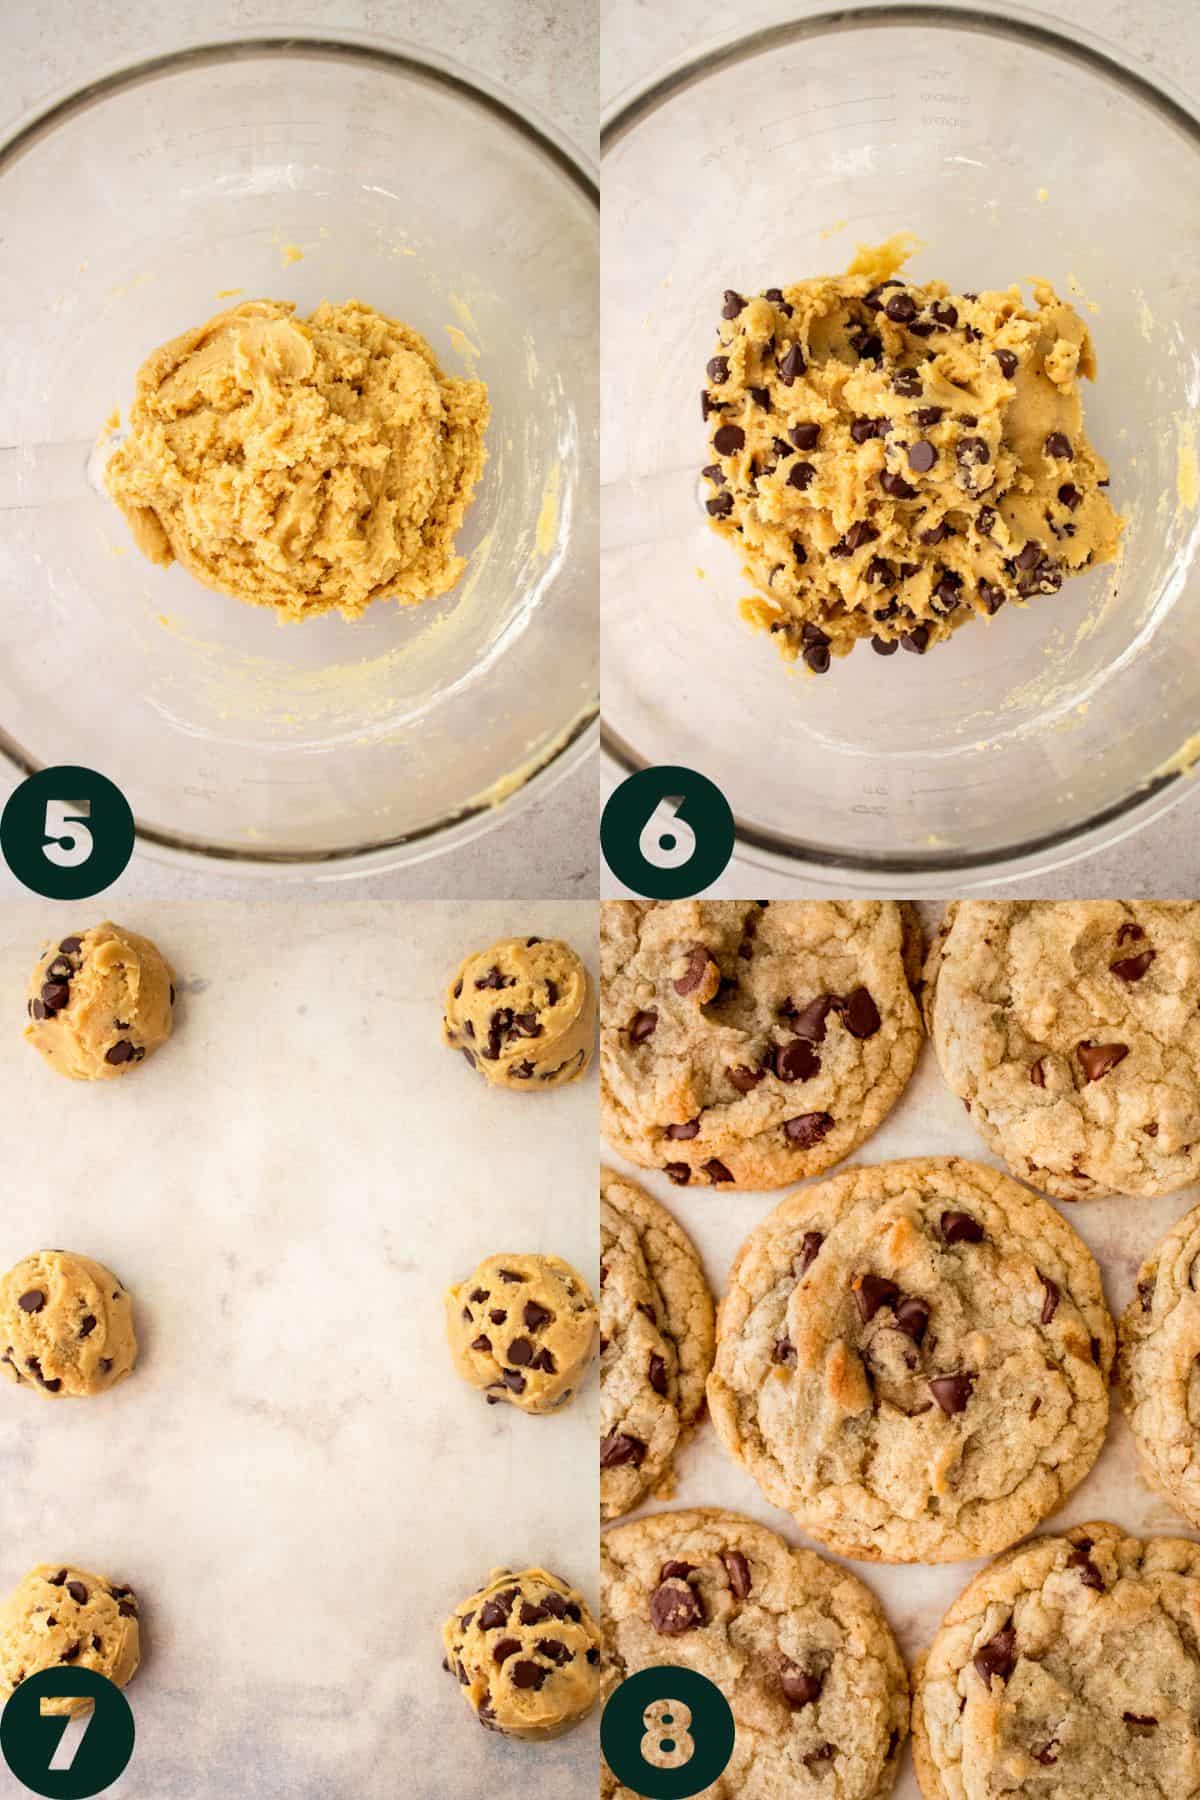
- Beat in the flour mixture on low until just combined.
- Fold in the chocolate chips.
- Use a 2oz/1/4 cup cream scoop to scoop out the dough onto the prepared cookie sheets.
- Bake for 14-16 minutes. Serve warm.
Variations
Any mix ins can replace some or all of the chocolate chips. Add pecans or walnuts, sprinkles, toffee bits, coconut, dried fruits, peanut butter or butterscotch chips and more. Whatever mix ins you use, be sure to use 1 ½ cups total including chocolate chips (if using).
Replace semi-sweet chocolate chips with bittersweet, milk or white chocolate chips.
My recipe for Brown Butter Toffee Chocolate Chip Cookies and Bourbon Rye Chocolate Chip Cookies are other variations of chocolate chip cookies to try.
Baking Tips
- This dough does not need to be chilled before baking, BUT, I will say that you should. Refrigerating your dough allows the flavors to meld together and some of the water content to evaporate, concentrating that caramel flavor, as well as re-solidifying the butter for less spread. Less spread=thicker, gooey-er cookies. Even an 30 minutes in the refrigerator can make a difference. I have baked these cookies right after mixing and they're still amazing, but if you have some time to optimize the flavor and refrigerate, you'll be happy you did so.
- You can use any size ice cream scoop to portion your dough. I used a large ¼ cup scoop to make large, thick cookies, but you can use a standard size or a mini scoop. Adjust the baking time for smaller cookies.
- When the cookies come out of the oven, while they're still hot, scoot a large round cookie around them in circular motion. This helps the cookies have a perfect round shape.
Storage and Freezing
Baked cookies should be stored in an airtight container for up to 5 days.
Cookie dough balls can be chilled in the refrigerator for up to 3 days. Dough balls can also be frozen for up to 3 months. I like to store frozen cookie dough balls in a double layer of ziptop bags.

Recipe FAQs
Make sure the butter is room temperature before using. Warm butter can make the mixture too soft and the cookies could spread in the oven.
An oven that is holding irregular temperatures, or too low temperatures can also cause spreading. Keeping an oven thermometer in your oven at all times makes sure that your oven is hovering at the right temperature.
Over mixing can also cause spreading. If you notice cookies spreading in the oven, use a spoon or spatula to reshape them, or use the scoot method mentioned under Baking Tips, and then continue baking.
Bake one sheet of cookies at a time. This ensures an even bake.
Freeze the cookie balls for 10 minutes before baking.
Absolutely. You can use smaller cookie scoops to make standard size or even mini cookies. Adjust the baking time for smaller cookies.
Oftentimes, a too hot oven, or too much flour is the culprit for cookies that aren't spreading.
Flattening the cookie dough balls coming directly from the freezer before baking can help them spread properly. You can also let frozen cookie dough balls come to room temperature before baking.
Did you make this recipe? Share it with us! Tag @littlevintagebaking on Instagram and leave a star rating below if you LOVED this recipe. For more baking and decorating ideas follow me on Pinterest.
More Cookie Recipes to Try

Recipe
Bakery Style Chocolate Chip Cookies
Ingredients
- 10 tablespoons unsalted butter
- 2 cups unbleached all-purpose flour
- ½ teaspoon baking soda
- ½ tsp fine sea salt
- ½ cup granulated sugar
- ⅔ cup light brown sugar
- 1 large egg
- 1 large egg yolk
- 1 tablespoon pure vanilla extract
- 1 ½ cups semi-sweet chocolate chips
Instructions
- Preheat the oven to 350 degrees F and line two cookie sheets with parchment paper.
- Microwave the butter for about 40 seconds to just barely melt it. It shouldn’t be hot – but it should be almost entirely liquid. Cool for a minute or two until room temperature.10 tablespoons unsalted butter
- Whisk together the flour, baking soda and salt in a medium bowl.2 cups unbleached all-purpose flour, ½ teaspoon baking soda, ½ teaspoon fine sea salt
- Combine the granulated sugar, brown sugar, and melted butter in the bowl of a stand mixer fitted with the paddle attachment. Beat on medium speed for 2 minutes until well blended.½ cup granulated sugar, ⅔ cup light brown sugar
- Beat in the egg, egg yolk and vanilla until light and creamy.1 large egg, 1 large egg yolk, 1 tablespoon pure vanilla extract
- Beat in the flour mixture on low until just combined.
- Remove bowl from the mixer and fold in the chocolate chips.1 ½ cups semi-sweet chocolate chips
- Use a 2oz/1/4 cup cream scoop to scoop out the dough onto the prepared cookie sheets, leaving 3" between each cookie. Refrigerate for 30 minutes or for up to two days.
- Bake for 14-16 minutes or until the edges are lightly brown and the tops look just set. Transfer to cookie sheets to wire racks to cool slightly. Serve warm.
M. W. says
I don’t think I’ve ever commented on an online recipe before but I had to tell you that this is the absolute best chocolate chip cookie recipe I’ve ever made! So simply and SO GOOD!!!!
Toni S. says
My new go-to chocolate chip cookie recipe. Just perfect from the easy prep to the over indulgent size to the chewy inside and crisp edges. It really is just perfect!!!
Aislinn says
Hello Ashley,
I just got finished making a batch of these chocolate chip cookies, and, I must say, your recipe is exceptional! I wanted to leave you a note because I’ve made a few of your recipes, and each one I have found to be superior to many others of the same that I have found available online. I’m American, but I’m living in France. It can be a complex effort to make American recipes with French ingredients, so I was happy to see in the reviews you provided the protein percentage of the flour you used in this recipe! I found T65 to be the perfect equivalent (in case anyone out there is interested) for this recipe. It would be cool if you could provide the protein percentages for the flours you use in other recipes. I, for one, would be most grateful!
Merci beaucoup,
Aislinn
Chanté says
Do you have to refrigerate the dough before baking? And is can a person add baking powder?
Ashley says
Hi Chanté! This recipe uses baking soda only, so no baking powder is needed. Baking soda goes into the dough when the flour gets added. Refrigerate the dough before baking.
Julie says
Hi,
I just followed this recipe to a T; it ended up very very soft. Nowhere does it say to put the dough in the fridge.
Ashley says
Hi Julie. The dough will be soft due to the melted butter. They don't have to be refrigerated, as mentioned under Baking Tips, but refrigerating does benefit the flavor and texture. 30 minutes at the least, and up to 2 days.
Ashley says
Hi Chanté! This recipe uses baking soda only, so no baking powder is needed. Baking soda goes into the dough when the flour gets added. Refrigerate the dough before baking.
Ashley says
Hi Chanté! This recipe uses baking soda only, so no baking powder is needed. Baking soda goes into the dough when the flour gets added. Refrigerate the dough before baking.
Cherie says
I too was hoping for chewy and ended up with cakey. I even reduced the flour by a couple tablespoons It could have been reduced by another quarter cup. Though as it is the texture is OK. The flavor is good. And I think that my son who likes Cakey cookies will love these. Thank you for sharing.
Ashley says
Hi Cherie! I'm not sure why these ended up cakey for you. Perhaps, if you plan to make them again, bake them just until they look set in the middle. That might do the trick. Thank you for the feedback! -Ash
Karen says
Came out perfect. Didn’t flatten out like most chocolate chip cookies. I did not use the whole mix so I put it in the refrigerator. Hopefully the next batch will come out as well as the first batch did. Definitely be making this recipe again. Thank you
Ashley says
Wonderful! So happy you loved them. Ash
Simone De Los Santos says
best chocolate chip cookies. period. (and i've been making yummy ones for a looong time) i now use this recipe exclusively. thank you!
Ashley says
Hi Simone! I'm so happy to hear that you love them! Ash
Patti says
These are amazing.
Elaine says
These cookies look amazing- I’m just wondering which brand of all purpose flour you Use as different brands have varying protein content? Thank you in advance!
Ashley says
Hi Elaine! Generally, I use Gold Medal for all purpose because I like the moderate protein content. It would be beneficial using an all purpose flour with a higher protein content (like King Arthur Flour) for these cookies because it helps with the chewiness. I like to aim for more protein than less in cookie recipes.
Emma says
Is the cookie dough supposed to be a darker color? Or a light color?
Ashley says
Somewhere in the middle? They could end up a bit darker if your ingredients are darker - darker yolks, butter, or brown sugar or if you use vanilla paste. If the dough is lighter in color, that's perfectly normal too.
Lizeth Giron says
Hey! How long do they last in the freezer? Do you cook them instantly after taking them out of the freezer or you let them defrost first?
Thank you!
Ashley says
Hi! These will last in the freezer for about a month or two, depending on how well they're protected from freezer burn. You can totally cook them right out of the freezer, or you can defrost them for a little bit first. If you bake directly from the freezer, they won't spread as much, but if you let them defrost, they'll look more like the photos. Hope you love them!
Shannon says
Excellent cookie, I browned the butter for a caramel flavour and added 1 tsp of espresso powder.
Ashley says
Hi Shannon! So happy you liked them! The brown butter and espresso sounds amazing - I'll have to try them.
Grady Lynch says
These cookies are AMAZING! My wife makes them and whenever she does, I am the Cookie Monster. These are my absolute favorite chocolate chip cookies...ever. Once you have these, all other chocolate chip cookies will forever be inferior!
Natalie says
So, so good! I've maybe been making them a bit too much during quarantine (if that's even possible!). I like to start on it before dinner, let it refrigerate while I cook and eat dinner, pop them in the oven after, and it's the perfect quick, yet delicious dessert.
Kristen says
These are my favorite chocolate chip cookies! They’ve become a staple in my home as well! They’re also a requirement for any large family gatherings. The texture is perfect and I can barely get them out of the oven before little hands start grabbing them!
Katie says
I had a craving for cookies and this recipe popped up. But I am pretty disappointed with how they turned out. They feel and taste cakey and aren’t sweet enough in my opinion. I was expecting chewy and I got cakey 🙁 They didn’t spread at all either. The only change i made to the recipe was using vegan butter. But I don’t think that should have had any effect...
Ashley says
Hi Kate!
Oh no! I’m sorry the cookies didn’t turn out for you! They’re definitely supposed to spread and be chewy with gooey centers. I’m not sure what could have gone wrong. I don’t believe it was the vegan butter. Not spreading, a cakey texture and not tasting sweet enough sounds like maybe too much flour could have been added.
Pennie says
Hi, there!
Do you recommend portioning these and then refrigerating? Or refrigerating and then portioning?
My mouth is watering, by the way!
Ashley says
Hi! Portion them, then refrigerate. Then they'll be ready for baking when you need them. Enjoy!
Lauren says
Hi! Curious on how long you would recommend chilling the dough for? Overnight?
Ashley says
Overnight is best, but a few hours will work if you’re in a hurry. Enjoy!
Jenaya says
I have probably tried thirty chocolate chip cookie recipes looking for one that creates a cookie that is soft and puffy. These are perfect and check all of the boxes.
Ashley says
Hi Jenaya! I'm so happy to hear you enjoyed these!