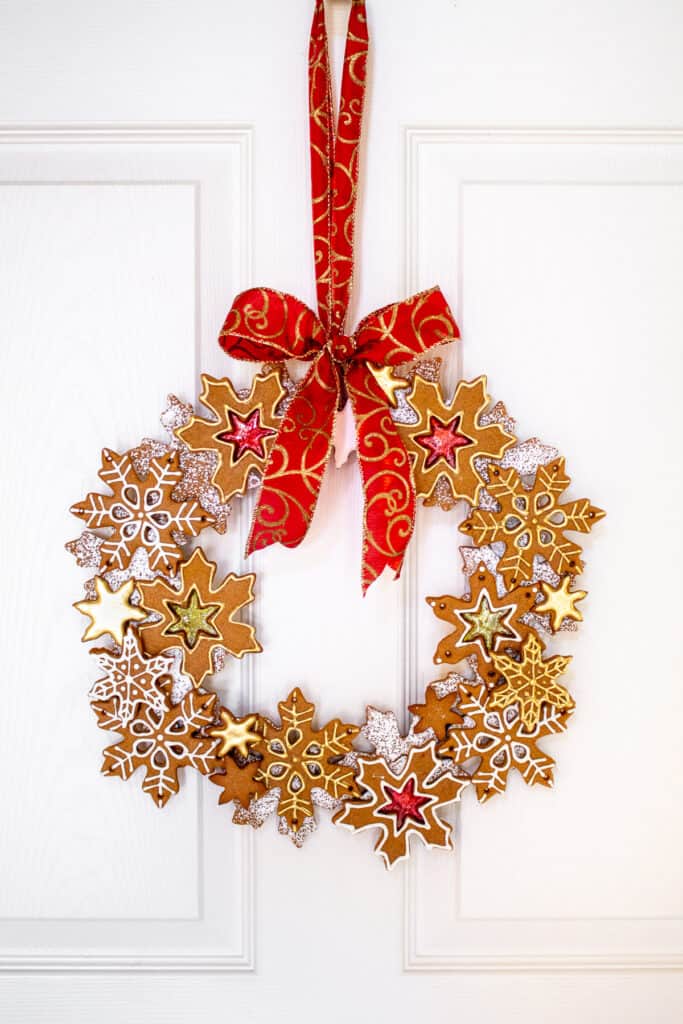
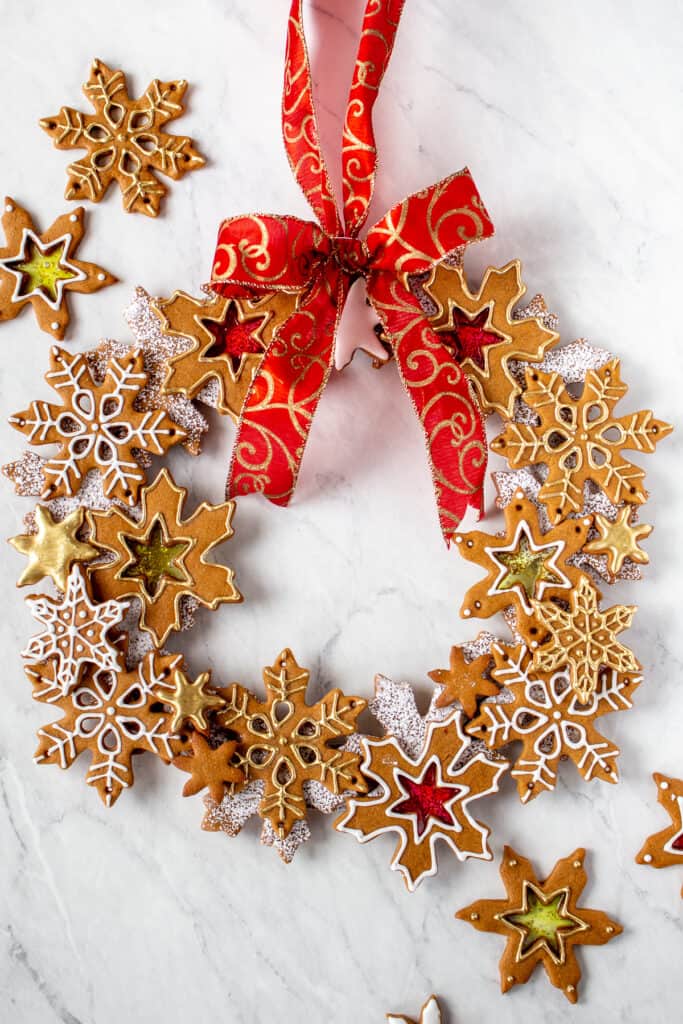
Not only can you legit eat the cookies off of this wreath, but you can hang it up as an actual wreath! I am so excited to share my gingerbread cookie wreath tutorial with you. Of course you know I absolutely love creating edible art, so I LOVED making this wreath. It's currently hanging up in my house. Some cookies missing, of course, because little hands found out that she could eat this wreath. This wreath makes for a beautiful gift, a great addition to holiday decor and also looks beautiful as a centerpiece. It's totally a project that can be done with the kiddos or as a family. So fun, and so delicious.
The gingerbread cookies
Gingerbread cookies are so full of flavor and warming spices, what is there not to love? These gingerbread cookies don't spread in the oven, and no chilling is required before baking. Because the cookies have molasses in them, the dough can be a bit sticky. I like to roll the cookies out on a silicone baking mat. I cover the dough in parchment, then roll them out. Be sure to liberally flour your surface, and check occasionally to make sure they're not sticking. I keep my bench scraper handy to lift up the dough and add more flour as needed.
Decorating the gingerbread cookies
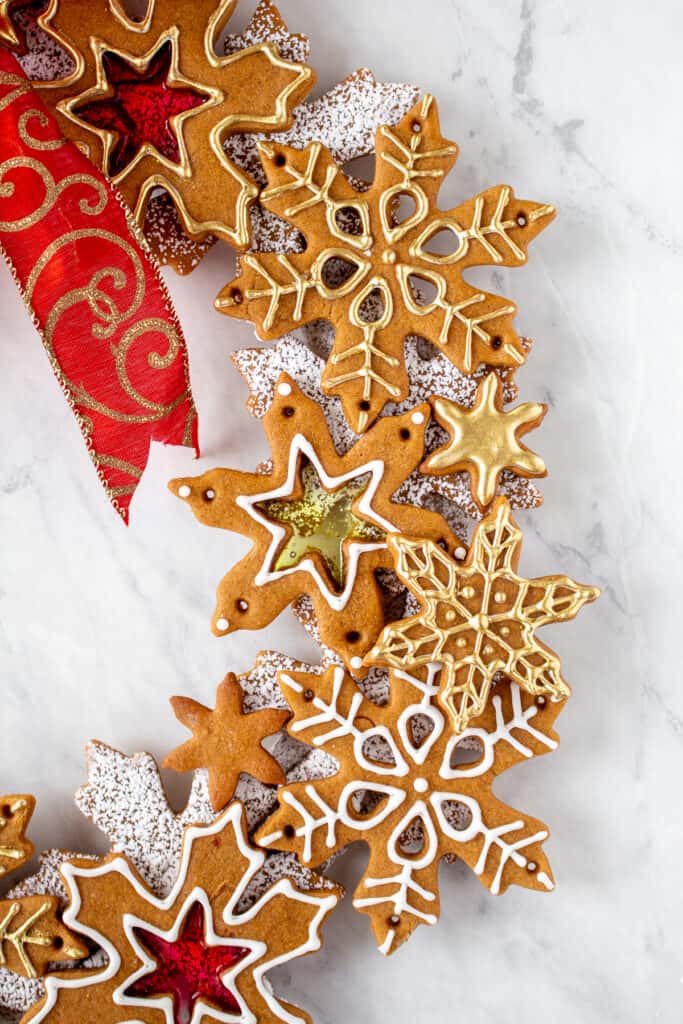
This gingerbread cookie wreath is easily adaptable to other cookie shapes and icing colors. I have different Christmas cookie cutters, but I default to snowflakes all. the. time. They're my favorite. This wreath would look adorable with ornament cookies. Star of David cookies would be amazing for a Hanukah wreath.
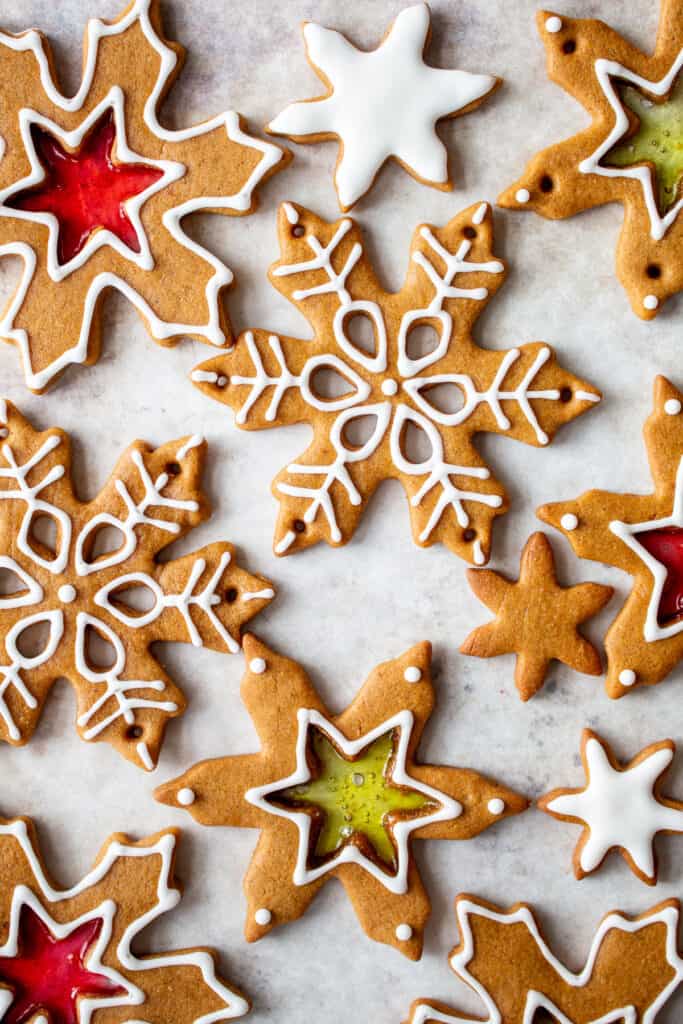
I used a variety of decorating methods for my gingerbread cookies. I used these cutters and this cutter for the snowflakes. I cut out some snowflakes that I left entirely undecorated to be used as a foundation layer on the wreath. Those cookies get coated with confectioners sugar.
For the cut out designs, I used a small tear drop shaped cutter from this cutter set and a #3 piping tip for the small holes. I used the smallest cutter in the snowflake cutter set to cut out the centers for the stained glass cookie technique. For some royal icing snowflake techniques, check out my sugar cookie post here.
For the stained glass cookie technique, you will need Jolly Ranchers, or another hard (not sugar free) candy. Place the desired colors into individual zip top bags. Cover the bags with a kitchen towel, and use a rolling pin to smash them into very small pieces. I suppose you could use a food processor, but where's the fun in that? #2020
Fill the cut out areas with the Jolly Rancher pieces until it's filled almost flush with the cookie.
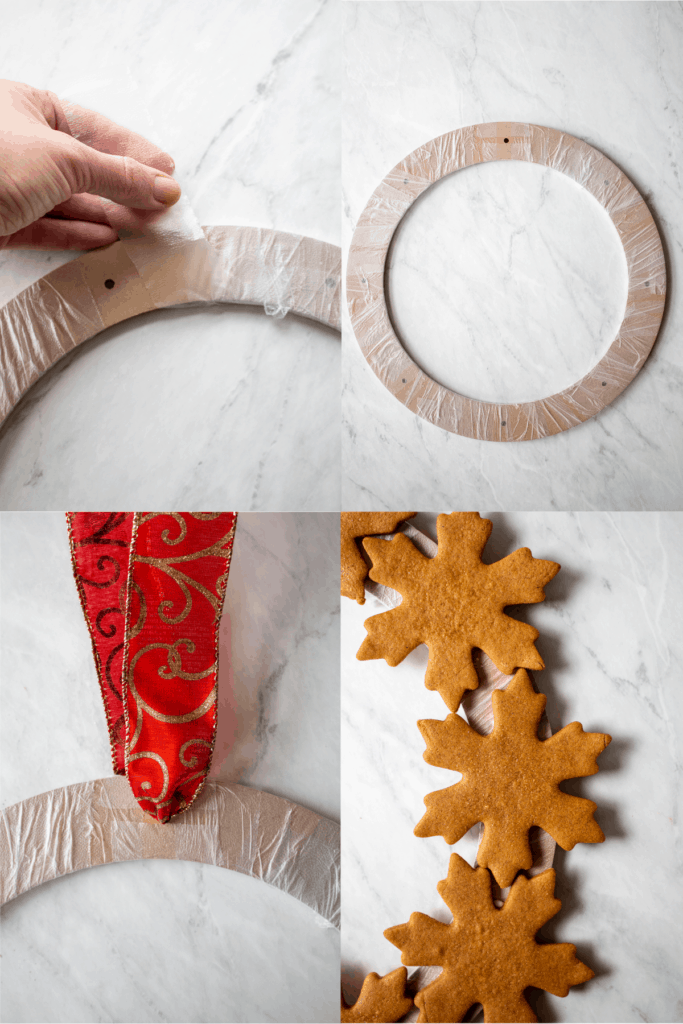
Only a few supplies are needed for the gingerbread cookie wreath. Gingerbread cookies (recipe below), royal icing, a 12" wood floral ring (I got mine from Michaels Craft Store, and it is the Ashland brand.), Press and Seal, and a festive ribbon for hanging.
How to make the gingerbread cookie wreath
To make the wreath form food safe, cut strips of Press and Seal and wrap tightly around the form, leaving one of the holes in the form accessible for the ribbon.
Cut a length of ribbon (as long as you would like for hanging it) and thread it through the hole of the frame.
Lay down the first (foundation) layer of cookies. I used solid cut out snowflake cookies with no additional decoration as my foundation cookies. "Glue" the cookies to the wreath form with royal icing. Be generous with the royal as you want these cookies to really be stuck on there.
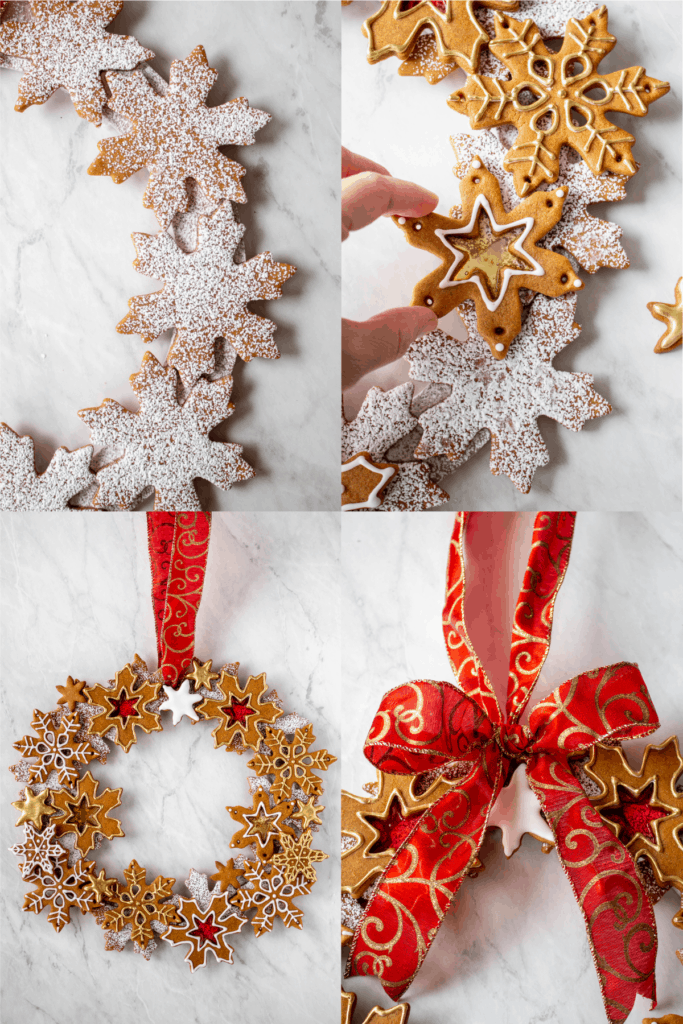
Place the wreath onto a piece of parchment paper, and using a small sieve, dust the foundation cookies with confectioner's sugar. It give the cookies a snowy appearance.
Glue the decorated cookies onto the wreath form, staggering them and alternating designs. Glue down the larger cookies with royal icing first, followed by smaller cookies to fill in any gaps. You want to conceal as much of the frame as you can.
If desired, tie a bow around the ribbon hanger.
Let the wreath dry overnight. The royal icing glue needs to dry completely or the cookies will slide off.
I hope you love this gingerbread wreath tutorial as much as I do. If you make it, I'd LOVE to know! Comment below or tag me on Instagram.
Enjoy!
Ash xx
Recipe

Gingerbread Cookie Cutouts
Ingredients
- 3 cups (360g) all purpose flour
- 2 teaspoons ground ginger
- 1 teaspoon cinnamon
- ¼ teaspoon cloves
- ¼ teaspoon nutmeg
- ¾ teaspoon fine sea salt
- ⅔ cup (142g) light brown sugar
- 6 tablespoons (84g) unsalted butter, room temperature
- 1 large egg, room temperature
- 1 teaspoon pure vanilla extract
- ½ cup (170g) molasses
Instructions
- Whisk together the flour, ginger, cinnamon, cloves, nutmeg and salt in a large bowl. Set aside.
- In the bowl of a stand mixer fitted with a paddle attachment, beat the butter and sugar together on medium-high speed until smooth, fluffy and creamy, about 2 minutes.
- Add the egg, followed by the vanilla extract, beating until just combined.
- Add in the molasses, beating until just combined. Scrape down the bowl to ensure everything is incorporated.
- With the mixer on low speed, gradually add the flour mixture and beat until the dough starts to form large clumps and no large pockets of flour remain.
- Turn the dough out onto a work surface sprinkled lightly with flour. Divide the dough in two and pat the dough into two disc shapes.
- Wrap the discs in plastic wrap and chill the dough for 30 minutes.
- Heat the oven to 350F. Line two cookie sheets with parchment paper.
- Generously flour a work surface, as well as your hands and the rolling pin. The dough can become sticky as you work, so keep extra flour nearby to use as needed. You can roll out the dough between two pieces of wax paper or parchment paper to prevent any sticking issues if you prefer.
- Roll out the disc until ¼ inch thick. Cut the dough with cookie cutters. Re-roll the remaining dough and continue cutting until all is used.
- Place the cookies 2" apart on the baking sheets.
- Bake the cookies for 10-12 minutes, or until the edges are just beginning to turn brown. Rotate the cookie sheets halfway through baking. Let the cookies cool for 5 minutes on the pan, then transfer to a rack to cool completely before decorating.
Comments
No Comments