You asked and I listened - a simple, fast sugar flower tutorial using minimal specialty tools. NO veiner and NO cutter required, but by all means, if you have them, you can totally use them. These fast and easy gum paste holly leaves and berries look gorgeous on a holiday or winter cake, cupcakes and other centerpiece holiday desserts. Make these unwired and with modeling chocolate and put them on a Bûche De Noël. Impressive and so, so beautiful.

Supplies:
Gum paste - mid green and light red
Small rolling pin, like a Celpin
Groove Board, optional
Paper covered floral wire, gauge 28
Petal dusts: bright red, dark green, moss green, golden yellow, brown, black
Egg white
Firm foam mat, for shaping
Small square of aluminum foil, or holly veiner
Bumpy foam for drying
Paintbrushes for dusting
Small needle nose jewelry pliers
Scribe tool, or toothpick
*More sugar flower supplies can be found in the Little Vintage Baking shop*

How to make the berries
1. Prep the berry supplies. Condition the red gum paste by kneading in a small amount of shortening until smooth and pliable.
2. Cut the floral wire into thirds, cutting as many as you need for your arrangement. Use small needle nose pliers to make a small hook on the end of the berry wires.
3. Roll a small ball of red gum paste, like the size of pea. Dip the hooked wire into egg white, removing any excess, and insert halfway into the berry.
4. Make a small indentation into the top center of the berry with the umbrella tool.
5. Make a light "x" shape over the indentation with the scribe tool. Set the berry aside to dry in the foam, and continue to make the remaining berries.
5. Once dry, liberally dust the berries with the bright red petal dust. Dust the centers of the berry (with the indentation and "x") with the black dust. Just a small amount.
6. To set the color and remove the chalky appearance of the dusted berries, quickly wave the berries through the steam of a tea kettle, an iron, or a steamer. Take care to not burn yourself. The steam is very hot and can burn you. Set aside to dry.
How to make the holly
1. Prep the holly supplies. Condition the green gum paste by kneading in a small amount of shortening until smooth and pliable. Cut the floral wire into thirds, cutting as many as you need for your arrangement.
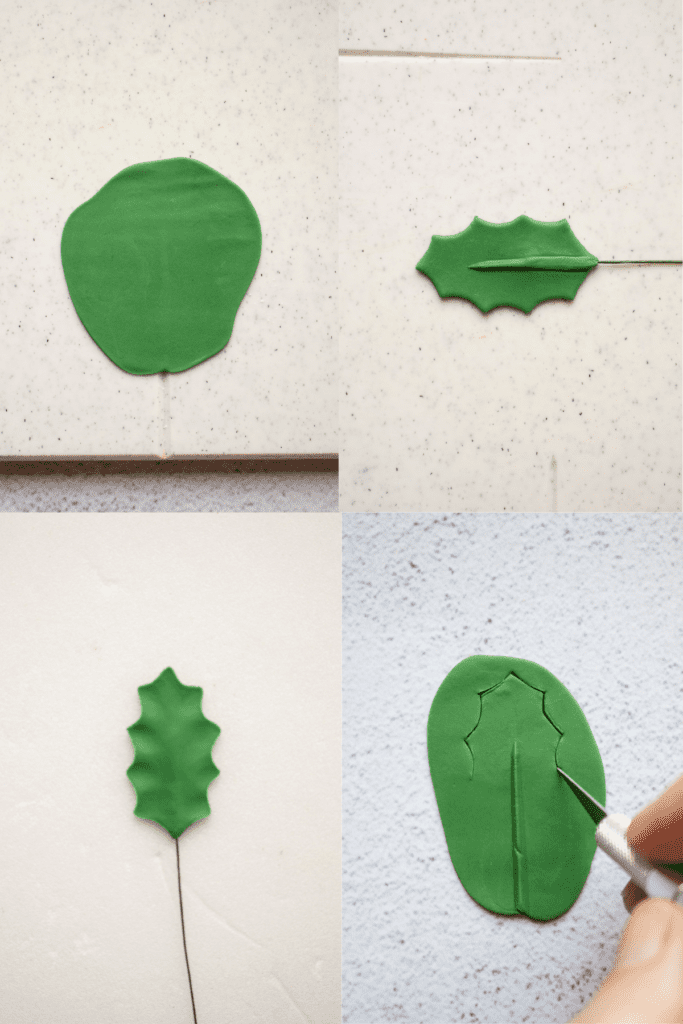
2. Roll a small piece of green gum paste over the groove of a groove board. Don't roll the paste too thin as you need to be able to stretch and thin it it out to shape it.
If you are not using a groove board, roll the paste out on a non stick surface. You want it thick enough to be able to insert a wire without it poking through the leaf.
3. Remove the paste from the groove board and set the paste down, groove side up.
4. Center a holly cutter over the groove, and cut out the leaf.
If you are not using a holly leaf cutter, use a very sharp, brand new blade exacto knife to cut out the shape of a holly leaf. Refer to photos online, or my holly above to cut out the correct shape. These do not have to be perfect or all the same shape and size. Remember, nature is imperfect.
5. Dip the end of a wire in egg white, wiping off the excess. Insert the wire into the groove of the leaf, about halfway up.
If you didn't use a groove board, place the holly leaf between you thumb and pointer finger. With your other hand, insert the wire into the leaf, between your fingers so that you're sort of guiding the wire into the leaf without it poking through the paste.
6. Place the leaf groove side down on a firm foam mat. Use the ball tool to thin the surface of the leaf and the edges, stretching the pointy tips of the leaf.
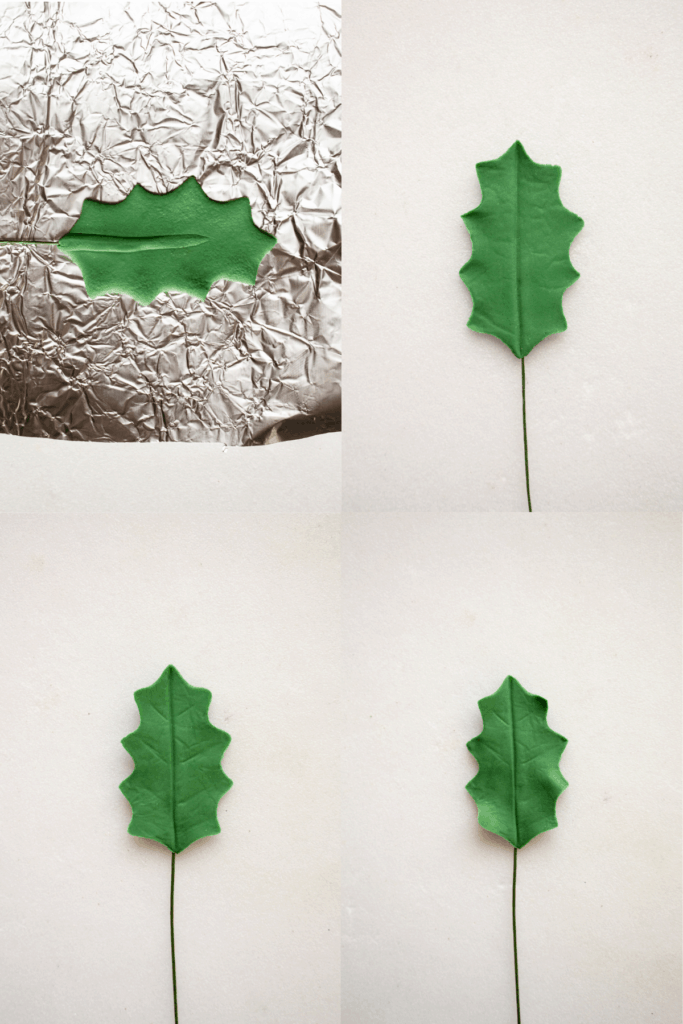
7. Take a small piece of aluminum foil and crumple it up into a ball. Smooth out and flatten the foil, being careful not to rip it too much.
8. Place the leaf onto the foil. Fold the foil in half over the leaf and press lightly to make some subtle veining on both sides of the leaf.
9. Use the thin side of a dresden tool to draw a straight line from tip to bottom of the leaf. Make a few light veins on either side.
10. Point the tips of the holly leaf by pinching gently with your fingertips. Shape them a bit by slightly bending the tips down or up to give them some realism.

11. Place the leaves onto some bumpy foam to dry completely.
12. Once dry, dust the leaves. Dust the center vein with the golden yellow dust.
13. Liberally dust the remaining front side of the leaf with the dark green dust.
14. Make a 50/50 blend of the dark green and moss green. Liberally dust the backside of the leaf.
15. Mix a small amount (50/50) of dark green and brown. Lightly dust the tips of the leaf to define the tips and slightly darken them.
16. To set the color and remove the chalky appearance of the leaves, quickly wave the leaves through the steam of a tea kettle, an iron, or a steamer. Take care to not burn yourself. The steam is very hot and can burn you. Set aside to dry before arranging.
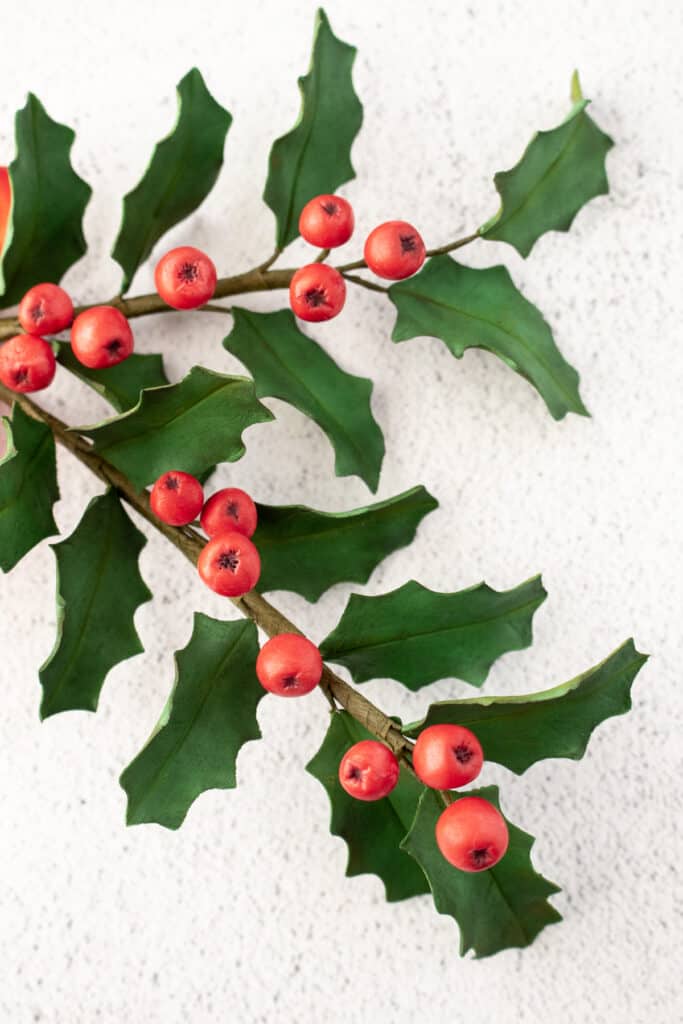
17. Stretch a length of floral tape to activate the glue. Individually tape the berries and leaves, taping about halfway down the wire.
18. Assemble your arrangement as desired.
If you make an arrangement using my gum paste holly and berries tutorial, be sure to leave me a comment or tag me on Instagram!
Ash xx
For more gum paste tutorials, check out these posts:
Comments
No Comments