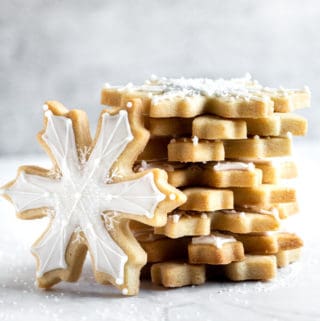
These no spread sugar cookies will easily become your go-to cut out sugar cookie recipe. These tender, buttery cookies roll out like a dream, and keep their shape when baked. They are the perfect cut out cookie for any decorating project.

I like to decorate these no spread sugar cookies with royal icing, but they’re also delicious with buttercream or sanding sugar.
Jump to:
Why You Will Love This Recipe
- Dough is easy to make with simple pantry ingredients.
- These cookies have a tender, buttery, sweet interior texture, with crisp edges.
- They are easy to roll out and they keep their defined shape when baking.
- These cookies are very versatile and adaptable to different flavor combinations.
- Easy to follow recipe with step-by-step photo instructions for perfect sugar cookies every time.

Recipe Ingredients
Unsalted butter – Unsalted butter is best, but if you only have salted, you can use it. Do not add the additional salt listed in the recipe.
Granulated sugar
Egg – Binds the dough together.
Vanilla extract/paste – Either will work, but I like to use vanilla paste for a stronger vanilla flavor.
Almond extract (optional) – Just a small amount to get that classic sugar cookie taste.
All-purpose flour
Fine sea salt – For flavor and balancing out flavors.

Recipe Instructions
- Whisk together the flour and the salt.
- Beat together the butter and sugar until thoroughly combined.
- Beat in the egg, vanilla and almond extract.
- On low speed, gradually add the flour and the salt and beat until just combined.
- Pat the dough into a disc shape.
- Wrap with plastic wrap and chill in the fridge for at least 30 minutes.

Preheat the oven to 350F and line two cookie sheets with parchment paper.
- Roll out the dough to ⅛-¼" thick, depending on your preference, rotating the dough as you roll to prevent the dough from sticking.
- Cut out desired shapes with a cookie cutter and place the cookies 2" apart on the cookie sheets. Chill for 30 minutes.
- Bake the cookies for 17-20 minutes, until starting to turn a light golden brown on the edges. Cool completely before decorating.

Substitutions and Variations
Extracts and emulsions, like orange, lemon, maple, and coconut can be used in place of the vanilla and almond extracts.
Freeze dried fruit, mini chocolate chips and sprinkles can also be added to the dough. Add ⅓ to ½ cups of add ins.
Herbs, zests, and spices can also be added to the dough.
Baking Tips
- For thicker and softer cookies, roll the dough to ¼” thick. For thinner and crispier cookies, roll the dough out to ⅛”.
- Beat the butter and sugar only until combined. Beating in air during the beating process could cause the cookies to spread or distort as it causes the cookies to puff up and deflate while baking.
- When cutting out sugar cookies, keep your cut outs as close together as possible to get as many cookies out of your dough as possible. Re-roll any leftover dough so that you use all of the dough. Keep in mind that with each re-roll more flour is being incorporated into the dough, so the more cookies you can get out of the first roll, will help limit how many times the dough needs to be rerolled.

Decorating Tips
- When planning for more of a detailed design for decorating cookies, trace the cookie cutter onto some sketch paper, then sketch out the design to see if the design will translate well to the cookies.
- My go-to royal icing uses corn syrup in the recipe to help keep the icing from getting rock hard when dry, and it also helps the icing have a bit more elasticity when piping.
- For easier icing clean up, especially for kids, squeeze bottles made for icing can be used in place of piping bags.
Storage and Freezing
Cookie dough will keep in the refrigerator for up to three days. The dough can be frozen for up to three months.
Baked cookies can be stored in an airtight container for up to 7-10 days.
Undecorated, baked cookies can also be frozen, in a single layer, for up to three months. Defrost in the refrigerator.

Recipe FAQs
This recipe makes 16-22 cookies depending on the size of the cutter used (3”- 4” cutters). I get 18 cookies with my 4" snowflake cookie cutter.
Make sure it has been chilled for 30 minutes before rolling out. Also rolling the cookie dough between two pieces of parchment or wax paper makes for easier clean up and prevents the dough from sticking to surfaces.
Chilling the dough accomplishes two things. One, it relaxes the gluten in the dough so that it is easier to roll out and makes them more tender. It improves the texture and flavor of the cookies. Two, it also keeps the cookies firm as they go into the oven so the cookies keep their crisp cut edges and won’t spread.

Did you make this recipe? Share it with us! Tag @littlevintagebaking on Instagram and leave a star rating below if you LOVED this recipe. For more baking and decorating ideas follow me on Pinterest.
More No Spread Cut Out Cookies to Try


Recipe
No Spread Sugar Cookies
Equipment
- Electric Stand Mixer (or hand mixer)
- Snowflake cookie cutter (or cookie cutter of your choice)
Ingredients
Sugar Cookies:
- 1 cup unsalted butter, room temperature
- 1 cup granulated sugar
- 1 large egg, room temperature
- 2 teaspoons vanilla extract or paste
- ¼ teaspoon almond extract
- 3 cups all purpose flour
- ¼ teaspoon fine sea salt
Instructions
Sugar Cookies
- In the bowl of a stand mixer fitted with the paddle attachment, beat together the butter and sugar until thoroughly combined.1 cup unsalted butter, room temperature, 1 cup granulated sugar
- Beat in the egg, vanilla and almond extract.1 large egg, room temperature, 2 teaspoons vanilla extract or paste, ¼ teaspoon almond extract
- With the mixer on low speed, gradually add the flour and the salt and beat until just combined.3 cups all purpose flour, ¼ teaspoon fine sea salt
- Turn the dough out onto a work surface sprinkled lightly with confectioners' sugar. Pat the dough into a disc shape.
- Wrap tightly with plastic wrap and place in the refrigerator for at least 30 minutes.
- Preheat the oven to 350F. Line two cookie sheets with parchment paper.
- Place the dough on a work surface that has been sprinkled with confectioner's sugar. Sprinkle the top of the dough and the rolling pin lightly with confectioner's sugar to prevent from sticking.
- Roll out the dough to ⅛-1/4" thick, depending on your preference, rotating the dough as you roll to prevent the dough from sticking.
- Cut out desired shapes and place the cookies 2" apart on the cookie sheets.
- Place the cookie sheets into the refrigerator for at least 30 minutes to chill.
- Bake the cookies for 17-20 minutes, until starting to turn a light golden brown on the edges. Rotate the cookie sheets, halfway through baking.
- Let the cookies cool on the cookie sheets for 10 minutes, before transferring them to a cooling rack to cool completely before decorating.
Melody says
Thank you! My cookies always spread! I will be trying your solutions to reduce spreading! Thanks!
Ashley says
You're welcome, Melody! Let me know how they work out for you!