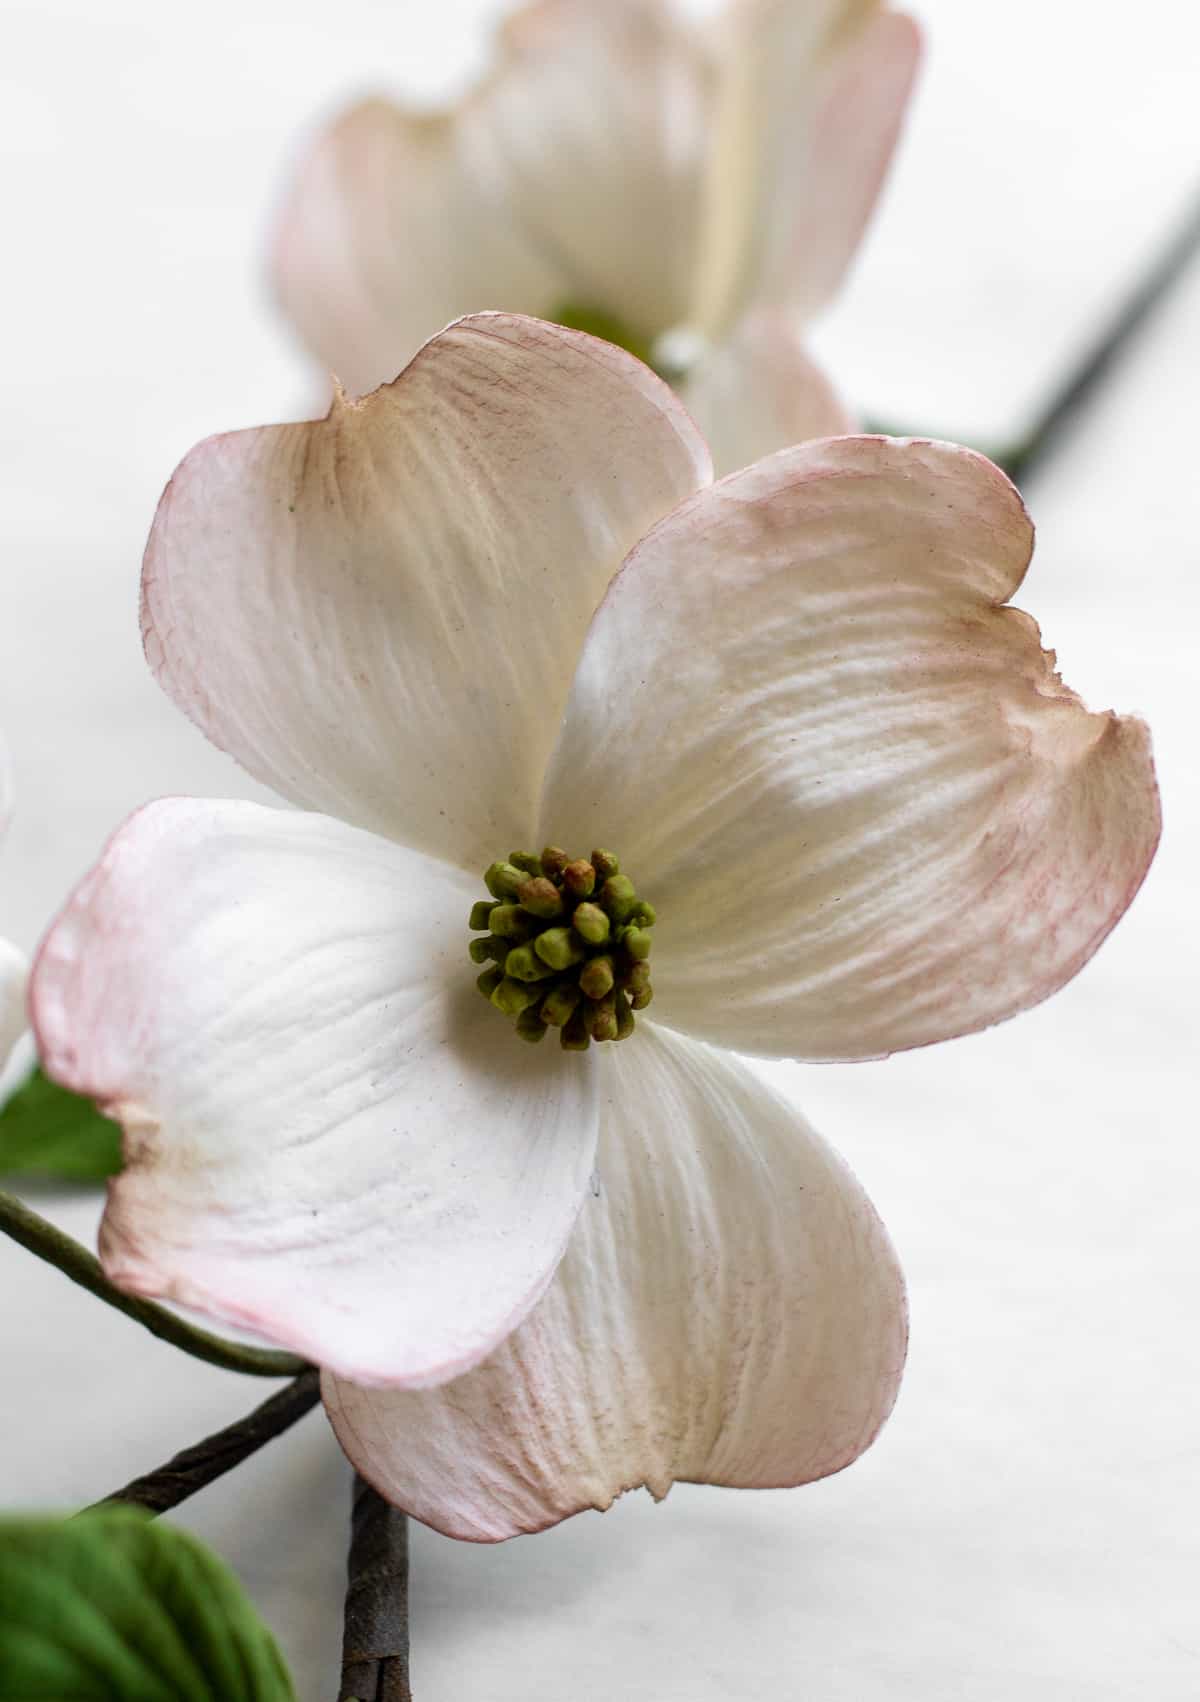
When the flowering dogwood trees start blooming, it's a sign that Spring has sprung. These beauties are mostly seen as white, or white with tinges of pink, but they also can be found in light pink, bright pink and rarely, yellow shades. For this dogwood branch tutorial, I've made my favorite color dogwood flower - white with a touch of pink. In this tutorial, I'll take you through how to make the dogwood flower centers, and bracts (petals), two different stages of buds and some leaves to create a beautiful, multi-stemmed dogwood branch.
The cutters, veiners and center molds are from Sweet Art Master, and they are absolutely fabulous to work with. The bract cutters make super clean cuts, and the veiners are botanically correct and super detailed. I've purchased many veiners over the years that are subpar - whether the paste sticks to them, the veining impression is too light or the veining is not very detailed. The veiners from Sugar Art Master work perfectly. The center moulds are not only time savers, but they are detailed, botanically correct and easy to use.
Supplies:
Gum Paste - white, light avocado green, leaf green
Floral Wire - gauges 22, 26, 20 (cut into thirds) - white is recommended for the flowers, but for the other components, green or white will work
¼" Floral Tape - moss green, twig brown
Cutters: Sweet Art dogwood petal cutters , Sweet Art Master dogwood leaf cutters, small olive or ruscus leaf cutter (¾-1"), 4-petal flower cutter (I used a hydrangea cutter)
Veiners: Sweet Art Master dogwood petal veiner, Sweet Art Master dogwood leaf veiners
Molds: Sweet Art Master dogwood center mold
Petal Dusts: moss green, burgundy, dusty pink, brown, rose leaf green
Sugar Glue
Cornstarch
Bumpy foam
Firm foam, for drying
Brushes, for dusting

Make the dogwood flower centers:
1. Fill the two cavities of mold with the avocado green paste, using a dresden tool to push in the paste, making sure to completely fill all of the mold.
2. Make a hook at the end of two pieces of 22-gauge floral wire. Dip each of the hooked wires in sugar glue, wiping off any excess glue. Insert the hooked wires into each of the centers.
3. Use a dresden tool to push the paste around the wire, covering up the wire insertion point and cleaning up any paste overflowing the mold cavities.
4. Place the mold in the freezer for 25-30 minutes to firm up the paste. This is necessary to be able to successfully remove the center from the mold.
5. Remove the paste from the mold by peeling the mold away from the wired center and removing carefully. Set the centers in foam to dry overnight. You will need 6 centers total for this arrangement.

Make the dogwood flower bracts:
1. Roll white paste over a groove on a groove board. You should be able to just start to see the line through the paste. You don't want the bracts to be too thin.
2. Remove the paste from the groove board and flip the paste over so that it is groove side up. Center the bract cutter over the groove and press firmly to cut out the bract. Remove any stray pieces of paste from the cutter by running your finger along the edge of the cutter.
3. Dip a piece of 26 gauge floral wire into sugar glue, wiping off any excess. Insert the wire into the groove of the bract.
4. Groove side down on the foam pad, use a ball tool to thin the edges of the bract.
5. Place the bract into the bottom (green) part of the veiner. Place the yellow part of the veiner on top and press firmly to vein.
6. Lay the bract on the foam pad. Using the thick side of a dresden tool, push the tool into to the top/center of the bract to create an indentation. Place the dresden tool on the edge of the indentation and lightly scrape some of the paste away. This gives the bracts more of an aged and realistic look.
7. Place the bract over some bumpy foam to dry. Place some bracts curved in, some peeled back, some more flat, depending on the stages of bloom you want your flowers to be in. I made one flower with bracts more peeled away to represent more of an over bloomed flower, one flower with bracts more flat, with only a slight curve at the edges of the bract, and one flower with curved in petals to make a newly blooming flower. You will need 4 bracts for each flower (12 total for this arrangement). Let the bracts dry completely on the foam.
*You can make all of your bracts the same size using just one cutter, or you can use 2 different sized cutters (one larger, one smaller) to make a slightly offset flower. I used the smaller cutter to make 2 bracts, and the larger cutter to make 2 bracts for each flower.*

Make the leaves:
1. Roll out a piece of leaf green paste over the groove on a groove board. Remove the paste and lay the paste groove side up on the board.
2. Center the dogwood leaf cutter over the center of the groove and cut out the leaf. Remove any stray pieces of paste by running your finger along the edge of the cutter.
3. Dip a piece of 26 gauge floral wire into sugar glue, wiping off any excess. Insert the wire into the groove of the leaf.
4. Place the leaf into the bottom (green) part of the veiner. Place the yellow part of the veiner on top and press firmly to vein.
5. Lay the leaves on bumpy foam to dry, shaping them with a little bit of curve to make them look a bit more realistic.
*You can make a variety of both small and larger leaves, or all one size. You will need 8-9 leaves. I made 3 larger leaves, and 5 smaller.

Make the small buds:
1.Make a hook at the end of a piece of 26 gauge floral wire. Using the avocado green paste, roll a small piece into a cone shape. Dip the hooked wire into sugar glue, wiping off excess.
2.Insert the wire into the larger end of the cone shape. Work the paste onto the wire so that it is firmly adhered. Leave a little bit of the paste tapered off the bottom of the bud.
3. Shape the bud by tapering off the end to a dull point. Slightly bend the tip of the buds over so it looks like they're leaning just a little. Set aside in foam to dry completely.
*Make a variety of sizes from super small to a bit larger, but keep them smaller than ⅝". You will need 3 small buds total.
4. Repeat steps 1-5 of making the leaves, using the small leaf cutter (1") to create the small leaves of the buds. You will need 3 small leaves total.
*PART TWO: LARGER BUDS, DUSTING, AND COMPILING THE ARRANGEMENT*
For other sugar flower tutorials, check out these posts:
Gum Paste Blackberries, Leaves and Blossoms
Agueda says
This is just amazing!!! What a wonderful creation . This is 💘 love to the first 👀 seem 😍
Arati says
Lovely!
Ashley says
Thank you, Arati!