[This post is written in partnership with Iron Orchid Designs. All text and opinions are 100% mine. Please note that I would never endorse a product or company that I don't actually enjoy using. Thank you for supporting brands that help me and my business grow!]
Hi guys! I'm super excited to share my white on white Baroque cake mini tutorial with you. Since monochrome cakes are one solid color, it can be hard to emphasize detail and textures, since those elements can get lost in the overall look of the cake. So, I'm going to share some ways to make a single color cake really pop. One of the best ways is to add textural elements using moulds, stamps, or other 2D elements.
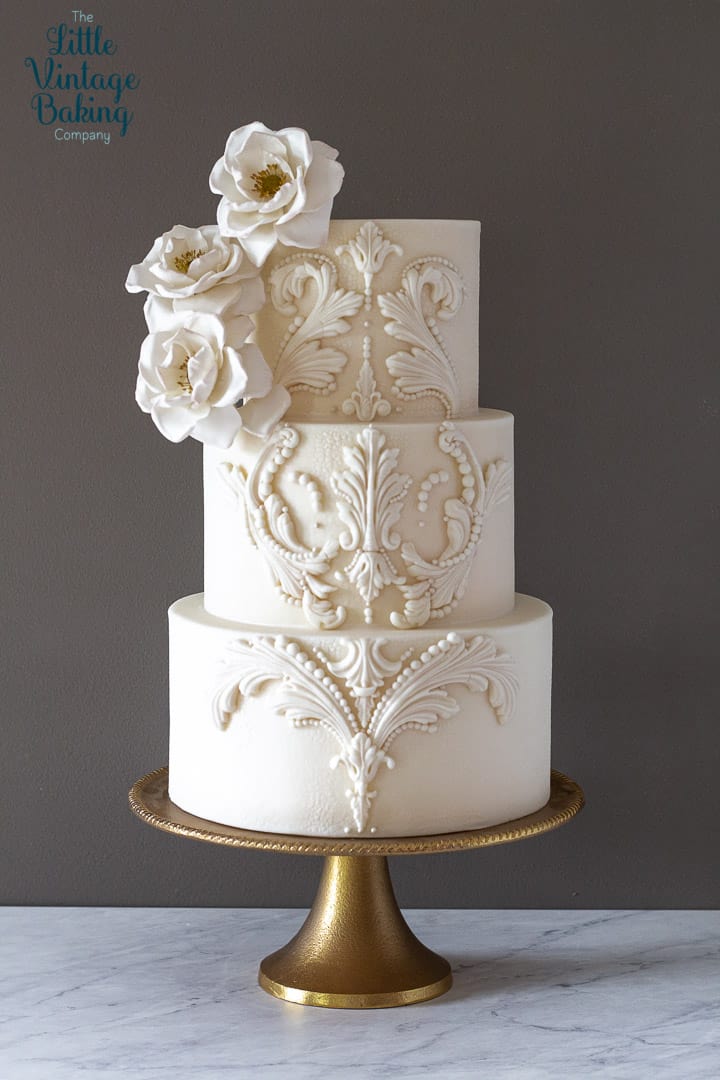
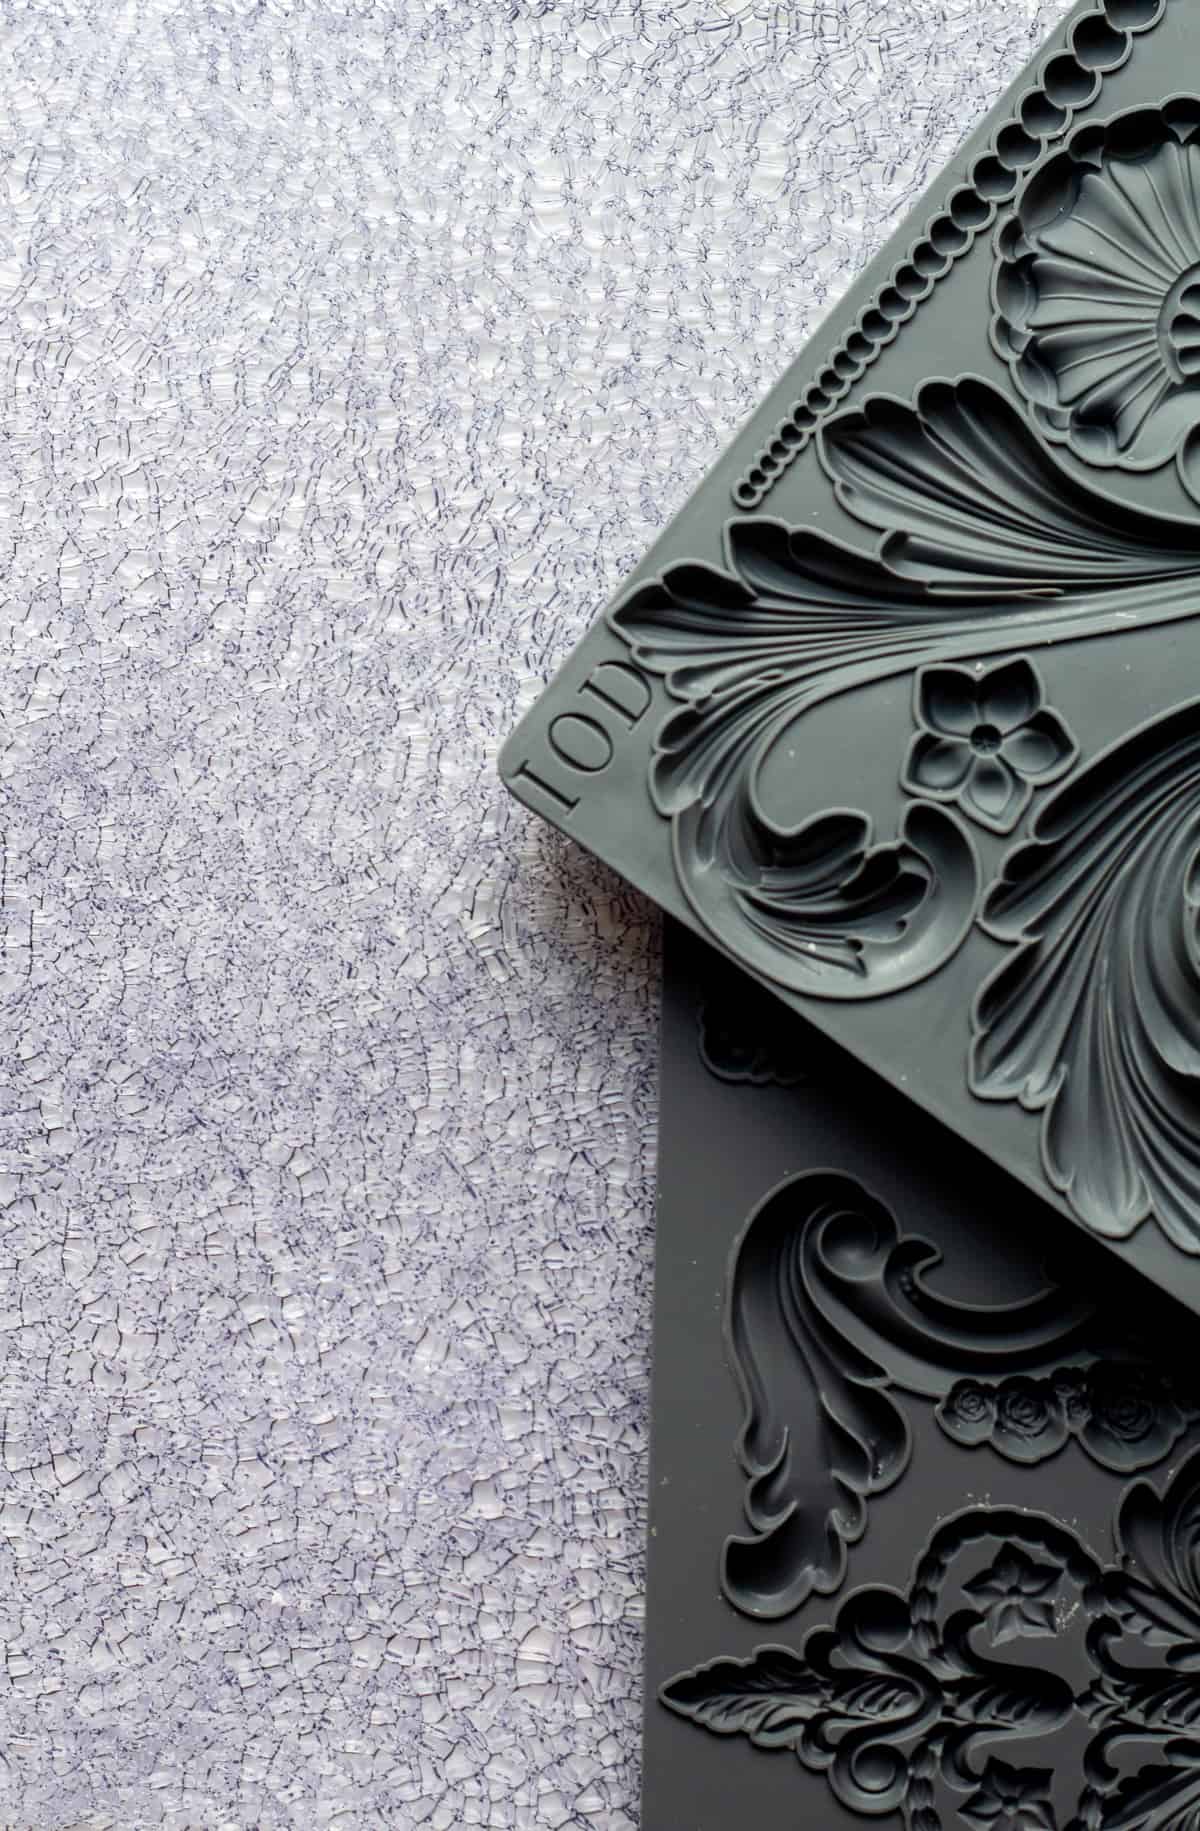
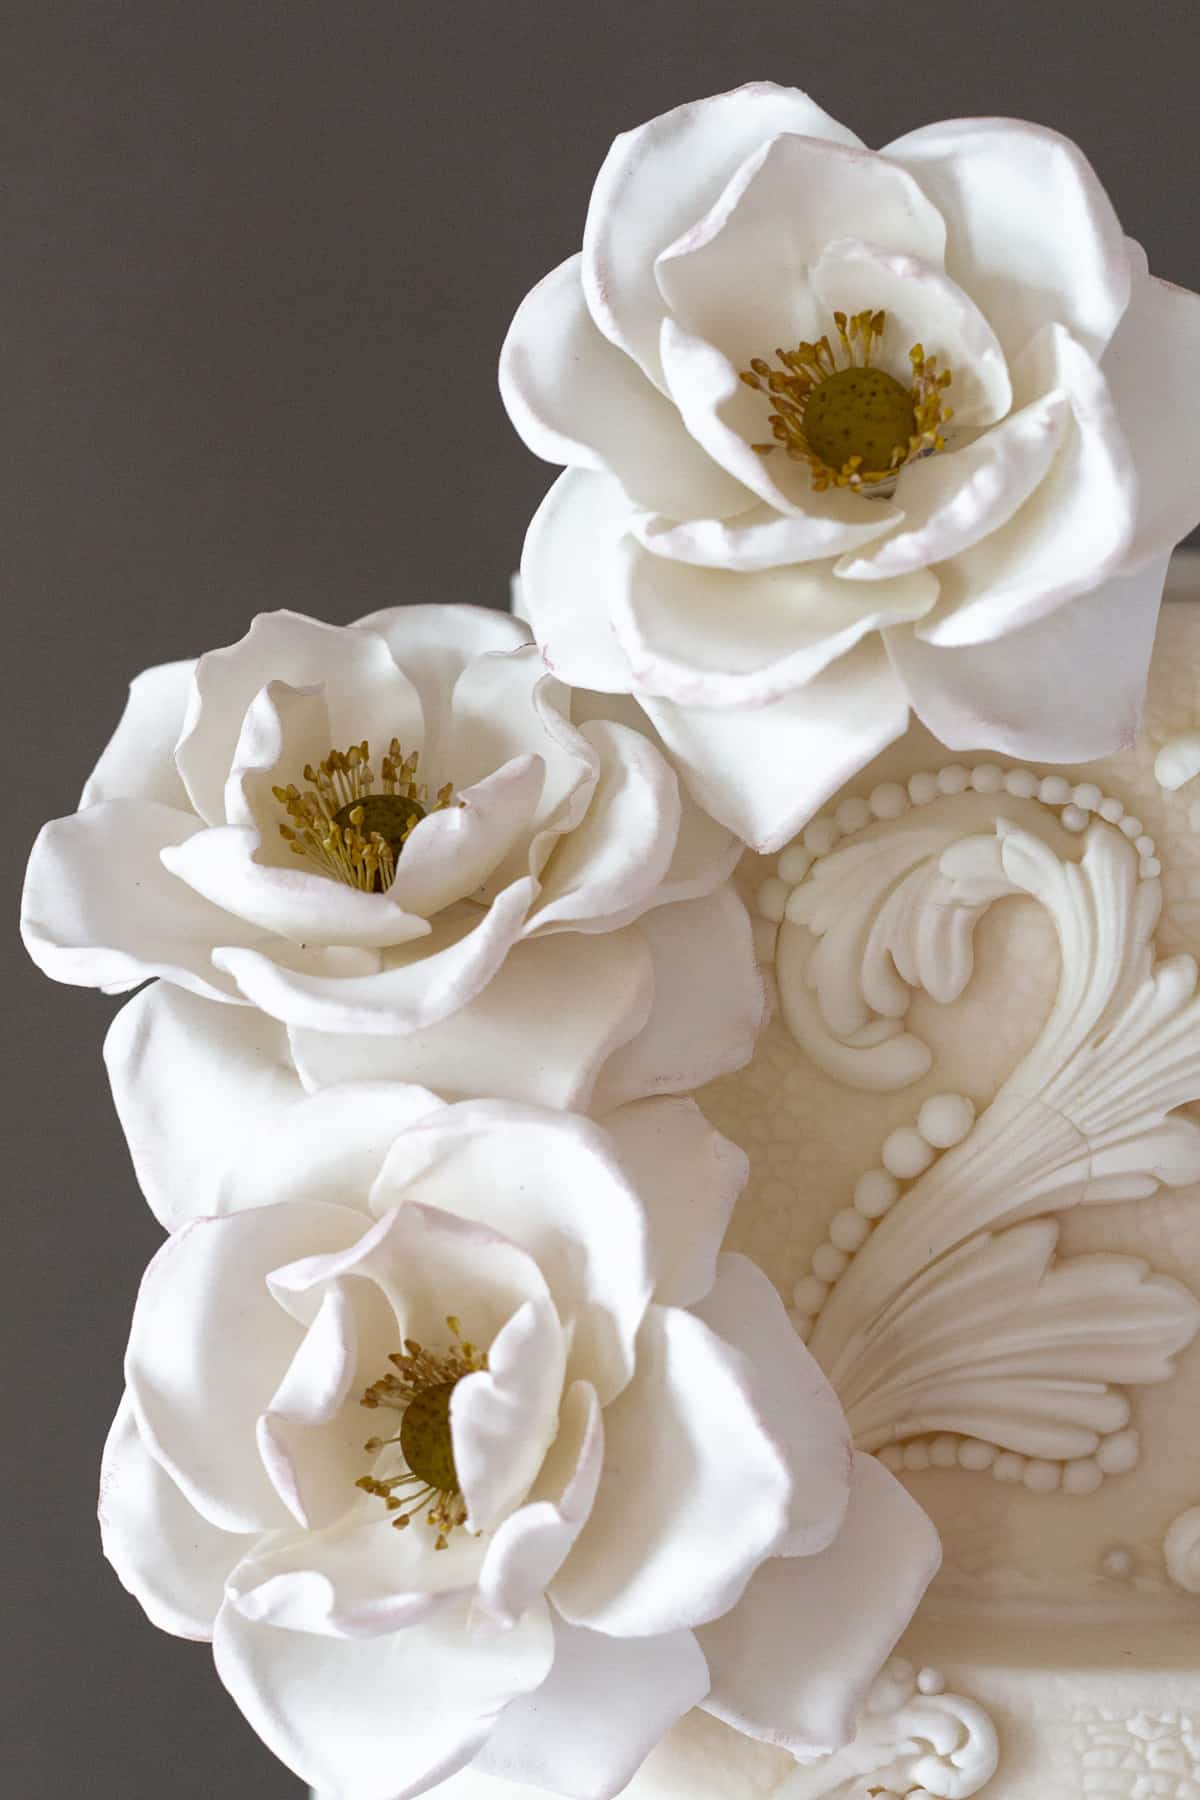
The moulds I used for this cake are by Iron Orchid Designs. They're large, durable, made with high quality food-safe silicone and are super easy to use. The fondant doesn't stick to the moulds, and is easy to remove. The moulds also have a micro rim to help get a super clean edge. The two that I chose to use are baroque style moulds (the Classic Elements and Acanthus moulds) with lots of scrolls and embellishments with some pearl detail.
For the cake, I used a natural white fondant (slightly ivory tinted) and used an Iron Orchid decor stamp, called Craquelure. I love this stamp. It's perfect for creating a fishnet texture, a lacy texture and great for animal skins, like snakes and reptiles. I imprinted all of my cake tiers with this stamp to add additional texture under the moulded pieces.

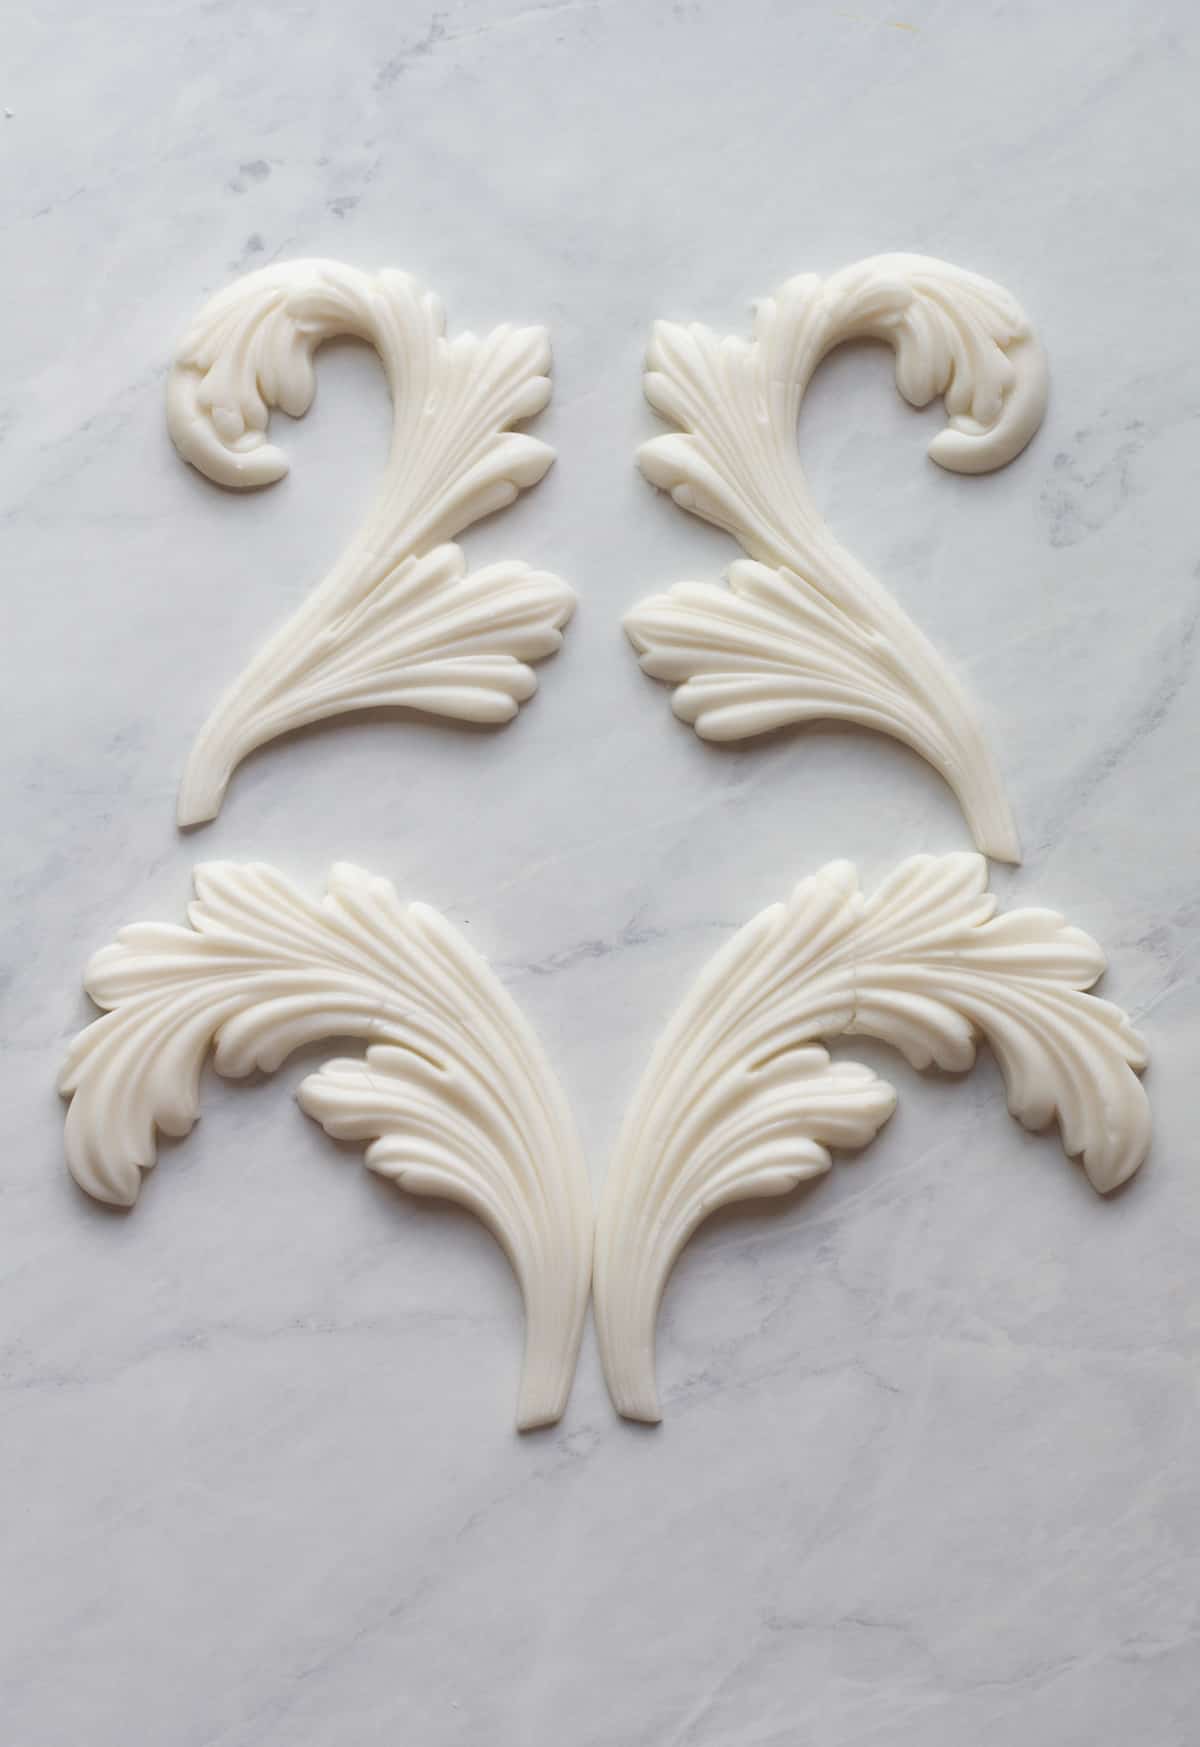
The best way to plan out the mould design for your cake is, as you are making pieces, lay them out on a non-stick mat to form the big components of your design before putting them on your cake. To use these moulds, press the fondant firmly into the mould. You can use a solid piece of fondant, or you can place the fondant into the mould in pieces. Note that the finished mould piece will be a bit segmented since the fondant was placed in pieces. I tend to like that look because it reminds me of old stone pieces, so a lot of my moulded pieces have some random segmented lines.
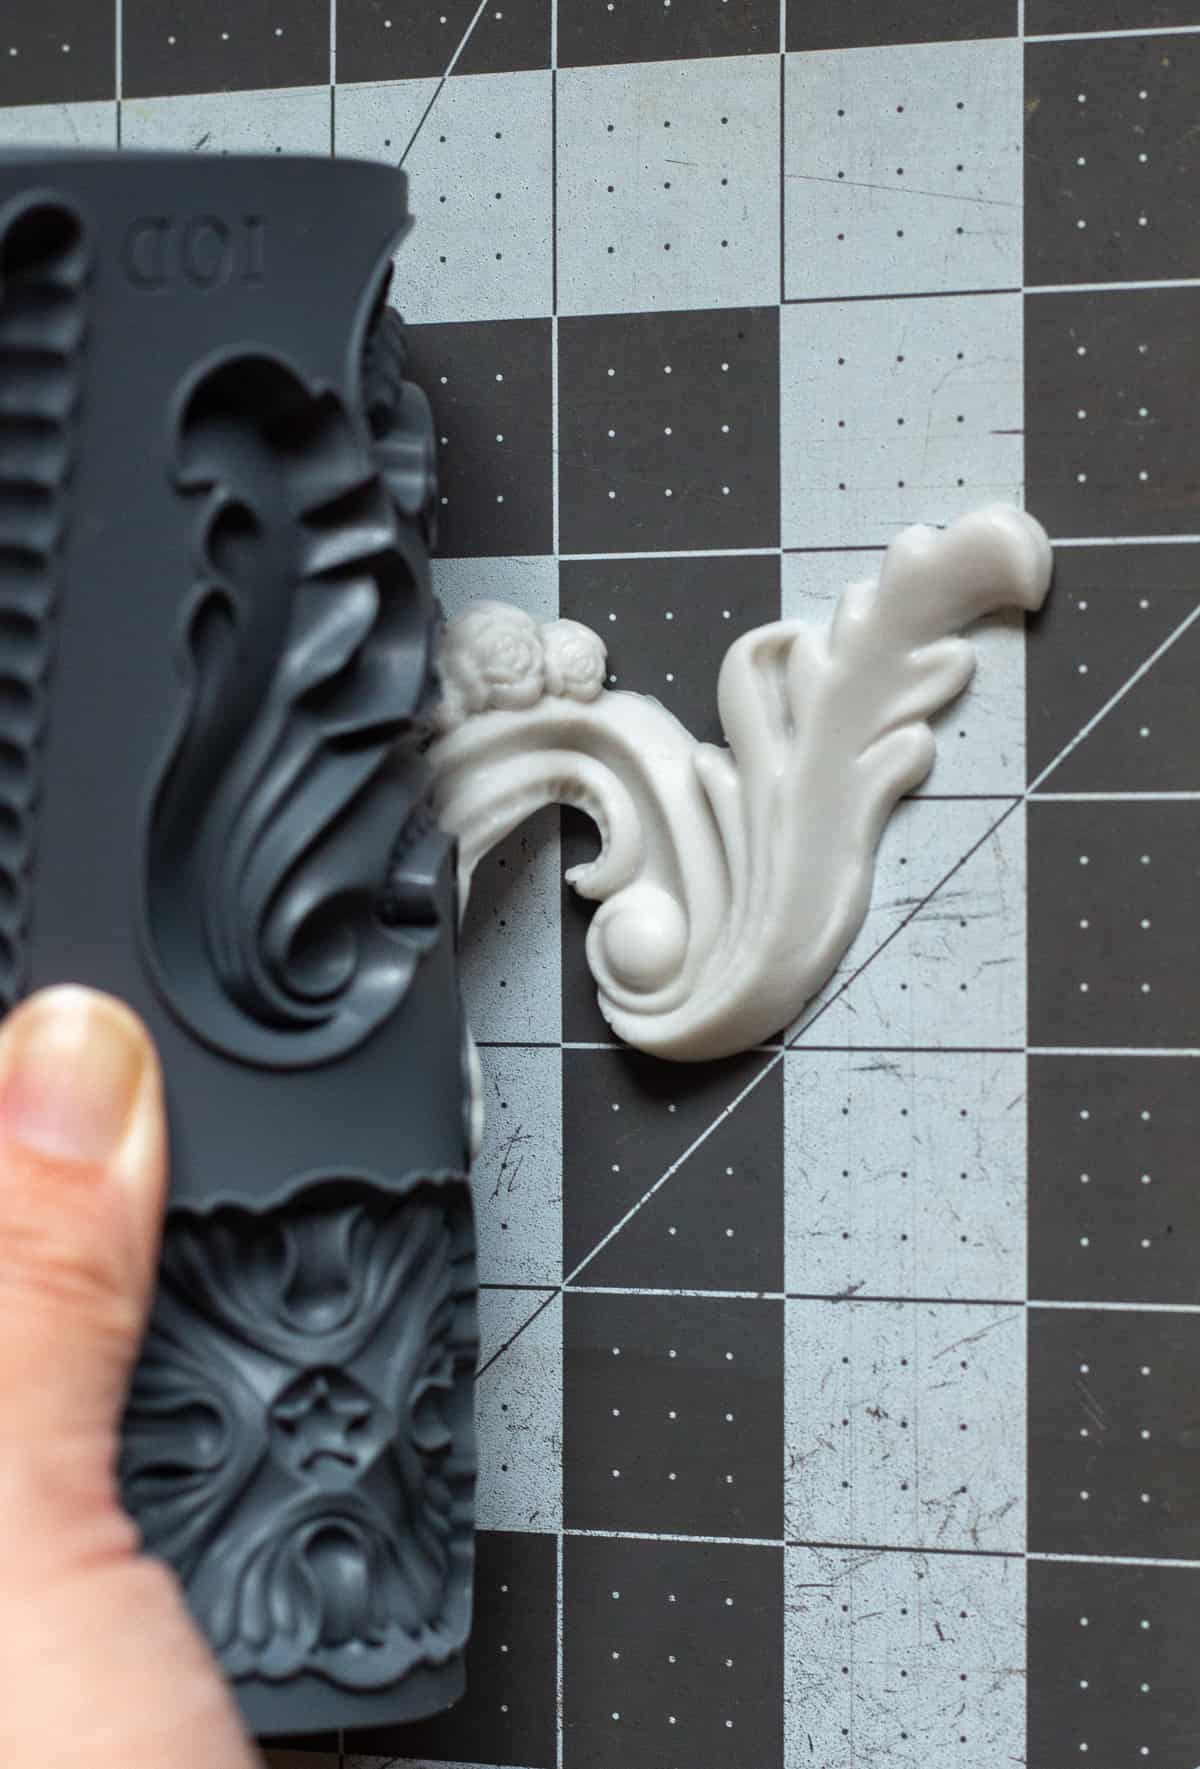
Once the fondant is in the mould, use a modeling tool to scrape off the excess paste. To remove the fondant, place the mould face down. Gently peel back the mould and ease the fondant out. It should come out easily and all in one piece.
I formed the larger pieces of my design to get a basic design and layout, then placed them onto the cake with sugar glue. Then I filled in the design with smaller accent pieces, followed by the pearl details. The pearl detail on the bottom tier is my absolute fave. It's probably my favorite tier.

I also added a few white dragees to accent the design and fill in some blank spaces. I made some white heirloom roses with lots of petals and added those to the cake for more of a romantic touch. I left the petals all white and dusted the edges with just a little bit of cream colored petal dust.
Moulds and stamps are a great way to add textural elements and additional detail to help this white on white cake really stand out. If you recreate this cake, let me know. Tag me on Instagram so I can see it and share it!
For more mini tutorials, check these out:
Lana says
I plan to use these with fondant.Can these be formed weeks ahead of adhering them to a round cake? Or do they need to be slightly damp to mould to shape of a round cake?
Ashley says
Hi Lana. You can make these weeks ahead, but I wouldn't let them dry out. I'd store them in a ziptop bag, stored flat. If they dry out, they'll crack when trying to adhere to the cake. Alternatively, you can form these around cake dummies so that they are already shaped. Ash
Lana says
Thank you Ashley.. Some of the tiers are dummies so I can have those done ahead then..
And closer to the day prep ahead and keep them in ziplock.
Janne L Smith says
Is the beaded detail with fondant as well or royal icing?
Ashley says
Hi Janne. The beading detail is all fondant. You can find silicone moulds that have rows of small pearls to achieve this look. -Ash-
Natalie says
Love this cake! Would you mind sharing where you purchased the cake stand from?! They go so well together.
Ashley says
Hi Natalie! I got the cake stand from Kirkland's 5-6 years ago. I'm not sure if they still sell it. They had a silver one too. -Ash
Hephzibah says
Absolutely beautiful cake, thank you for the the helpful tips, I'll sure give it a try
Ashley says
Thank you! Please let me know when you give it a try.