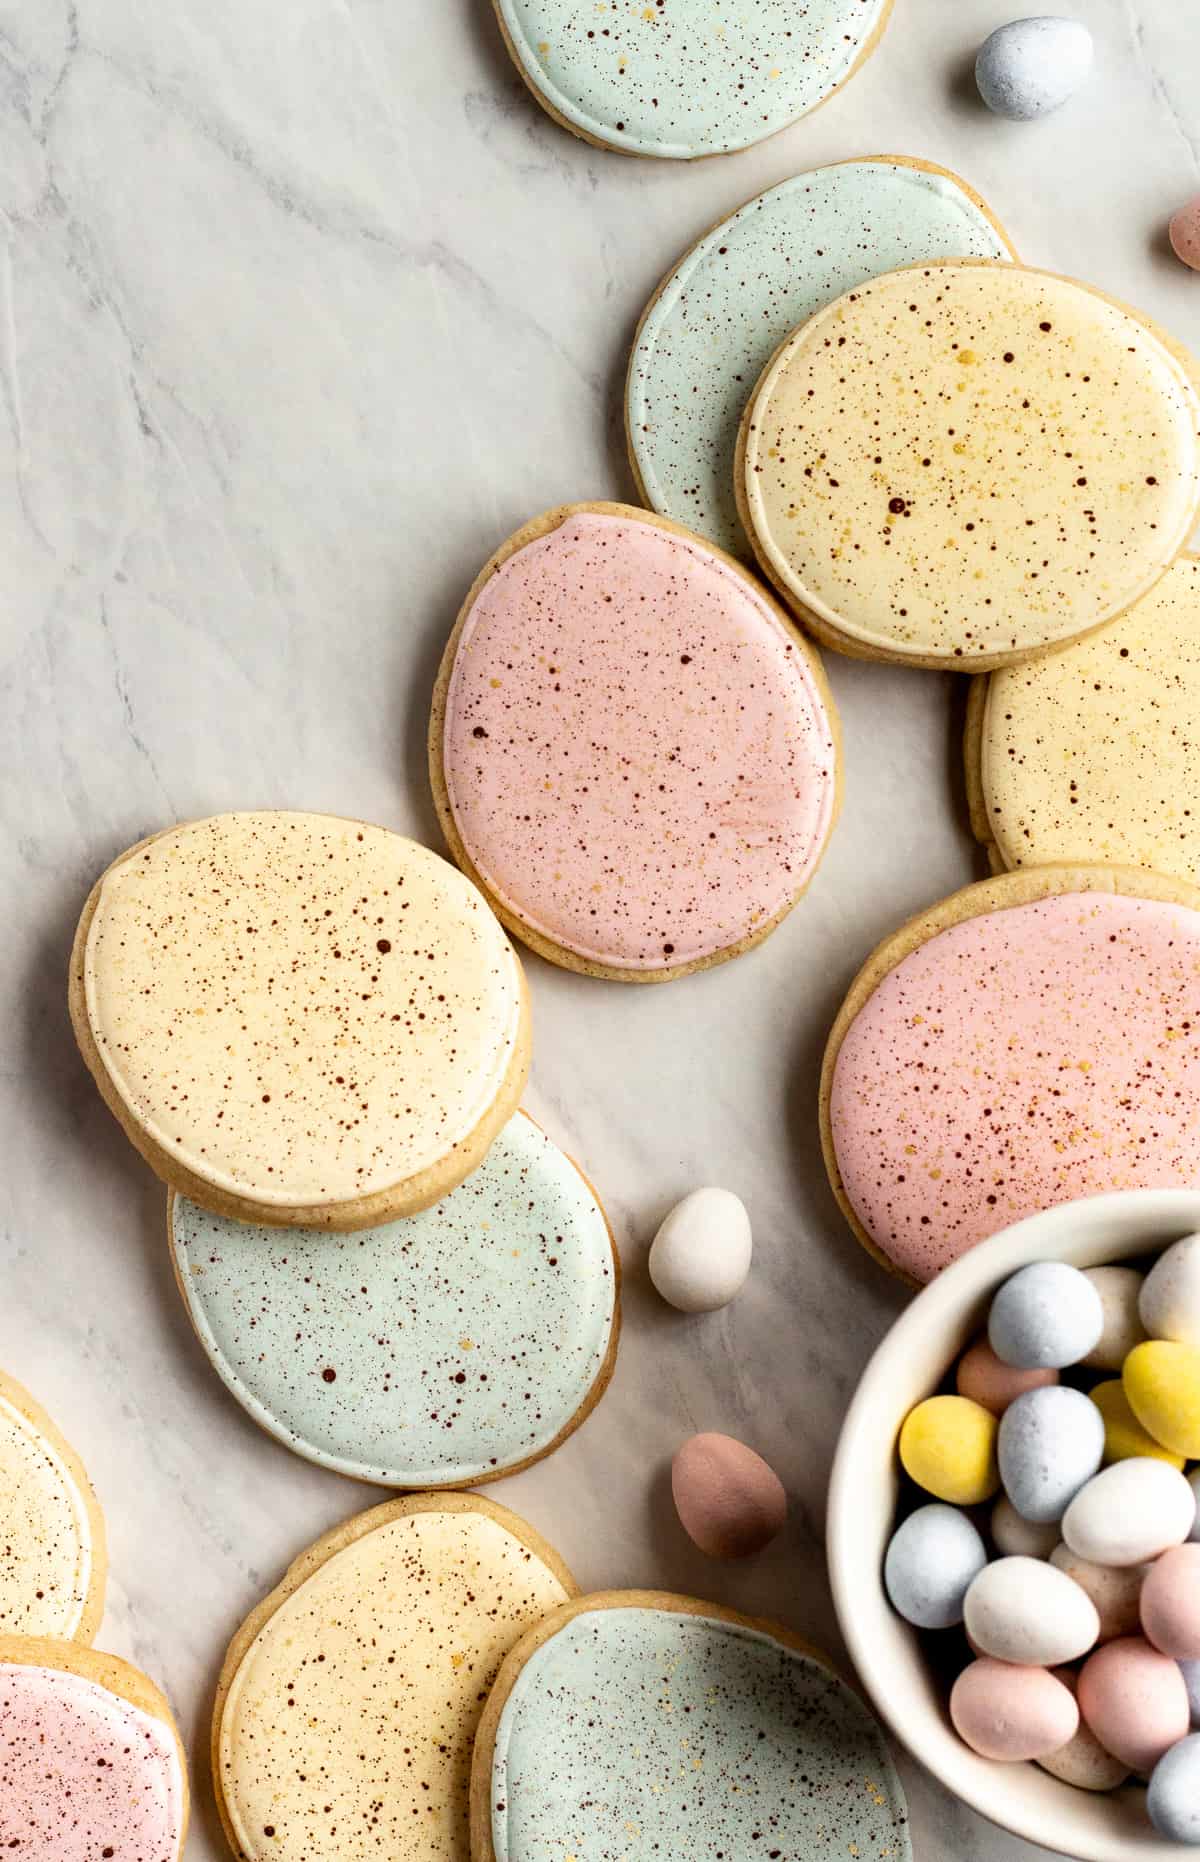
Today, I'm sharing this tutorial for an easy and fast way to decorate some Easter themed cookies. These speckled egg cookies are great to decorate with the kiddos and make super cute Easter basket gifts. The sugar cookie recipe I use for my speckled egg cookies is my go-to recipe. They are easy to roll out and they hold their shape when baked. They're easily adaptable - you can add in your favorite spices, extracts, herbs, and more. You can find the recipe for my sugar cookies on my Snowflake Sugar Cookie post.

I used an oval cookie cutter to cut out my cookies, and I tapered one end, by hand, to have a slightly pointed egg shape. You can also use a larger circle cutter and shape it to look like an egg. Alternatively, you can use a sharp knife and cut out an egg shape, with or without a template. I don't buy a lot of cookie cutters since I don't use them often so I tend to make do with what I have.
Once you cut out your cookies, they need to be chilled. Chilling is important with sugar cookies as it helps them retain their shape. Once the cookies have been chilled throughly, they are then baked and cooled completely. While the cookies are cooling, I make the royal icing. The recipe for my royal icing can also be found on my Snowflake Sugar Cookie post.
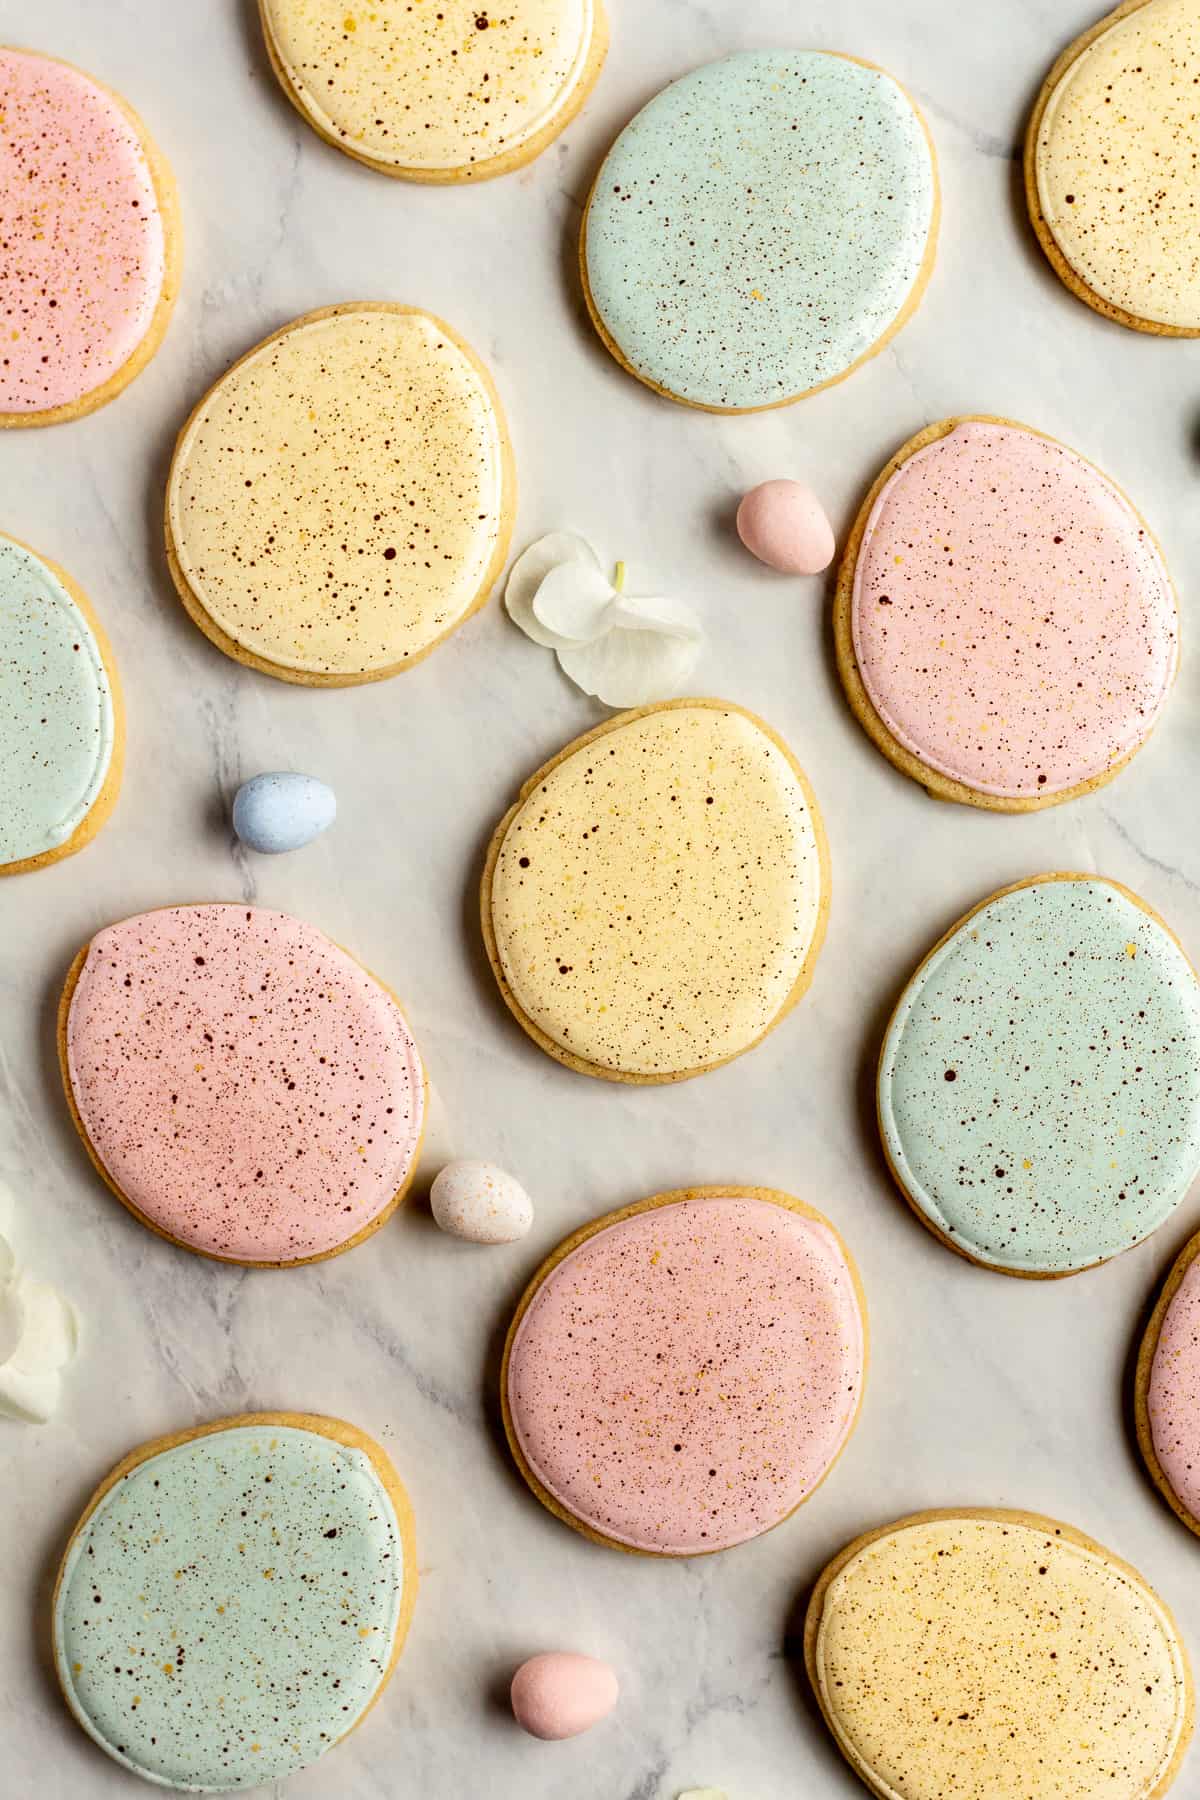
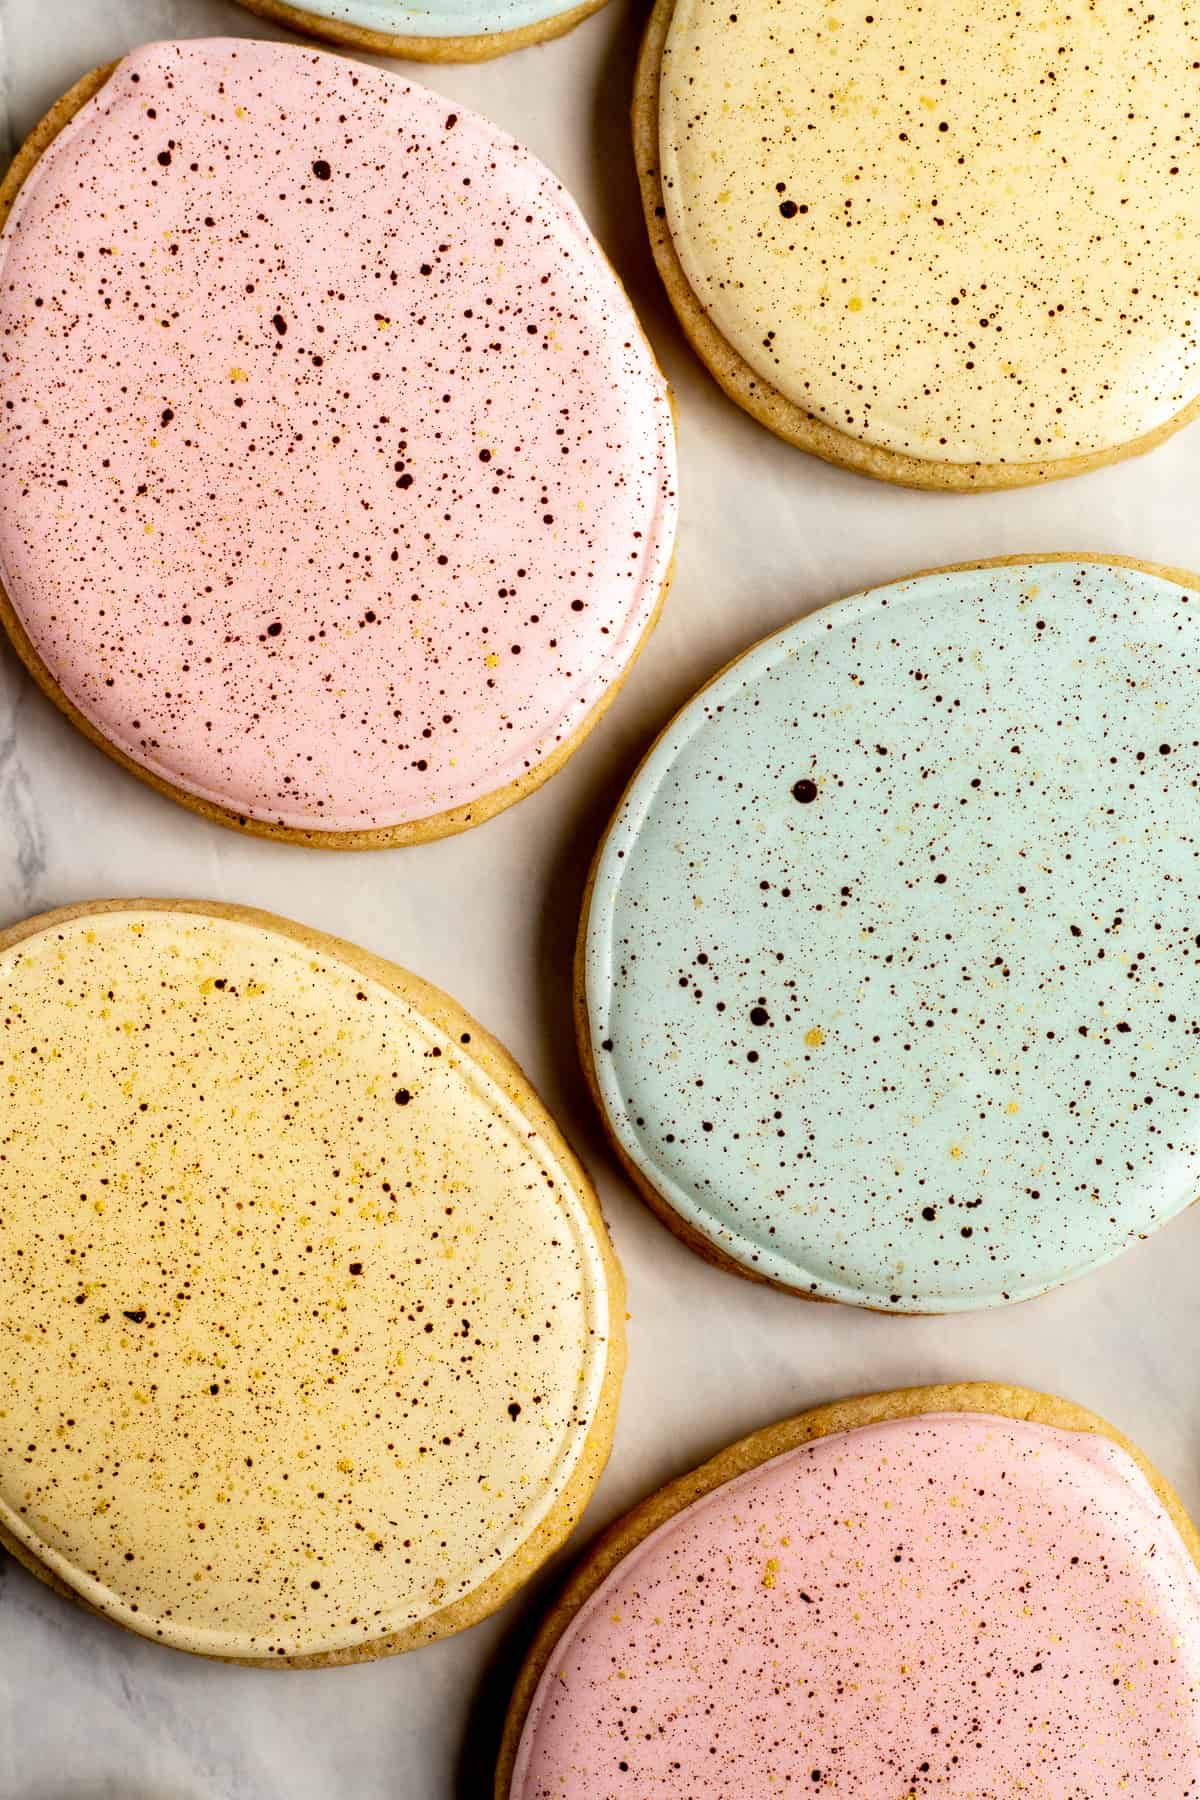
I made three different colors of royal icing to replicate the colors of Cadbury mini eggs - robin's egg blue, dusty pink and golden yellow. To mix color into royal icing, be sure to add very little at a time using toothpicks. Royal icing takes on color really well and can get too saturated really fast. Keep in mind that it will also darken a shade or two after it is colored. These are the gel colors I used to color my royal icing:
Robin's egg blue: royal blue and ivory
Golden yellow: gold, and lemon yellow
Dusty pink - electric pink, and ivory
Ivory helps to tone down the hues so that the colors aren't overly bright. Ivory is super necessary to have on hand for coloring royal icing, glaze, fondant, gum paste, etc.
One of the main issues that I hear from readers regarding royal icing, is that they are unsure of what the consistency needs to be for outlining and flooding, and if it is necessary to have multiple consistencies. I'm a no-fuss, one piping bag per color sort of cookie decorator, so I use a medium consistency for both outlining and flooding. This royal icing consistency post by Sweetopia is super helpful when determining if your icing is ready, so be sure to check it out. Royal Icing post coming from me in the near-ish future.
I used a PME tip #4 to outline my royal icing. I flooded the cookie with an Ateco #12 tip. After flooding the cookie, lightly shake it to distribute the icing and create a smooth and even surface. Outline, flood and let the cookies dry completely on the surface.
For the brown splatter effect, I mixed cocoa powder with a little bit of alcohol until a liquid paste (or slurry) forms. You can also use extracts instead of alcohol. Aim to use an extract that will compliment the flavor of your cookies and/or icing. I also made a metallic gold splatter using edible gold luster dust.
Now, this is the messy part. If you have an airbrush box, do these next couple steps in the box. Otherwise, lay out some paper towels to catch the impending cocoa mess. Using a paintbrush that is designated for food only, or a small pastry brush, dip the brush into the liquid paste mixture and wipe off any dripping excess. Use your finger to flick the chocolate mixture from the brush onto the cookies. I do recommend that you practice on a paper towel first to get the hang of how much of the chocolate mix to add you your brush as well as a good distance to hold your brush from the cookies to achieve the overall technique. Variations splatter size looks best.
I repeated the same process with the gold, but I used much less of the splatter effect. I just wanted a little gold to pop on my cookies.
Let the cookies dry completely (preferably overnight) before storing or serving. Enjoy!
For another delicious Easter dessert, check out this recipe:
Carrot Cake Cupcakes with Brown Butter Cream Cheese Frosting
Comments
No Comments