After a couple weeks of rainy weather, I'm welcoming warm, sunny Spring days with this woodland tree stump cake tutorial. Tree stump cakes have been pretty popular for quite a while now, and I think (I hope!) they're here to stay. Tree stump cakes are incredibly versatile, can be simple or extravagant and fits lots of themes - woodland, garden, lumberjack, and more.
I've done various tutorials on fondant tree bark for tree stump cakes on a couple online cake decorating schools, but after many requests for a tree bark tutorial without fondant, I created tree bark for this cake using chocolate. There are plenty of different ways to make chocolate tree bark, with relatively similar techniques, out there on the web, but this is my preferred go-to method to create them. This tree stump cake is easy and fast to make, and most of the components can be made in advance.
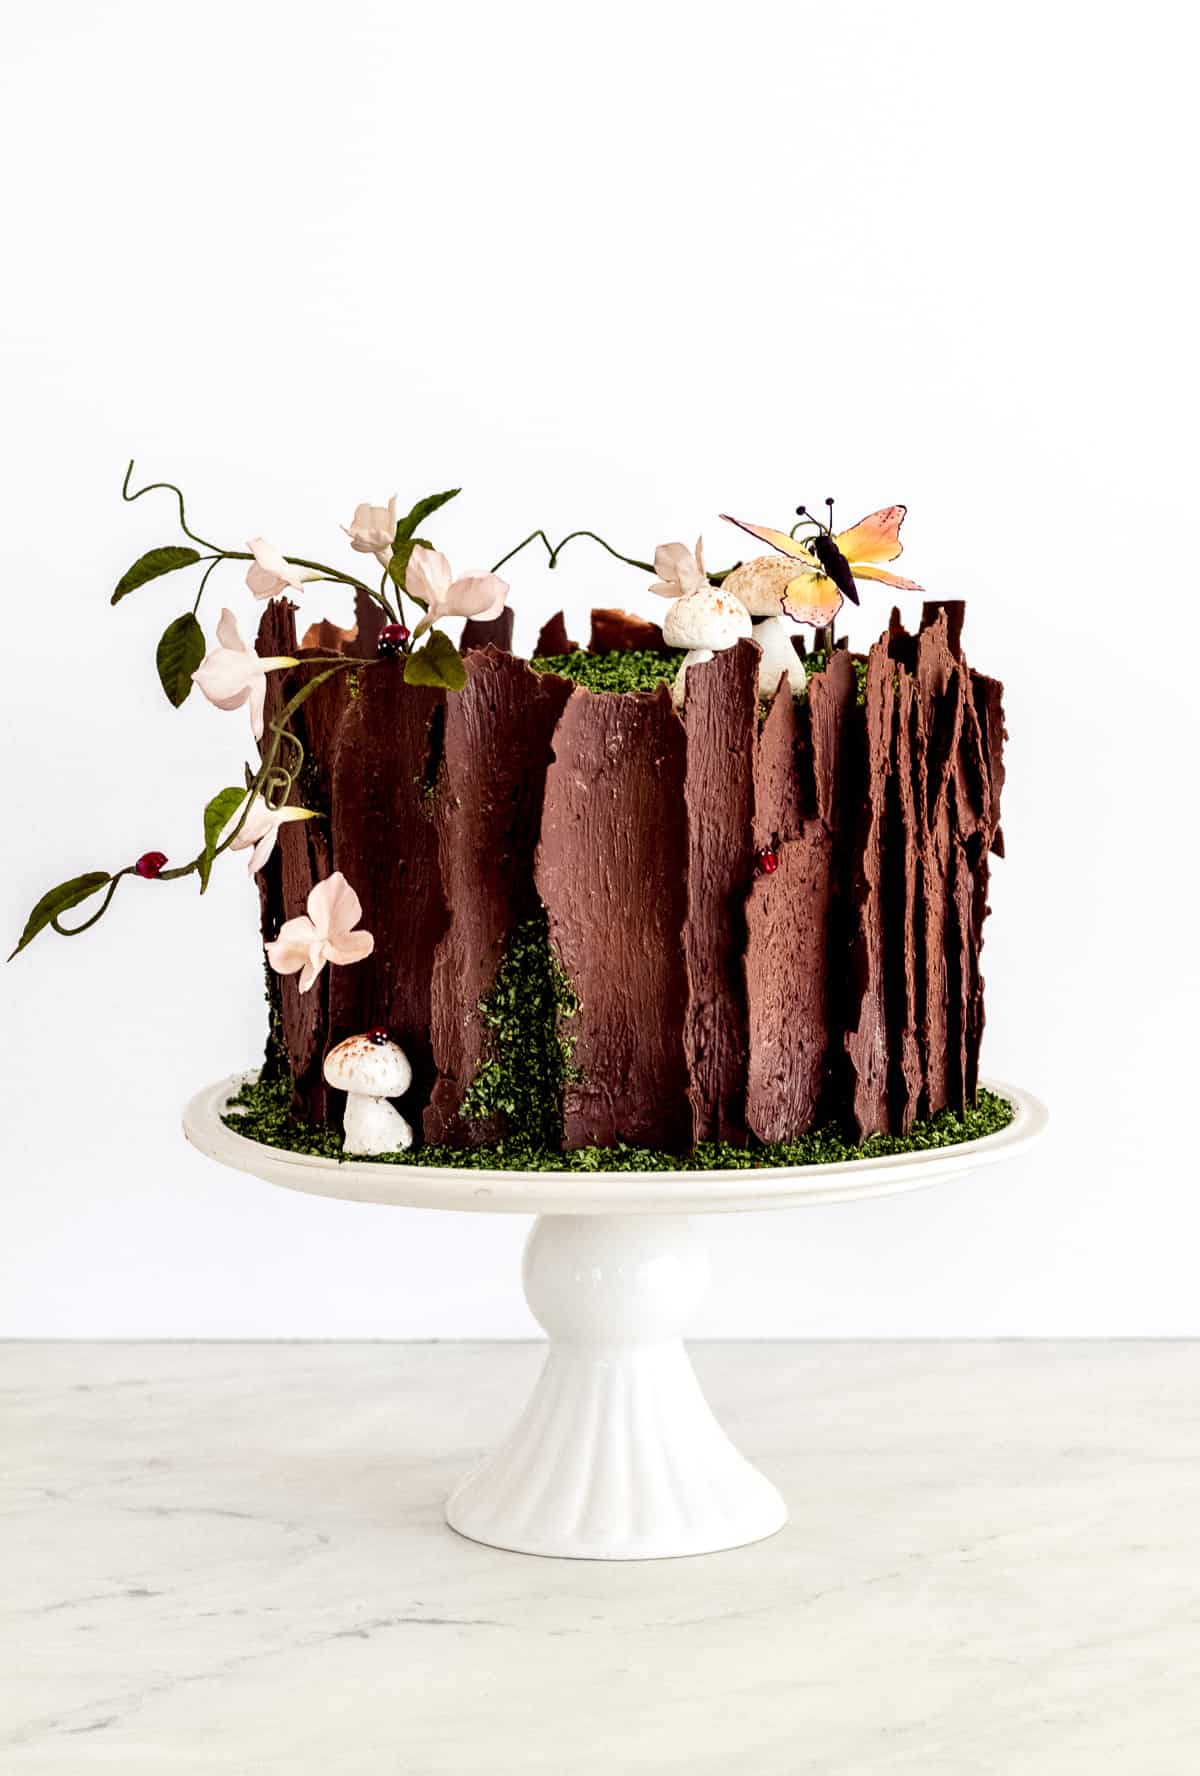
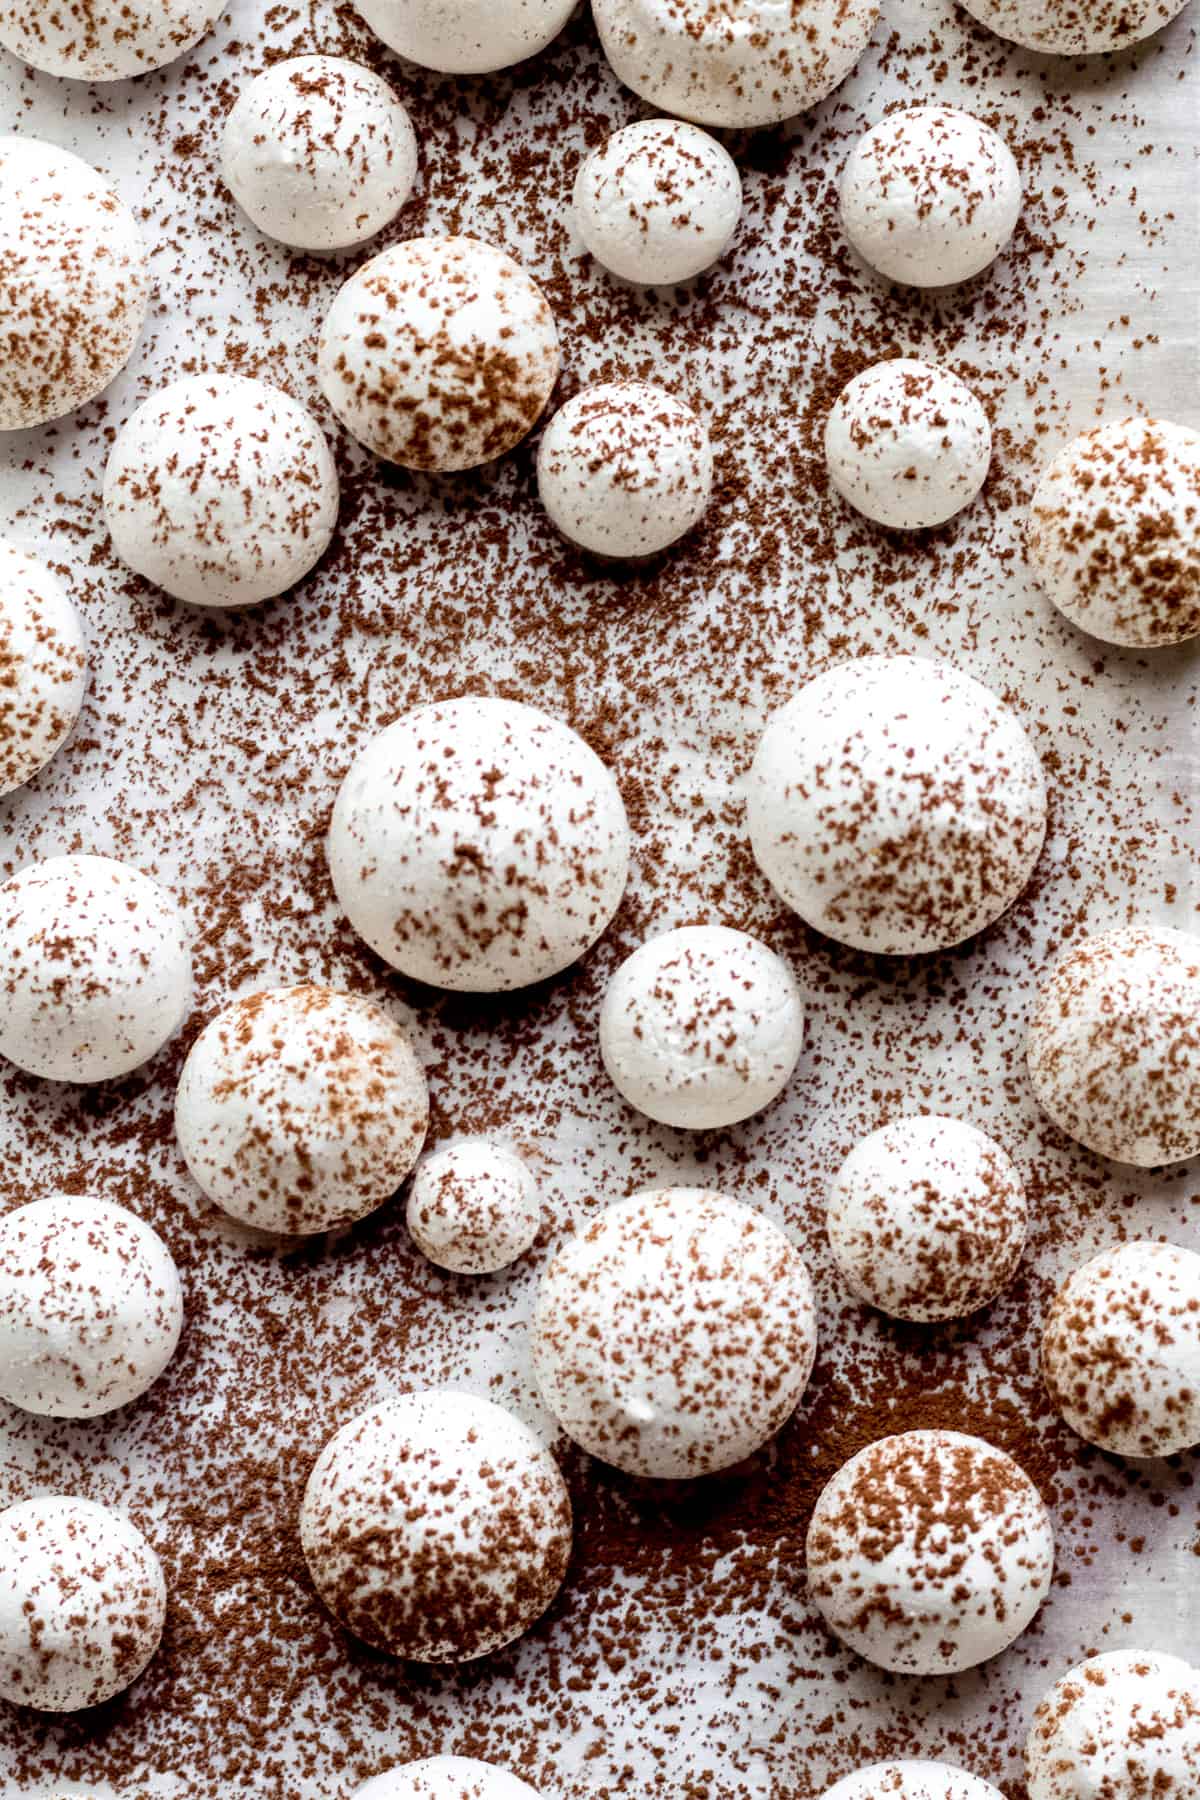
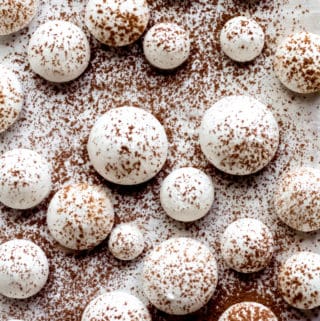
My woodland cake features edible moss, edible meringue mushrooms, sugar flowers, leaves, insects on a ganache covered cake with chocolate tree bark. Before decorating my cake, I made some meringue mushrooms. I've included the recipe for these in the bottom of the post. The recipe will make more than you need for the cake. The recipe can be halved, but if you halve it, I recommend using a hand mixer because it's hard for a stand mixer to properly whip such a small amount of egg white. I used a Wilton 1A round tip to pipe various size stems and mushroom tops from about ½" to 1 ½" diameter. I sprinkled a little bit of cocoa powder on top before baking. When they cooled, I attached the mushroom tops to the stems with melted chocolate.
To make the chocolate shards, you don't need an expensive chocolate, nor do you need to temper it. You can use any type of chocolate including candy melts. I used half and half dark chocolate and milk chocolate chips because I had both on hand. I also used this combination because I didn't want a super dark bark, so I cut the dark chocolate with a lighter color milk chocolate. Alternatively, you could make shards in various shades of brown - they don't all have to be the same. I used 8oz of dark chocolate and 8oz of milk chocolate.
I melted the chocolate in the microwave in 30 second increments until melted, stirring after every 30 seconds until melted. One thing that I do love about this cake is that it is very forgiving. You'll notice in my chocolate photos that my chocolate shards have air pockets and have lots of imperfections. Luckily, we're not looking for pretty chocolate for this cake. In fact, the uglier, the better. I poured the chocolate onto a large piece of parchment paper, and spread it out thinly, and fairly evenly with an offset spatula. Place another piece of parchment on top of the chocolate and roll like you would cinnamon roll dough. How tight you roll the parchment/chocolate will depend on how wide your chocolate shards will be. I like mine pretty wide so I rolled up the parchment a bit loose. I secured the parchment with small binder clips (paper clips work too) to keep the parchment/chocolate rolled. Place in the refrigerator for 30 minutes or so.
Carefully unroll the parchment. The chocolate will break a bit to create the shards as it is being unrolled and flattened out. If the chocolate is still a bit soft towards the center of the roll, pace the clips back on, and pop it back in the fridge for a bit longer. You want the shards to be completely set, cooled and able to crack.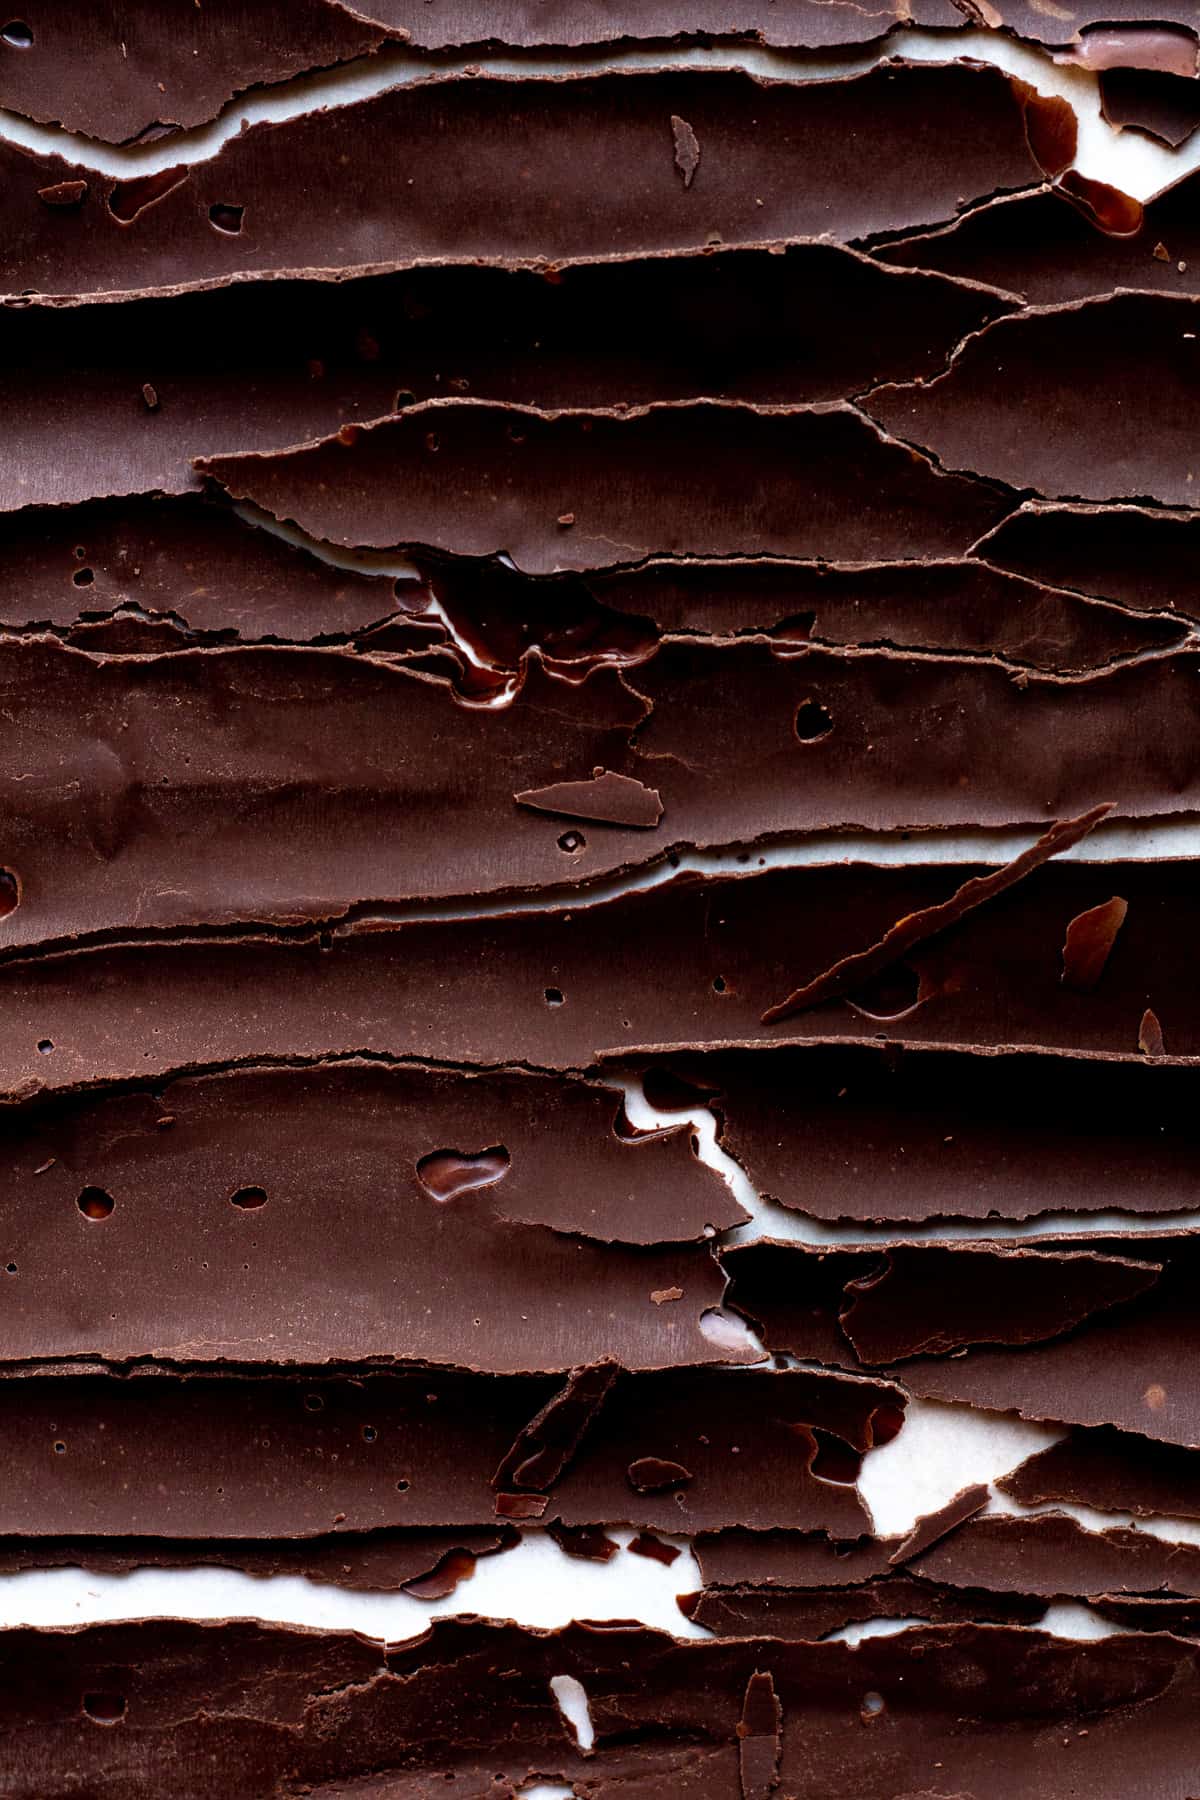
I used ganache as the outer layer of my cake. I suggest using ganache or a chocolate buttercream as the ganache will peek through some of the shards a bit. I placed the large shards on my cake first, adhering them to the ganache with melted chocolate. Once the large shards were in place, I filled in any gaps with smaller pieces of chocolate shards. I melted the remaining chocolate shards, and using a coarse pastry brush, I paint the melted chocolate evenly over the cake in vertical strokes, filling in gaps and texturizing the shards. I wasn't heavy handed with the melted chocolate, just placing it where it was needed to achieve the look and texture. Let the chocolate set completely.
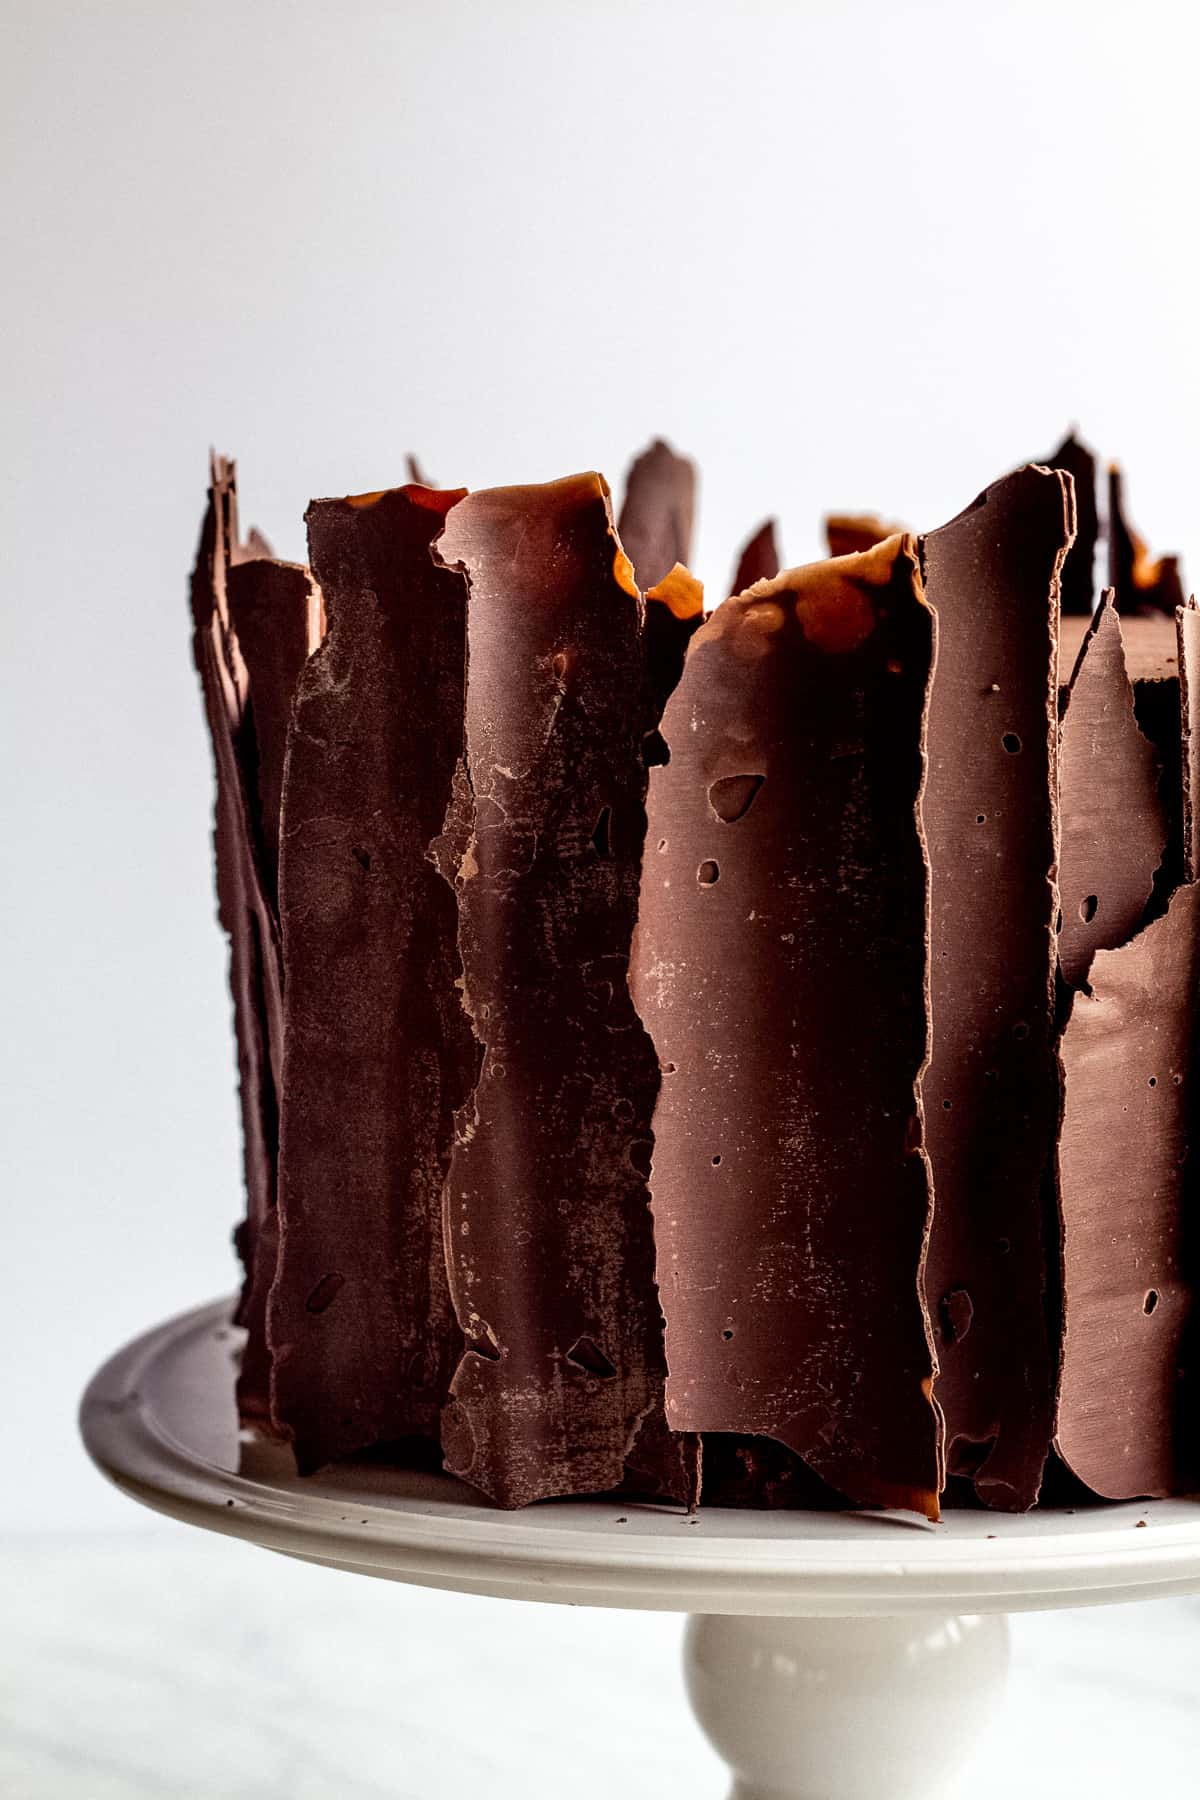
At this point, I wanted to add some depth and color to the bark so, with a dry pastry brush, I dusted areas of the cake with cocoa powder. I mixed in a little bit of cornstarch to lighten the cocoa powder and dusted some additional areas. This gives it a little bit more of a realistic look.
I opted for a moss covered top for my cake rather than the traditional tree stump rings. I used a mixture of desiccated coconut and crushed graham cracker mixed with leaf green, golden yellow and brown gel food color. Let the mixture dry on a parchment lined cookie sheet before using. I sprinkled the top of my cake with the moss and placed some up the sides of my cake as well. I also placed some around the bottom of the cake to cover the cake board.
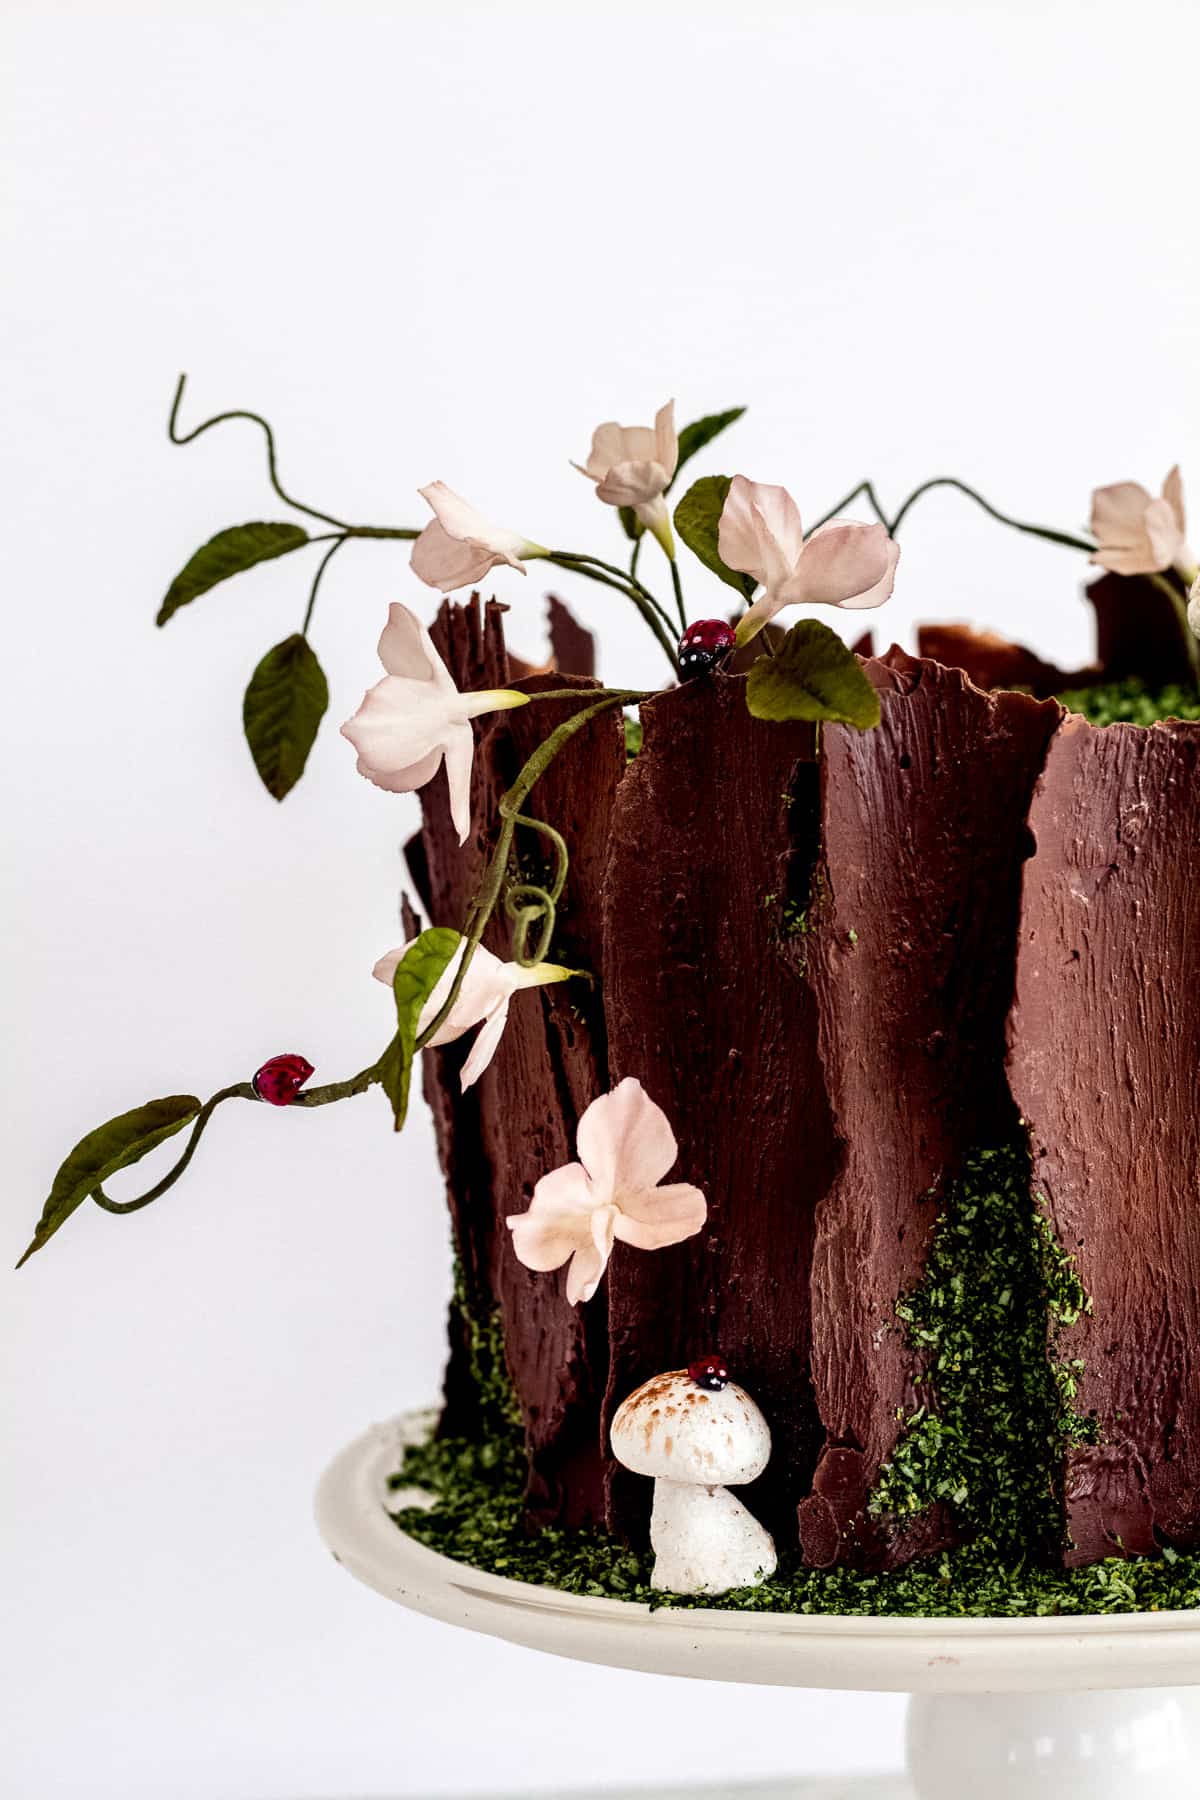
To finish my woodland tree stump cake, I placed a few meringue mushrooms on top of the cake and the base of the stump. I added a few leafy vines, some blossoms, a gum paste butterfly and some gum paste ladybugs. To see my tutorial on gum paste ladybugs, check out this post here.
Check out these posts for more cake decorating tutorials:
Mediterranean Tile and Flowers Cake
Mini Tutorial: Romantic Roses Cake
Recipe
Meringue Mushrooms
Ingredients
- 2 large, fresh egg whites, room temperature
- ¼ teaspoon cream of tartar
- ½ cup granulated sugar
- 1 teaspoon vanilla extract
- ⅛ teaspoon fine sea salt
- 1-2 teaspoons cocoa powder
- ¼ cup chocolate, melted
Instructions
- Heat the oven to 225F. Line two cookie sheets with parchment paper and set aside.
- Place the egg whites, cream of tartar and salt into the bowl of a stand mixer, and with the whisk attachment, mix on high speed until foamy.
- Slowly add the sugar and whip until stiff, glossy peaks form.
- Add the vanilla extract and beat to combine.
- Transfer the meringue to a large pastry bag fitted with a ½" tip (Wilton 1A). Pipe mushroom tops, about ½" to 1 ½" diameter, leaving about an inch apart between them.
- Put a little bit of water into a small bowl. Using a clean finger, dip your finger in the water, wiping off the excess, and gently tap down the peaked tops of the mushroom tops.
- Pipe the mushroom stems by holding the piping bag directly above the parchment, about ½" or so from the parchment. Apply pressure to pipe a thicker base with a tapered, thinner top in a variety of sizes. It's best to pipe these as straight up and down as possible to keep them from falling over when baking.
- Using a fine sieve, sift the natural cocoa powder on top on the mushroom tops. Sift as little or as much cocoa powder as you would like.
- Bake the meringue mushrooms for about 60-75 minutes until the meringue is dry to the touch, and can be easily removed from the parchment. I start checking the meringues every so often about 50 minutes into baking. Let the meringues cool completely.
- Fill a small piping bag with melted chocolate. Cut off the tip of the piping bag. You are going to need just a small amount of chocolate per mushroom.
- Using a small paring knife, make a small hole in center of flat side of each mushroom top. Pipe a little bit of chocolate into the hole and fit the smaller end of meringue stem into hole. Let the chocolate harden before decorating with the mushrooms.
Vicki Munro says
Made the mushrooms and worked perfectly, really looked like the real thing. Used Paul Hollywood’s chocolate fudge cake for the big tier of three at my son’s wedding. They loved it, the method for bark definition was perfect. I used a green coloured microwave cake for moss and various micro herbs, pea shoots and chick pea leaves for foliage and purple violas across the front. I kept it in the fridge and decorated with the flowers and foliage on the morning of the wedding, refrigerating until the last minute. I would post a pic but can’t see how. Ha ha, Thank you.
Rodrigo says
Hi Ashley.
I did the tree stump cake for my friend's baby shower.
Was lovely, everybody liked the idea.
Thank you for the inspiration and knowledge you have shared.
https://www.instagram.com/reel/CwcItVsswBO/?igshid=MTc4MmM1YmI2Ng==
LH says
The recipe for mushrooms fails to say when to put in the cream of tartar. Please update it.
Ashley says
All fixed. Sorry about that.
Barbara Liese says
I’m making this for an auction gala: desserts to be eaten at the dinner after having been bid on prior. If the dinner is on Saturday, do you think it would keep well once frosted and decorated overnight in the fridge? Mushrooms and all?
Thanks,
Barbara
Ashley says
Hi Barbara! I would not refrigerate the meringue mushrooms. Meringue has a tendency to melt or weep, when coming to room temperature. Everything else will be fine refrigerated overnight in the fridge. - Ash
Tania says
Is there something you could use other than coconut for the moss? Also did you just mix the food coloring with the mixture and then let dry and then mix the three different colors together? Thanks 🙂
Ashley says
You can also use crushed vanilla wafers or graham crackers. I just mixed all the color in with the coconut in a plastic bag and just worked the color into the coconut that way.
Mari says
Thank you so much for the bark idea/tutorial. I used it to make my son a cake yesterday. Normally, I'd've gone the fondant route (which i didn't have) and I think this was much better! I ended up making mushrooms out of candy clay (I had the melts on hand) and while I liked your moss better, no-one likes coconut here, so I opted for a "batter based moss. Thanks again!
DanielleT says
Love this cake! I made one yesterday and it looks very similar. I did a rainbow cookie cake inside, but then I used your ganache and meringue and chocolate bark technique. Turned out perfectly! Fantastic recipes. The meringue mushrooms were mush easier than I thought they would be. So was the ‘bark’. Thank you!
Ashley says
Hi Danielle! So happy to hear that! Thank you! Ash
Jed says
Hi Ash,
Love your cake finish. I’d love to try this out. Always wanted to do something like this and never knew how to achieve it. I’m so excited to try it out. Thank you for sharing this.
Jedxxx
Anika says
Hi, 1/2 cup sugar for meringue means 125 g?
Ashley says
Hi Anika. I would use 100g of sugar. Thanks! Ash
Anika says
Thank you. Can I make them ahead and how to store them? Can I stick the head with the stems and store them?
Ashley says
You can make them ahead. Store them in a single layer in an airtight container. Store in a cool dry place so that they don't get sticky. I'd say they last this way for about a week and a half.
Nora says
Gigi which cake recipe did you use to take your tree stump cake? Looks so beautiful!
Ashley says
Hi Nora! You can use any recipe you would like for this cake. There are a few layer cake recipes in my recipe archives that would work well for this - my stout chocolate cake and my buttermilk cake would be perfect for it. Thanks! Ash
Gosia says
The cake is stunning and my daughter wants this for her birthday. What kind of leafy vines did you use? Where did you buy them?
Ashley says
Hi Gosia! Thank you so much! The vines are made out of floral wire and tape with gum paste leaves, and I made them myself. You can also use artificial vines and leaves. I have sugar flower and leaf tutorials that can be found under the tab up at the top of the page. Let me know how the cake turns out!
Laisea husk says
Can I make this the day before if so how should it be stored. I was nervous about the chocolate sweating if refrigerated.
Ashley says
Hi Laisea! Yes, you can refrigerate it, though I wouldn't refrigerate the mushrooms as they can melt. The chocolate can sweat when coming to temperature. To avoid this, place the cake in a box (and close it) before leaving it out to come to room temperature. This helps prevent condensation. - Ash