Can we just talk about how it's August already?! Like, where did summer go? It went by in a blur. It's hard to believe that in just a couple short weeks one of my babies will be starting high school and the other will be starting kindergarten. We may be close to fall and heading back to school, but I am still baking up a storm with all the summer produce. My method for picking the best fruit for my next baking project is usually choosing what fruit I can smell when I first walk into the farmer's market. Lately it's been strawberries and peaches. ALL the peaches as you will see in my next post. Hint, hint, wink, wink.
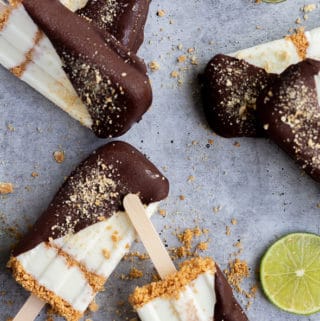
But being a citrus lover as I am, I stopped short in my tracks earlier this week when I saw the bags and bags of tiny little key limes, and recalled a yummy treat I had while we were recently vacationing in Sarasota, Florida. While hanging out in a local ice cream shop, I noticed that one of their specialties was chocolate dipped key lime pie. Me being somewhat burned out on ice cream (how is that even possible, right?), I decided to try it and found that I very much enjoyed it. So I picked up a few bags of those little key limes and created something similar at home - these chocolate dipped key lime pie pops.
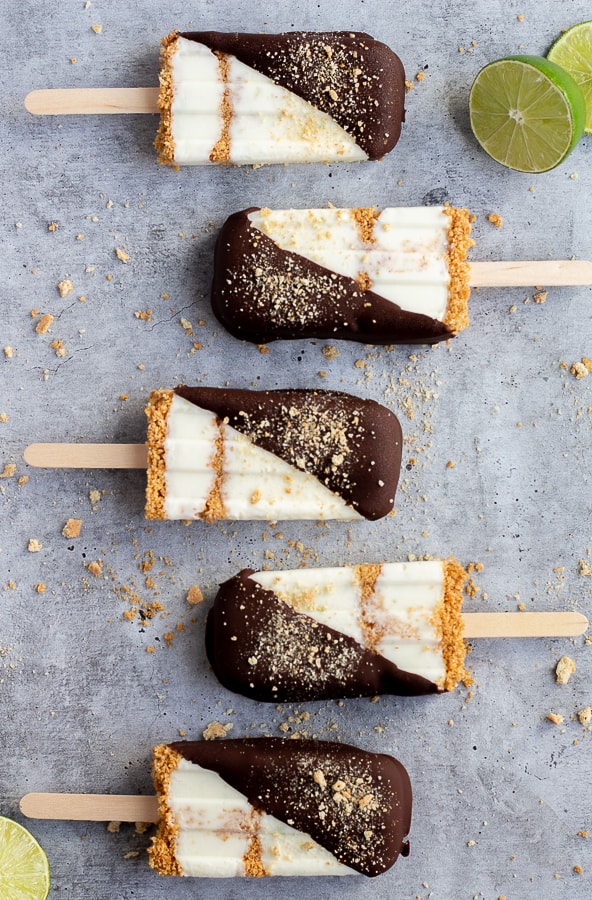
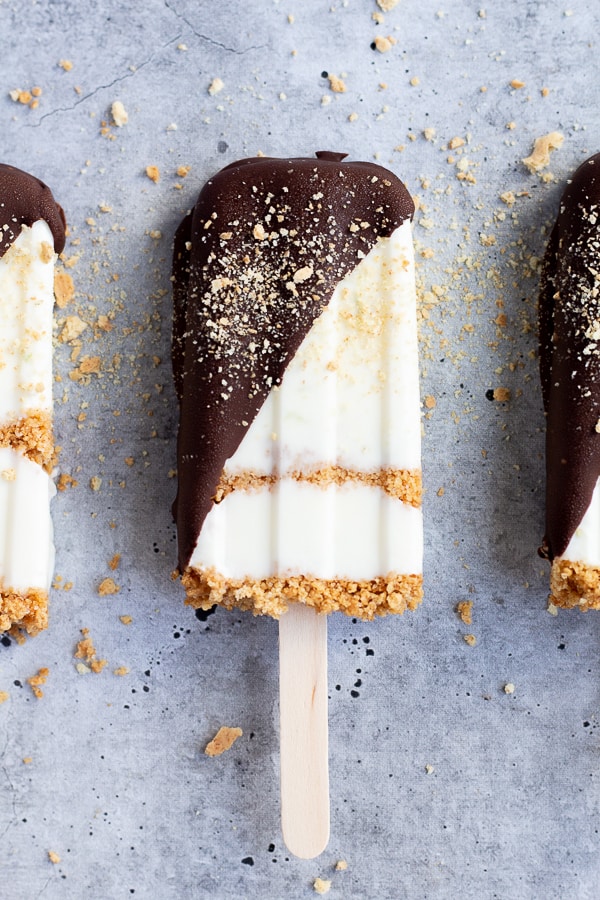
Tart, creamy and packed with key lime juice and zest, these chocolate dipped key lime pie pops are a breeze to make and so delicious and refreshing all on their own. Add some toasted graham cracker crumble and dip them in semi sweet chocolate and they crazy addictive.
Before making the pops, I mix together crushed graham crackers, melted butter and a little bit of sugar to make the graham cracker crumb "crust" part of the key lime pie pops. I bake the crumbs until golden and brown and set them aside to cool completely. This also crisps up the graham crackers a bit so they are less likely to get soggy in the pops.
If you’ve ever had to squeeze key limes, then you know that they yield little juice and you will need to squeeze a LOT of key limes to get a full cup worth. You can most definitely use regular Persian limes for these pops. I used key limes and Persian limes interchangeably while testing the recipe. Just keep in mind that key limes are considerably more flavorful and sour than regular limes. Definitely avoid bottled key lime juice as it has an artificial and bitter flavor.

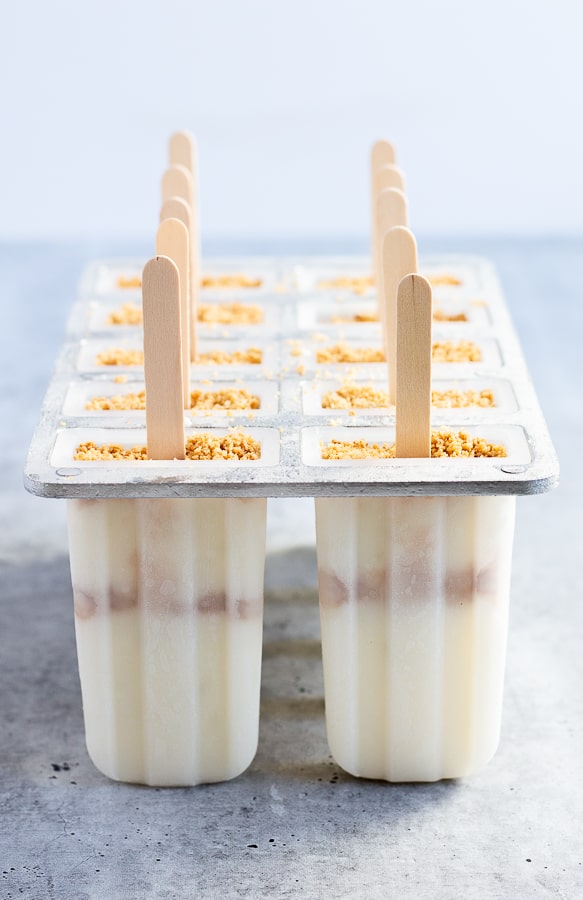
To make the pops, I use this ice pop mold. It’s sturdy, easy to use and easy to clean. I whisk the milks, cream, salt and zest together, then I whisk in the lime juice until thoroughly mixed. For ease of pouring into the pop molds, I usually transfer the mixture to a measuring cup with a spout. I pour the mixture into the molds until ⅓ to ½ of the way full, then add a layer of the graham cracker crumb. Gently push the crumb into the mixture just a bit to ensure there aren’t any air pockets. Fill the molds with the rest of the lime mixture, leaving about ½ inch at the top. I like to tap the mold on the counter so that the mixture is compact in the molds and there is not any air pockets around the graham cracker crumb. Add more graham cracker crumb on top and gently pack in the crumbs to reach the top of the mold.
I like to freeze my pops overnight to ensure they’re fully frozen all the way through. Removing the pops from the mold can be tricky. Place the mold into a few inches of lukewarm water for 20-30 seconds to loosen the pops. Remove the mold from the water and carefully remove the pops from the mold. If you find that the pops are still stuck, place back into the lukewarm water for another 20 seconds or so before trying to remove the pops again.
Once the pops are ready to be dipped, I melt good quality semi sweet chocolate with coconut oil to thin the melted chocolate just a bit. I only partially dipped the pops for this recipe but if you want a fully dipped key lime pop, double the chocolate and oil called for in the recipe. I used coconut oil because I enjoy the slight coconut flavor that really compliments the pops. You can use shortening instead if you wish. Then I sprinkled some reserved graham cracker crumbs over the chocolate and popped them back into the freezer to harden up the chocolate and to keep the pops frozen until serving.

Seriously guys, so, so good. I hope you enjoy these chocolate covered key lime pops as much as I do.
If you try my chocolate dipped key lime pie pops, let me know! Leave a comment in the comment area below and be sure to snap a photo and tag it #littlevintagebaking on Instagram. I love seeing your Little Vintage Baking creations!
For more summery treats check out these recipes:
Lavender Lemon Shortbread Bars
Recipe
Chocolate Dipped Key Lime Pops
Equipment
Ingredients
Graham Cracker Crumbs
- 3 graham crackers, finely crushed
- 1 tablespoon unsalted butter, melted
- 2 teaspoon granulated sugar
- pinch of fine sea salt
Key Lime Pops
- 1 cup (250ml) fresh key lime juice
- ⅛ teaspoon fine sea salt
- 1 tablespoon key lime zest
- ¾ cup (180ml) heavy cream
- ½ cup (125ml) whole milk
- 1 can (397g) sweetened condensed milk
- 1 ½ cups (265g) semi sweet chocolate chips
- 1 tablespoon coconut oil
Instructions
Graham Cracker Crumbs:
- Preheat the oven to 350F. Line a small sheet pan with parchment paper.
- Place the graham cracker crumbs, sugar and salt into a small bowl and mix to combine.
- Pour in the melted butter and mix to thoroughly combine. The mixture should be evenly coated with butter.
- Pour the mixture out onto the parchment lined sheet pan. Place into the oven and bake for 7-9 minutes, stirring halfway through, until golden brown and fragrant.
- Let the graham cracker crumb cool completely before using.
Key Lime Pie Pops:
- In a medium bowl, whisk the whole milk, sweetened condensed milk, heavy cream, salt and lime zest together until thoroughly combined.
- Whisk in the lime juice and whisk until completely incorporated.
- Pour the mixture into a large spouted measuring cup. Pour the mixture into the molds ⅓-1/2 way full.
- Add 1 and ½ teaspoons of the graham cracker crumbs, pushing down gently to eliminate any air pockets.
- Pour the rest of the key lime mixture into the molds, leaving about ½ inch at the top of the mold for the graham cracker crumbs.
- Add more graham cracker crumbs to fill up the molds, pushing down on the crumbs gently to pack. Lightly tap the mold onto the counter to get rid of any air pockets.
- Place the lid onto the mold and place the sticks into the pops. Place the pops into the freezer for at least 6 hours, preferably overnight.
- Once the pops are frozen, melt together the chocolate with the coconut oil. Line a baking sheet with parchment paper.
- Remove the pops from the mold and dip in the chocolate mixture. Place the pops on parchment paper after dipping. Sprinkle the pops with the graham cracker crumb mixture and place back in the freezer until serving.
Comments
No Comments