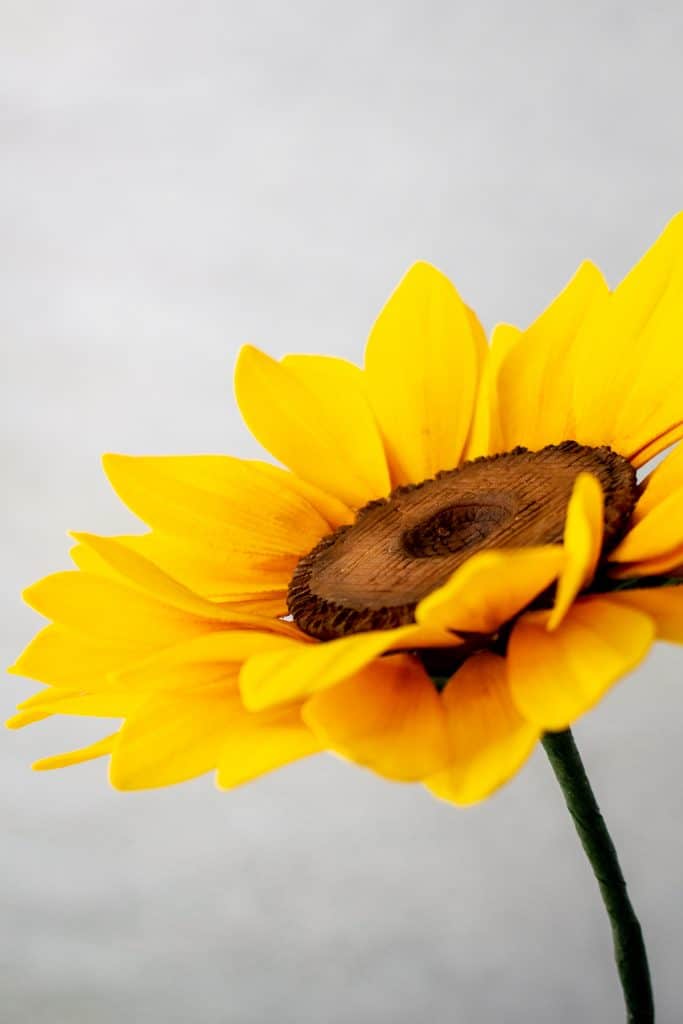
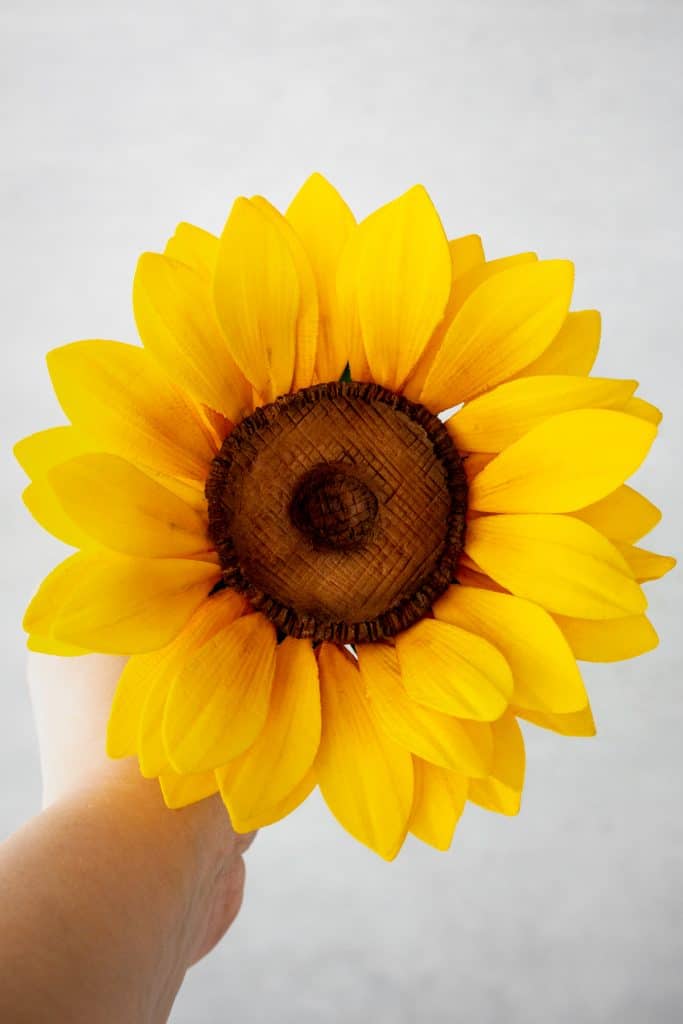
Recently, I was honored to be featured on the cover of the September/October 2021 issue of American Cake Decorating Magazine. While there is a tutorial on how to make the cake in the magazine, there isn't a tutorial for the large gum paste sunflower, the main focal point of the cake, included with the tutorial. So, after many requests, today I'm sharing tutorial for my gum paste sunflower.
Gum Paste Sunflower Supplies:
2" styrofoam ball - The type of styrofoam ball you use for this project is important. Avoid the foam used in floral arrangement as they crumble too easy, they are a pain to use and are not sturdy enough. I don't recommend using these for any sugar flowers.
There are two types of foam balls that are pretty easy to find. Smoothfoam, and more of a generic, softer foam ball. Smoothfoam is too hard to be able to insert the wires into the foam. If all you can find is Smoothfoam, you can punch your holes with a scribe tool before inserting petals. I have linked the foam balls I use.
Foam cutter, or sharp craft blade
Gum paste - light brown, golden yellow, mid-green
Petal dusts - burnt orange, golden yellow, hunter green, brown, dark brown
Dusting brush
Floral wire - 20 gauge (1), 26 gauge (12 wires cut into 5 pieces)
¼" width green floral tape
scribe tool
Exacto knife, or straight edge modeling tool
Small rolling pin
Firm foam mat with holes
Dahlia petal cutters - (4.5cm x 2cm) and (3cm x 1cm)
Dahlia veiner, JEM veining tool, or sunflower petal veiner
Daisy cutter
Shortening
Hot glue gun
Sugar glue
Bumpy foam
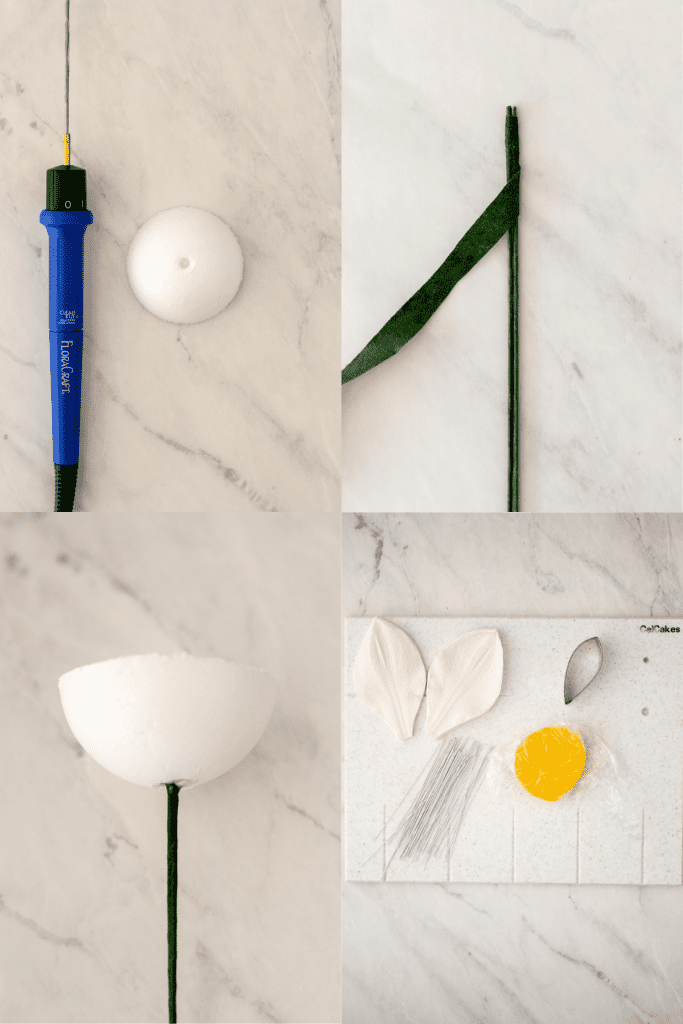
Step 1: Cut a piece of 20 gauge floral wire in half. Activate the glue in the floral tape by pulling on it gently, and tightly tape the two pieces of wire together.
Step 2: Cut the 2" styrofoam ball in half with the foam cutter or sharp blade. You only need one half for the sunflower.
Step 3: Lay the ½ sphere flat side down and punch a hole in the top of the ball with the floral wire. Fill the hole with hot glue and insert the wire into the ball, pushing the wire through until it just reaches the flat surface. Do not push all the way through. Let the glue dry completely.
Step 4: Knead a small amount of shortening into the golden yellow gum paste until the paste is smooth and pliable. Roll the paste over the groove of a groove board.
Step 5: Gently remove the paste from the board and lay groove side up on a smooth surface. Center the cutter over the groove and cut out the petal.
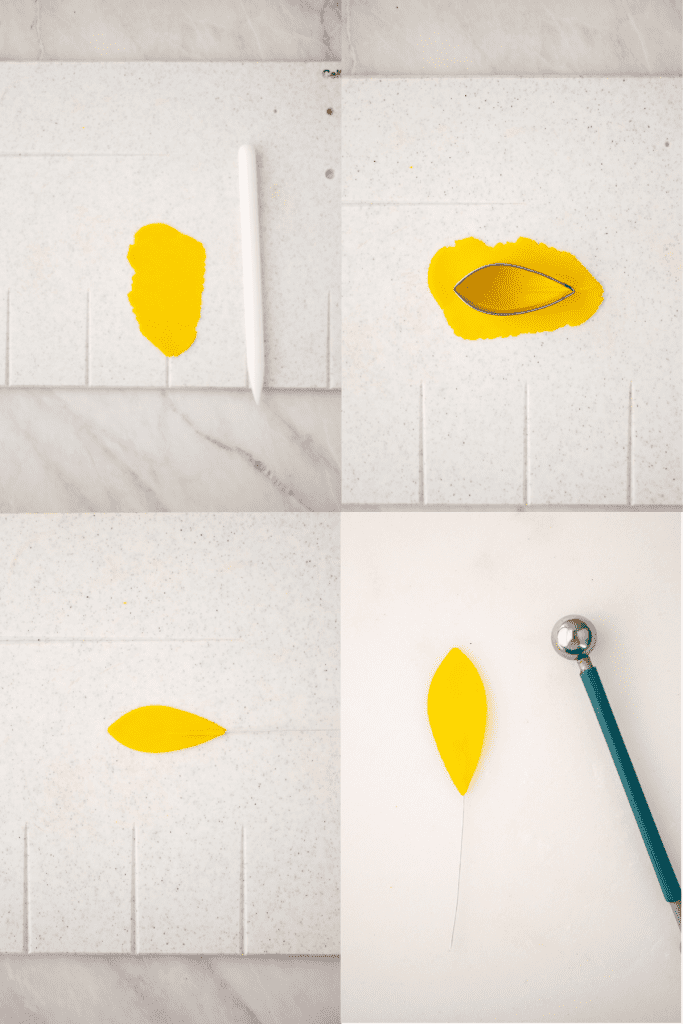
Step 6: Dip a 26 gauge wire into sugar glue and inset it ½" into the groove. Press the paste neatly around the wire to adhere, being careful to keep the shape of the petal.
Step 7: On the foam pad, thin the edges, elongate and widen the petal with a ball tool.
Step 8: Lay the petal into the veiner, vein side down, and press down on the top of the veiner firmly.
Step 9: Place the petal onto some bumpy foam to dry completely.
Step 10: Repeat steps 4-9 to make 55-60 petals. Give the petals more variety by slightly curving the tips of the petals back and some more forward. Give others a bit more movement by giving them a subtle twist shape. Dry completely.
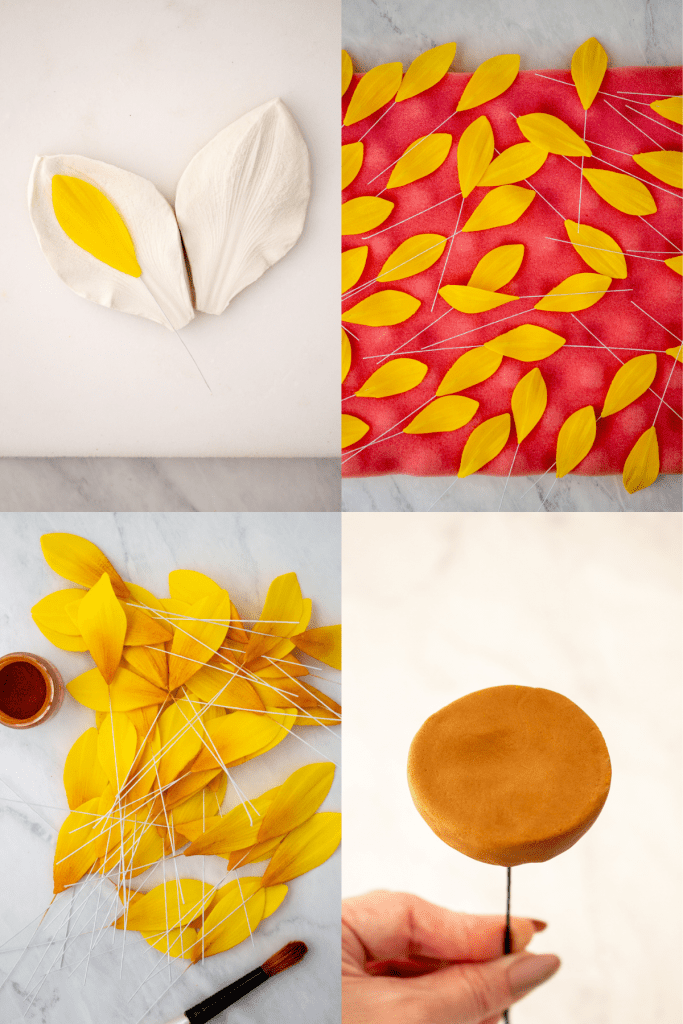
Step 11: Dust the petals all over with the golden yellow petal dust, focusing on the edges of the petals for most of the color.
Step 12: Dust the base of the petals with the burnt orange petal dust, concentrating more of the color towards the very bottom. Dust the color upward, tapering off the color for an ombre, more blended look.
Step 13: Knead a small amount of shortening into the light brown gum paste until the paste is smooth and pliable. Brush the ½ sphere with sugar glue. Smooth the paste onto the ½ sphere.
Step 14: Use a ball tool tool to make an indentation in the center. Using a modeling tool or the backside of a sharp blade to small cross hatches over the surface, including the center indentation.
Step 15: With small scissors, snip into the paste at the very edges about ¼" deep, making small and delicate cuts, overlapping and layering them to give the edges a frayed look.
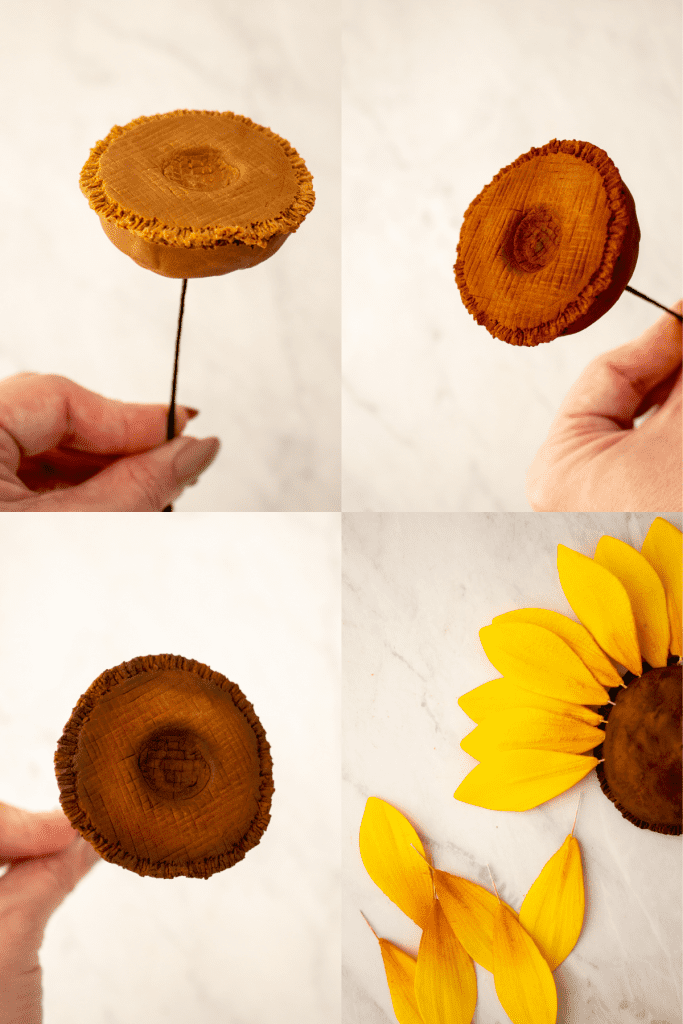
Step 16: Dust the entire surface of the sunflower center (don't forget the backside) with brown petal dust. Dust the edges and the center with the dark brown dust creating a bit of a shadow effect.
Step 17: While the paste is still pliable, insert the petals into the foam ball center. Cut the wires of the petals to ½". Dip the wires in sugar glue, wiping off any excess. Insert the first row of wires into the foam, right behind the frayed edges.
Step 18: Repeat step 17 and place a second row of petals, staggering them in between and behind the first row. Let the sunflower center dry completely.
Step 19: Make the first row of leaves for the calyx. Knead a small amount of shortening into the green gum paste until the paste is smooth and pliable. Roll the paste out on a smooth work surface.
Step 20: Cut out the leaf shape with the small dahlia cutter.
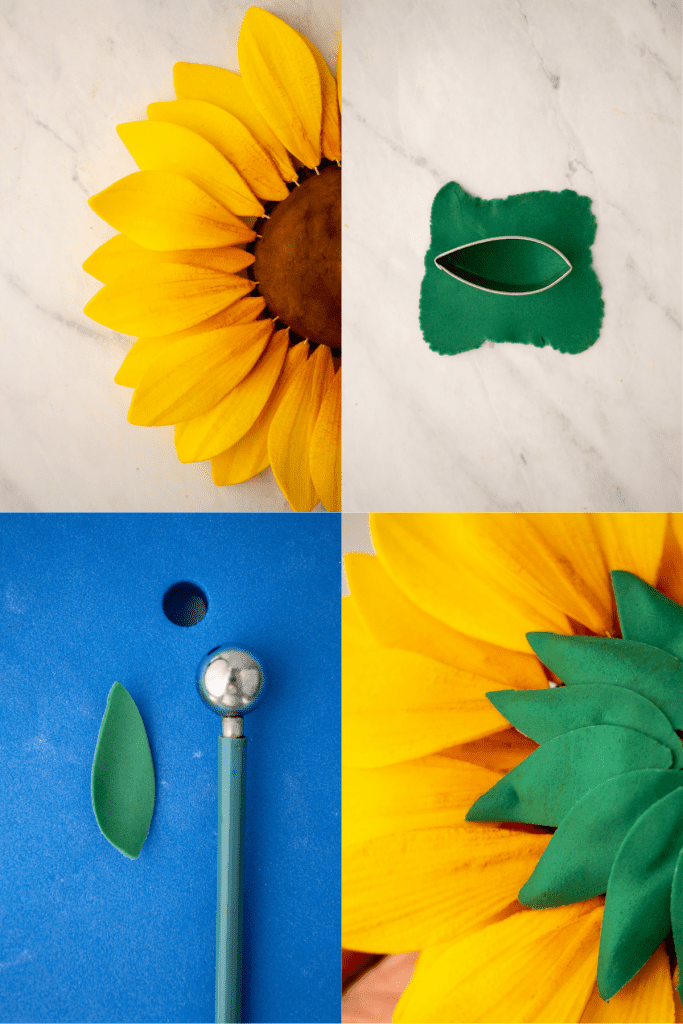
Step 21: Thin the edges of the leaf shape and curve the leaf with the ball tool.
Step 22: Repeat steps 19-21 to make a total of 15 small leaves.
Step 23: Brush each leaf with a small amount of sugar glue and space the leaves around the outer edges of the foam center, behind the last row of sunflower petals.
Step 24: Roll out more green paste over the medium size hole of a firm foam mat with holes. Remove the paste from the mat, and lay stem size up.
Step 25: Center the daisy cutter onto the paste, stem in the center, and cut out the calyx. Place the calyx stem side down into the large hole of the foam mat. Thin and elongate the calyx leaves with a ball tool.
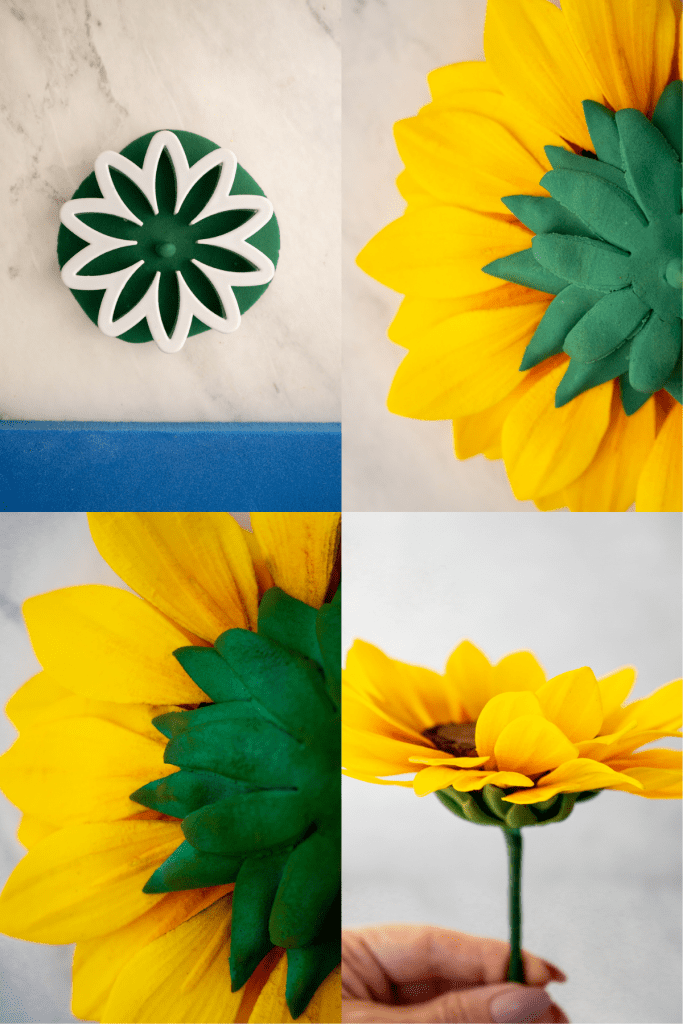
Step 26: Brush the leaves and the center of the calyx with sugar glue. Insert the wire of the sunflower into the center of the calyx, down through the stem of the paste.
Step 27. Adhere the calyx to the center, staggering the calyx leaves in between the first row of leaves.
Step 28: Adhere the stem of the paste to the wire, by twisting the paste onto the wire and blending with your fingers. Let dry upside down completely.
Step 29: Dust the calyx all over with green petal dust. Dust the edges of the leaves of the calyx with a little bit of brown.
Step 30: Steam to set the color.
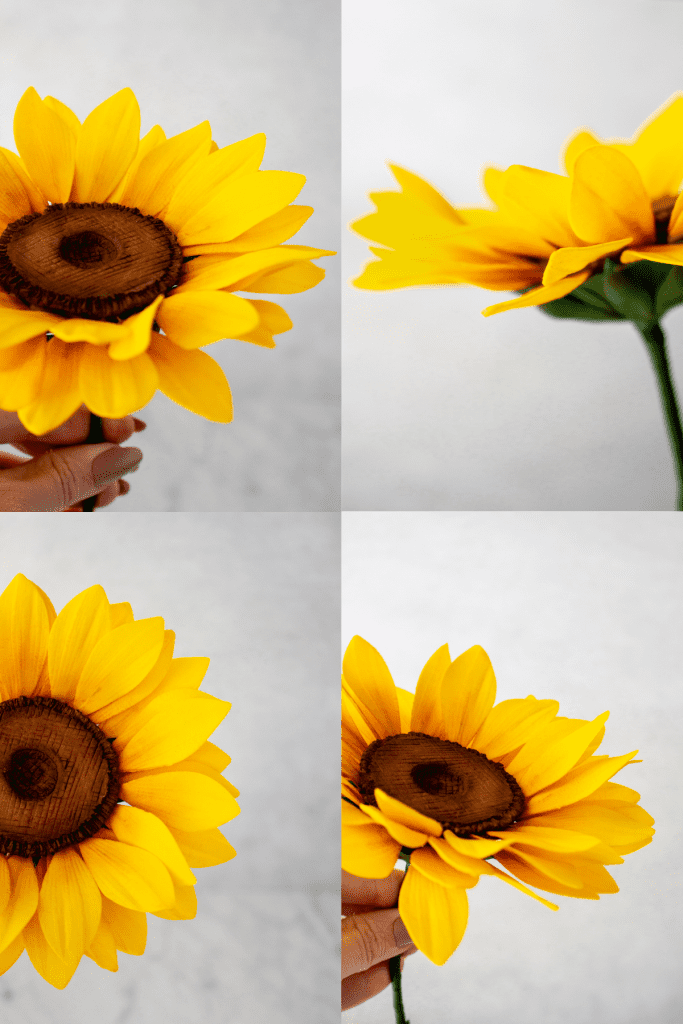
This does make a large sunflower, but you can make them using smaller foam balls and smaller petal cutters. Note that I use dahlia cutters for this tutorial and not sunflower petals. I think sunflower petal cutters are a bit thin for the sunflower look I'm trying to achieve so I love working with the dahlia cutters. I use these cutters for a few flowers. They're good to have on hand. I don't believe in buying cutters for every flower I make so it's good to repurpose ones you already have.
Remember, unless you are competing, you can still make a realistic and amazing looking sugar flower without having the exact supplies for a specific flower.
If you make a gum paste sunflower with my tutorial, let me know! Drop a comment or tag me on Instagram. I love seeing your bakes and creations.
Enjoy!
Ash xx
For more sugar flower tutorials, check out these posts:
berenice Genade says
BEAUTIFUL.
HOW DO YOU MIX BUTTERCREAM ICING NEED A GRAPE COLOR PLEASE
Ashley says
Hi Berenice. Eggplant purple, fuscia and a tad bit of red. Add colors gradually until you are happy with the color.