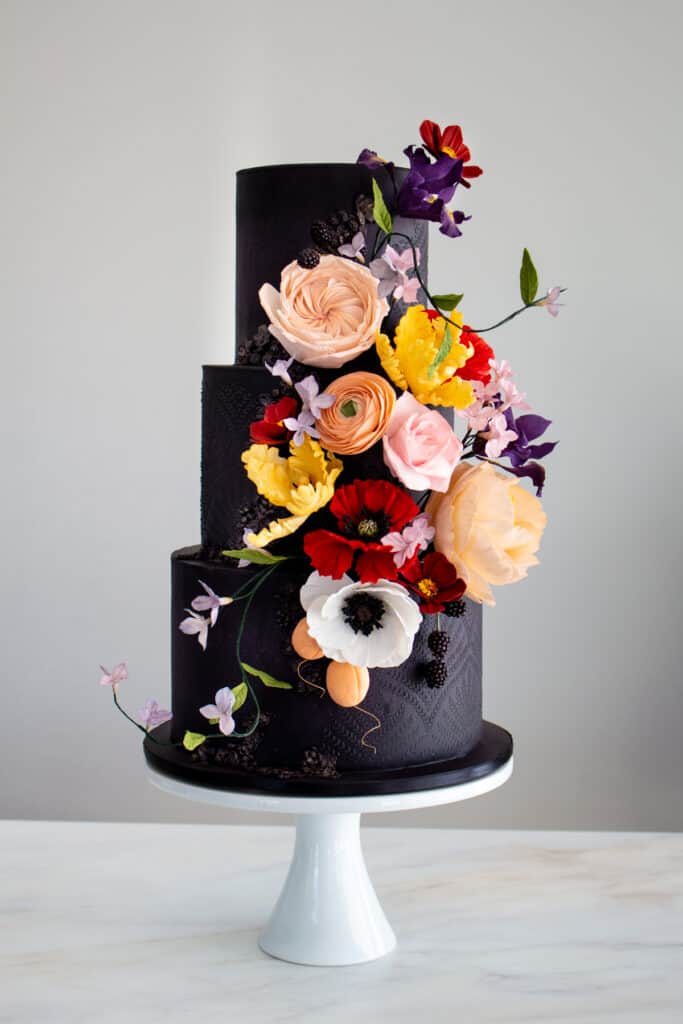
One of my biggest inspirations in creating sugar art, is art itself. I'm not limited to any type of art, as I find inspiration in art of all kinds, but I do especially love the Dutch masters paintings of still life, particularly flowers. This cake is inspired by such art. If you check out my portfolio or Instagram feed, you'll see sugar flower arrangements that I have made based on still life art as well. For my Still Life Flowers cake, I wanted to capture the moodiness of those paintings, as well as the vivid, often haphazard floral arrangement, in a variety of colors.
The Fondant
I started with a charcoal/dark eggplant colored fondant. I made my own marshmallow fondant for this project - Sugar Geek Show's recipe, with 1 tablespoon of black gel color. Within the past couple years or so, I've really been on a crusade to have less than perfect fondant for all of my cakes. After creating perfect wedding cakes for so long, I've embraced imperfection, which 9.5/10 time is a success. Texture, and imperfection is KEY to art and creating.
So, when making this fondant, I didn't fully melt the marshmallows. I was curious to see what the texture would be like, and weird as it may be, it didn't disappoint. It created little pockets that the color couldn't fully saturate, giving the fondant a rough, sort of concrete-like texture when applied to the cake. And so I went with it.
Coloring the fondant
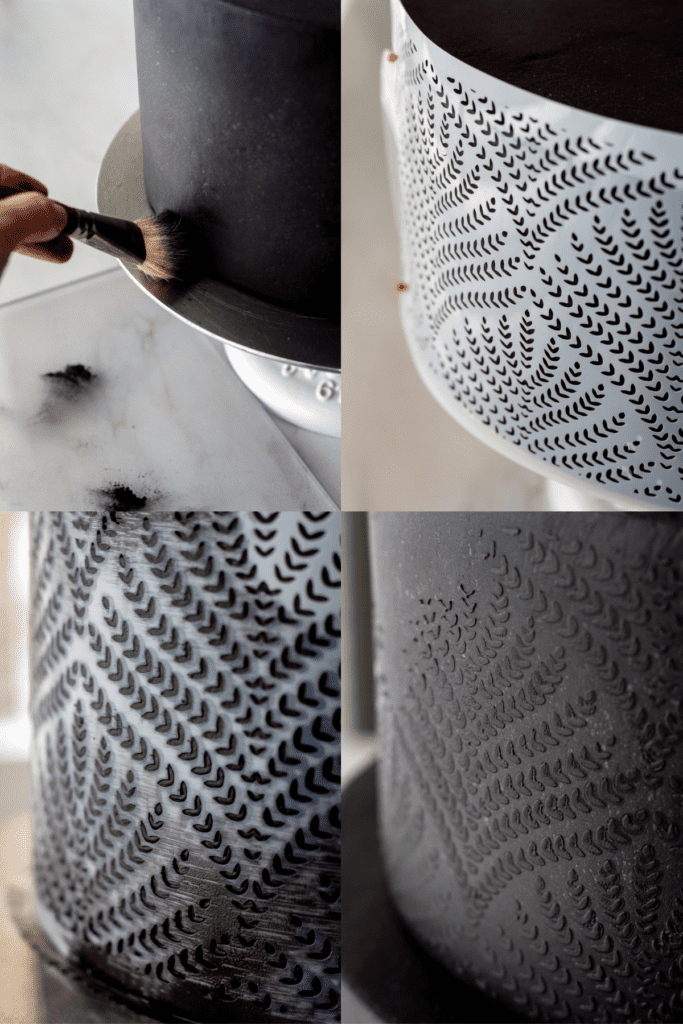
As for the color, many brands of black gel food color tend to have either a green or purple undertone, and I chose one with a purple undertone to achieve the color. To give the tiers a vignette look, I brushed along the bottom and top edges of each tier with a mixture of eggplant, charcoal, and black petal dusts.
Texturing with Stencils
For more texture, and to impart a filigree-like design for a little elegance, I used a stencil and black royal icing. I stenciled each tier, only about ½-2/3 of the way around, and alternated which side I stenciled to give the tiers a staggered look. I didn't perfectly stencil the tiers, I left some gaps and sort of trailed off the stenciling so it didn't end so abruptly. If you're unsure about the direction a design is going, proceed with the design as planned, but do it with intention. It makes all the difference.
Placing the Flowers
Once the stenciling was dry, I placed the flowers. I wanted the floral arrangement to be a bit off kilter on the cake. I knew the floral arrangement would be the star, but still wanted the stenciling and bas relief (more on that soon), to really show as well.
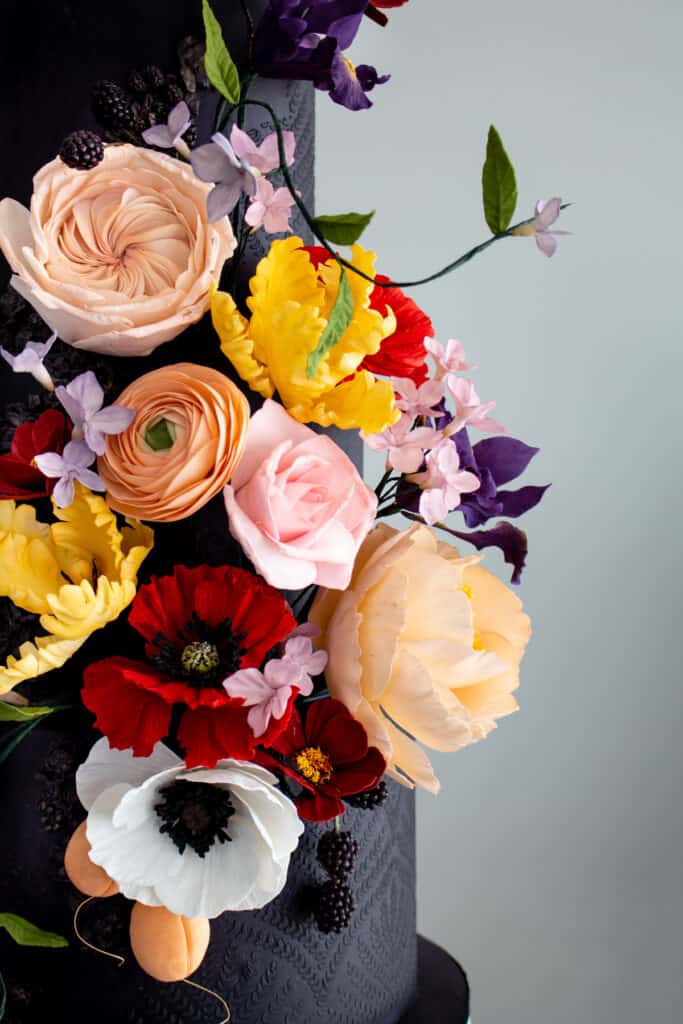
I always start with the largest and heaviest sugar flowers first - the peony and David Austin type rose. It's good to do this so that you can really anchor and secure them in the cake. Placing these flowers also act as a lead for placement for the remaining flowers.
Arranging Sugar Flowers
Then I placed the mid-size one off flowers - the anemone, ranunculus and rose. I only made one of each and wanted them to be seen. Then I placed the iris', one placed within the arrangement off to the side, then one coming up off the top of the arrangement. I placed the chocolate cosmos - check out my post on chocolate cosmos for a FULL TUTORIAL for those. I added the sugar apricots to the lower left, and the blackberries and blossoms to fill any unflattering negative space.
Lastly one of my favorite additions to any floral arrangement, adding floral components that appear to come off from the cake or give the arrangement any movement. I added some vines with some small leaves and blossoms to give the arrangement some whimsy and flow. I decided not to add any additional leaves and chose to just focus on the flowers for this cake.
Still Life Flowers Cake Finishing Touches
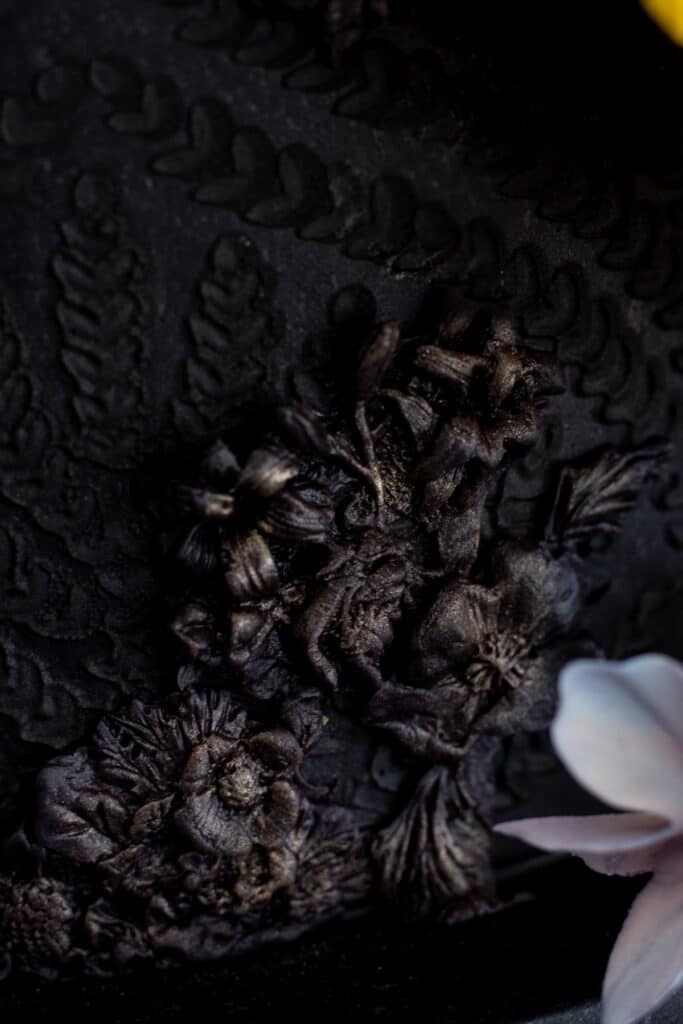
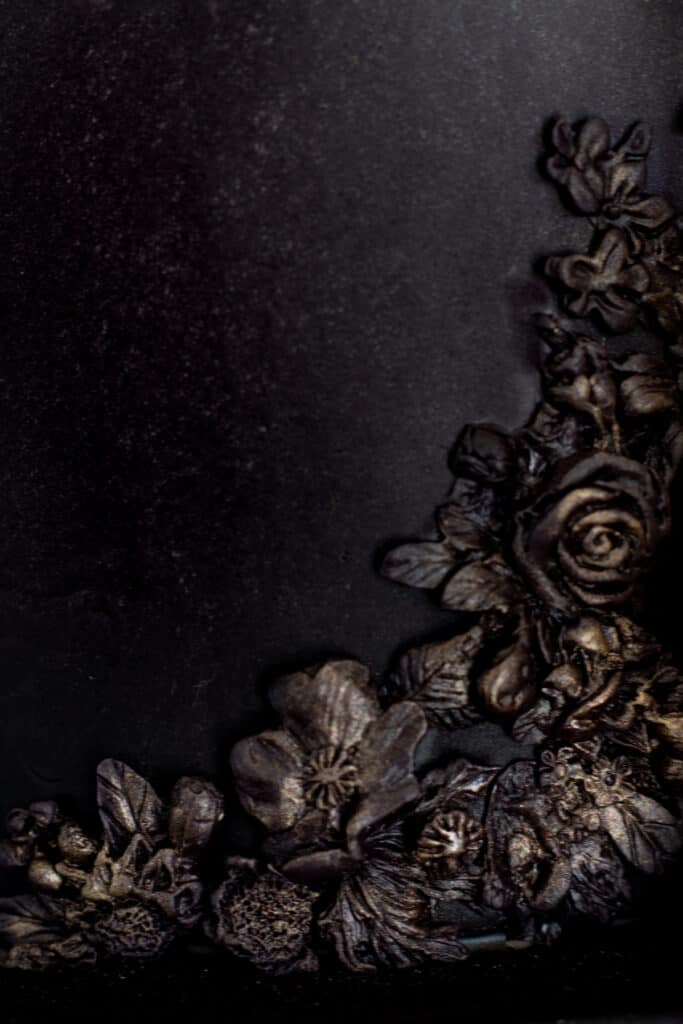
Often times, I will add final cake details after I add the florals, so that those details flow with, or are accentuated by the arrangement. I used the same fondant I used to cover my cakes and some floral moulds I had on hand to create some shallow bas relief. I placed the bas relief around the florals, taking care to not make each tier look too similar. I had no plan for adding the bas relief. I just added it where I thought it would look nice. Avoid symmetry when placing them.
To accentuate the bas relief, I dusted them with a little bit of bronze petal dust. I like how it sort of ages the bas relief and gives it more of an antique look. I totally love the bronze on black and feel like I need to revisit this look in the future on another cake.
So there you have it, a mini tutorial on how I made this cake. If you make a cake using any of the techniques within this Still Life Flowers tutorial, let me know! Drop a comment or tag me on Instagram. I love seeing your bakes and creations.
Enjoy!
Ash xx
For more tutorials, check out these posts:

Leave a Reply