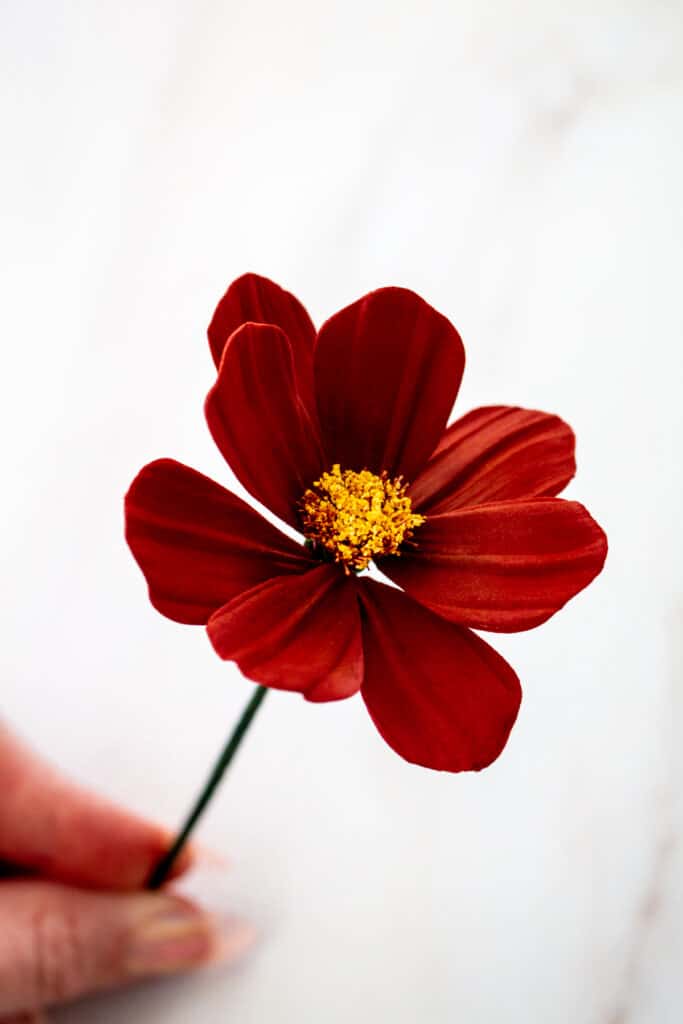
I love chocolate cosmos in floral arrangements on cakes. They're small, beautiful flowers that have a lot of movement and look great sort of coming off of a cake. They come together fairly quickly, and have a luxurious burgundy color that goes well with most other flowers. These flowers have a unique thread center, with a realistic pollen made with cornmeal and petal dust to make these sugar flowers even more impressive. I made my chocolate cosmos a burgundy color, but you can also give them a dark brown tone, or more of an eggplant color. I always like to refer to a photo of an actual flower when making my sugar flowers to choose the colors I like best for the project I'm working on.
Supplies:
Burgundy gum paste, kneaded with a small amount of vegetable shortening until smooth and pliable
Yellow cornmeal
4 - 26" gauge floral wire - white (green can be used in a pinch), cut into thirds (you will only need 10 wire total)
Dark green ¼" floral tape
white polyester thread
White ¼" floral tape (green can be used in a pinch)
Cosmos cutter (I used the smallest one)
Small rolling pin
Firm foam mat
Vegetable shortening
Sugar glue, or egg white
Ball tool
shallow bumpy foam
Petal dusts: burgundy, brown, mustard yellow
Dusting brushes
Small craft pliers
Gum Paste Chocolate Cosmos Tutorial
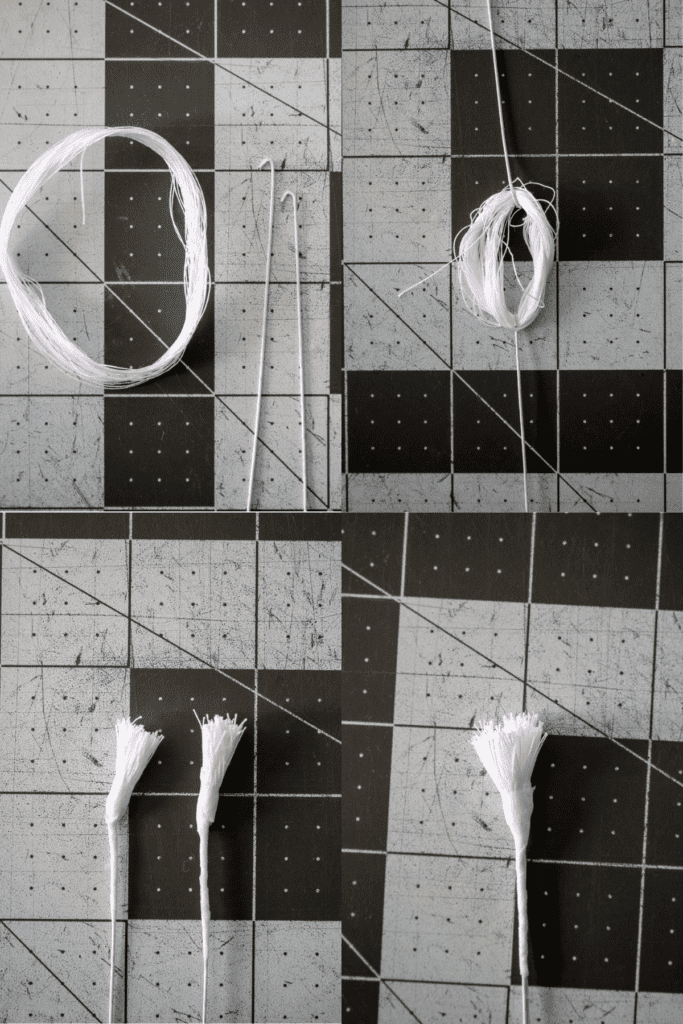
- Make a large hook at the end of two wires with small craft pliers. Create a long loop of thread by wrapping it around four spread fingers 50 times. Twist the loop into a figure 8 shape and fold in half.
- Hook the wires onto opposite ends of the folded thread. Tighten the hooks with craft pliers. Wrap each wire with white floral tape, covering the lower ⅛" of the hooked thread, working the tape all the way down the wire.
- Cut the thread in half, right across the center to make two pieces.
- Tightly wrap the two sections together. Trim the thread to even out the top.

- Roll the burgundy paste on a non stick surface. You want the paste to be thin, but still thick enough to be able to insert wire, about 1/16". Cut a petal shape with the cosmos cutter.
- Dip a wire into glue and insert it ½" into the base of the petal. Gently press the paste neatly around the wire while maintaining the petal shape to ensure the paste is adhered to the wire.
- On a foam mat, lengthen and elongate the petal by rolling upwards and along the edges of the petal with the ball tool.
- Place the petal into the cosmos petal veiner. Press down firmly to impress.
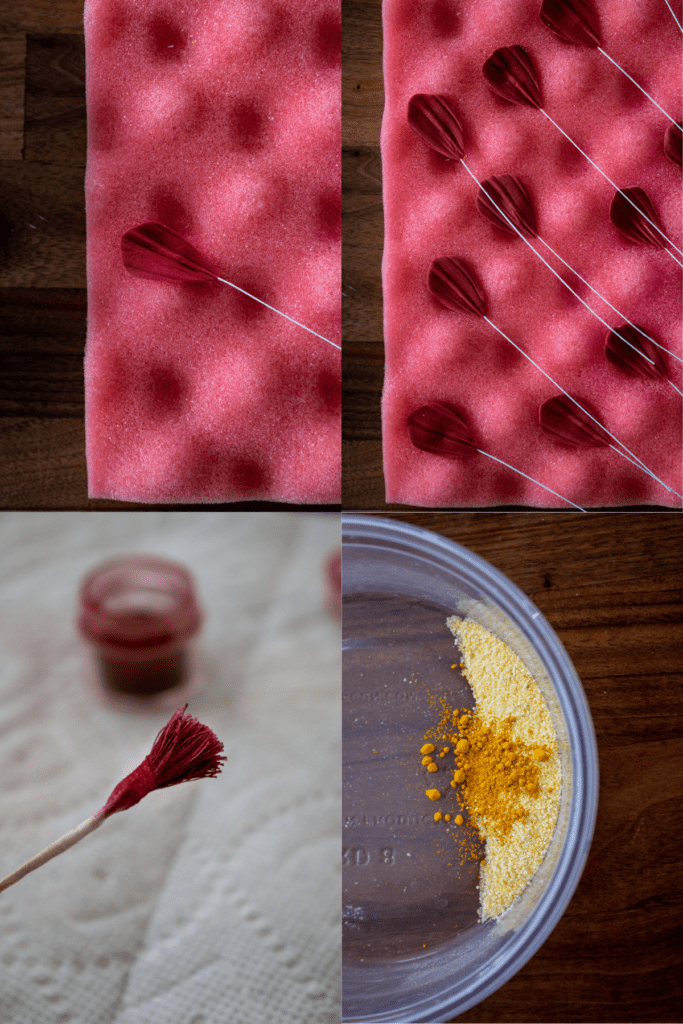
- Place the petal onto shallow, bumpy foam to give the petal a slight curved shape. Leave to dry completely.
- Repeat step to make 7 more petals, creating 8 total.
- Color the thread center by dusting the center thread and tape with burgundy petal dust.
- Combine a small amount of cornmeal with the mustard petal dust to make the pollen for the centers. Mix to combine the color.
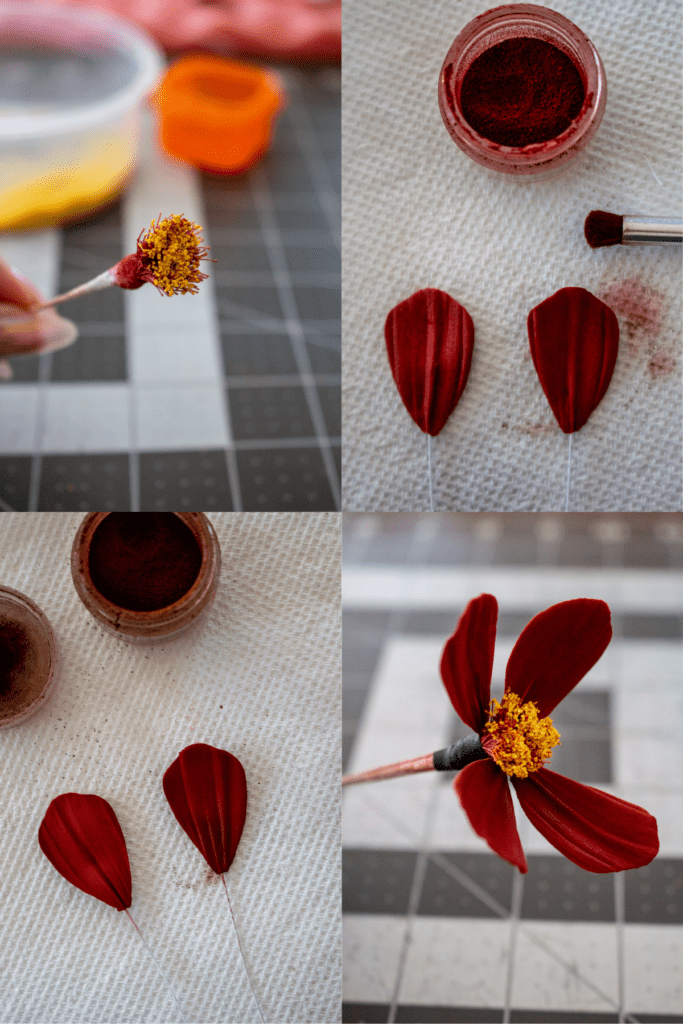
- Dab the top of the thread with glue with a flat brush. Dip the top of the thread center into the yellow pollen mixture, pressing into the mixture to ensure even coverage. Set aside to dry.
- Once the petals have dried, use a small fluffy dusting brush to liberally brush the front and back of the petals with burgundy petal dust.
- With the brown petal dust, from the base of the petal, near the wire, dust upwards, ⅓ - ½ the way up the petal with brown dust. The dust should be most concentrated at the base of the petal.
- Stretch a length of dark green floral tape to activate the stickiness. Evenly space and attach the first four petals to the center, with the base of the petal sitting at the top of the tape of the center.
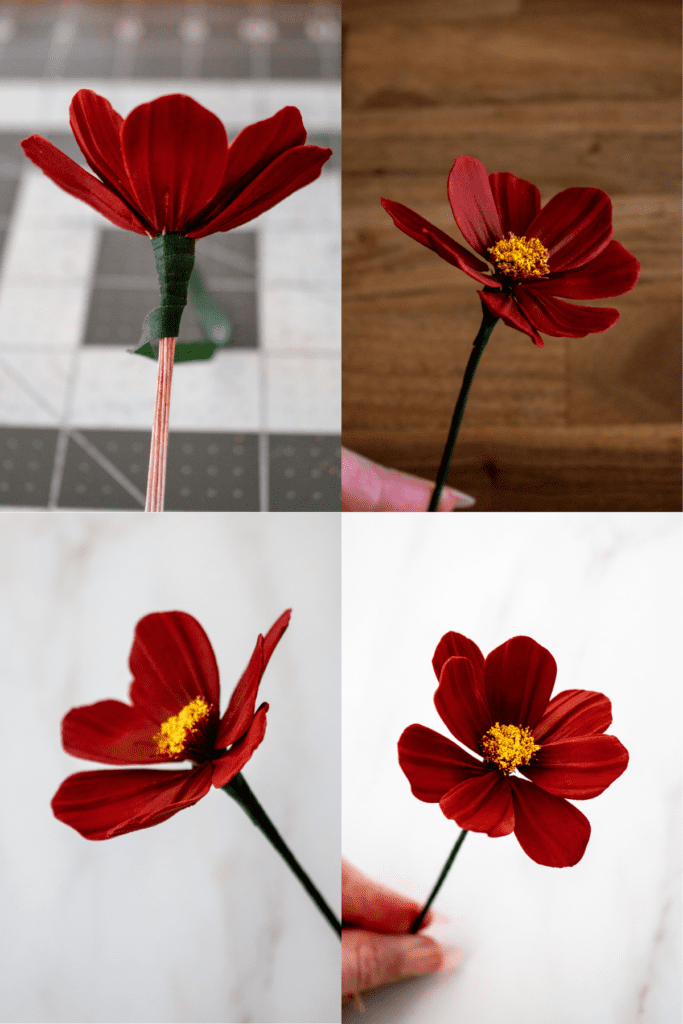
- Tape the remaining four petals around the center, at the same height, spacing them out evenly between the first row of petals.
- Finish taping the all the way down the wire.
- Gently steam the flower for a few seconds to set the petal dust. Let the flower dry completely before using.

If you make a gum paste chocolate cosmos with my tutorial, let me know! Drop a comment or tag me on Instagram. I love seeing your bakes and creations.
Enjoy!
Ash xx
For more sugar flower tutorials, check out these posts:
Comments
No Comments