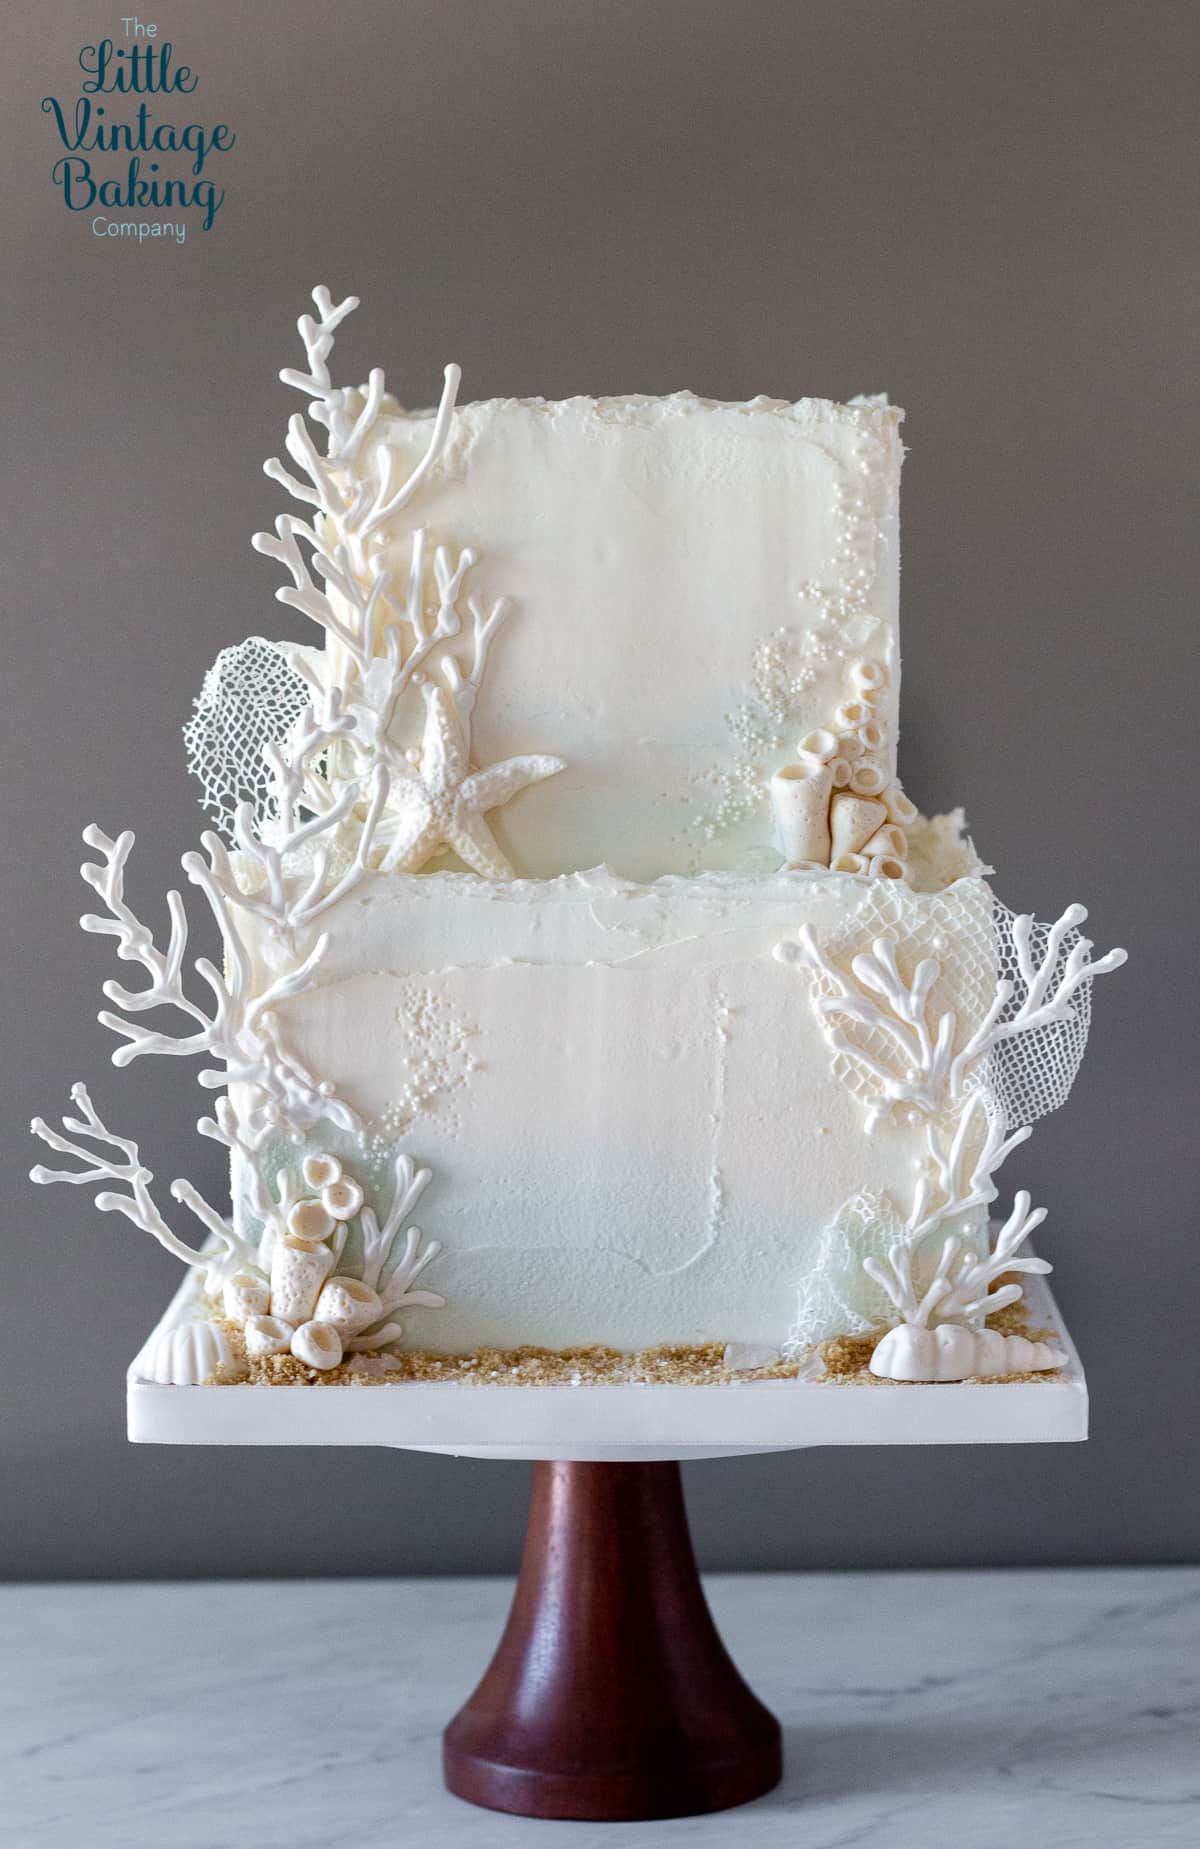
I love the sort of cakes where I can make all the decorative components in advance. Then, when the time comes to decorate, I can just pop everything on the cake, make it look fab, and then it's done. My Under the Sea cake is that sort of cake. All the decorative components can be made and stored in advance. The decorative components themselves are also relatively quick to make, and don't take hours like sugar flowers or sculpted figures, but are still impressive and beautiful. I absolutely loved making this impressive cake, and it's certainly a cake that is sure to wow your guests or clients.
Supplies:
6"square cake
8" square cake
white chocolate ganache - pale peach, cream and pale blue (recipe below)
royal blue, ivory, and orange gel colors
white chocolate, melted
modeling chocolate or fondant, pale peach
edible sand
ball tool
dresden tool
white rock candy
The ganache
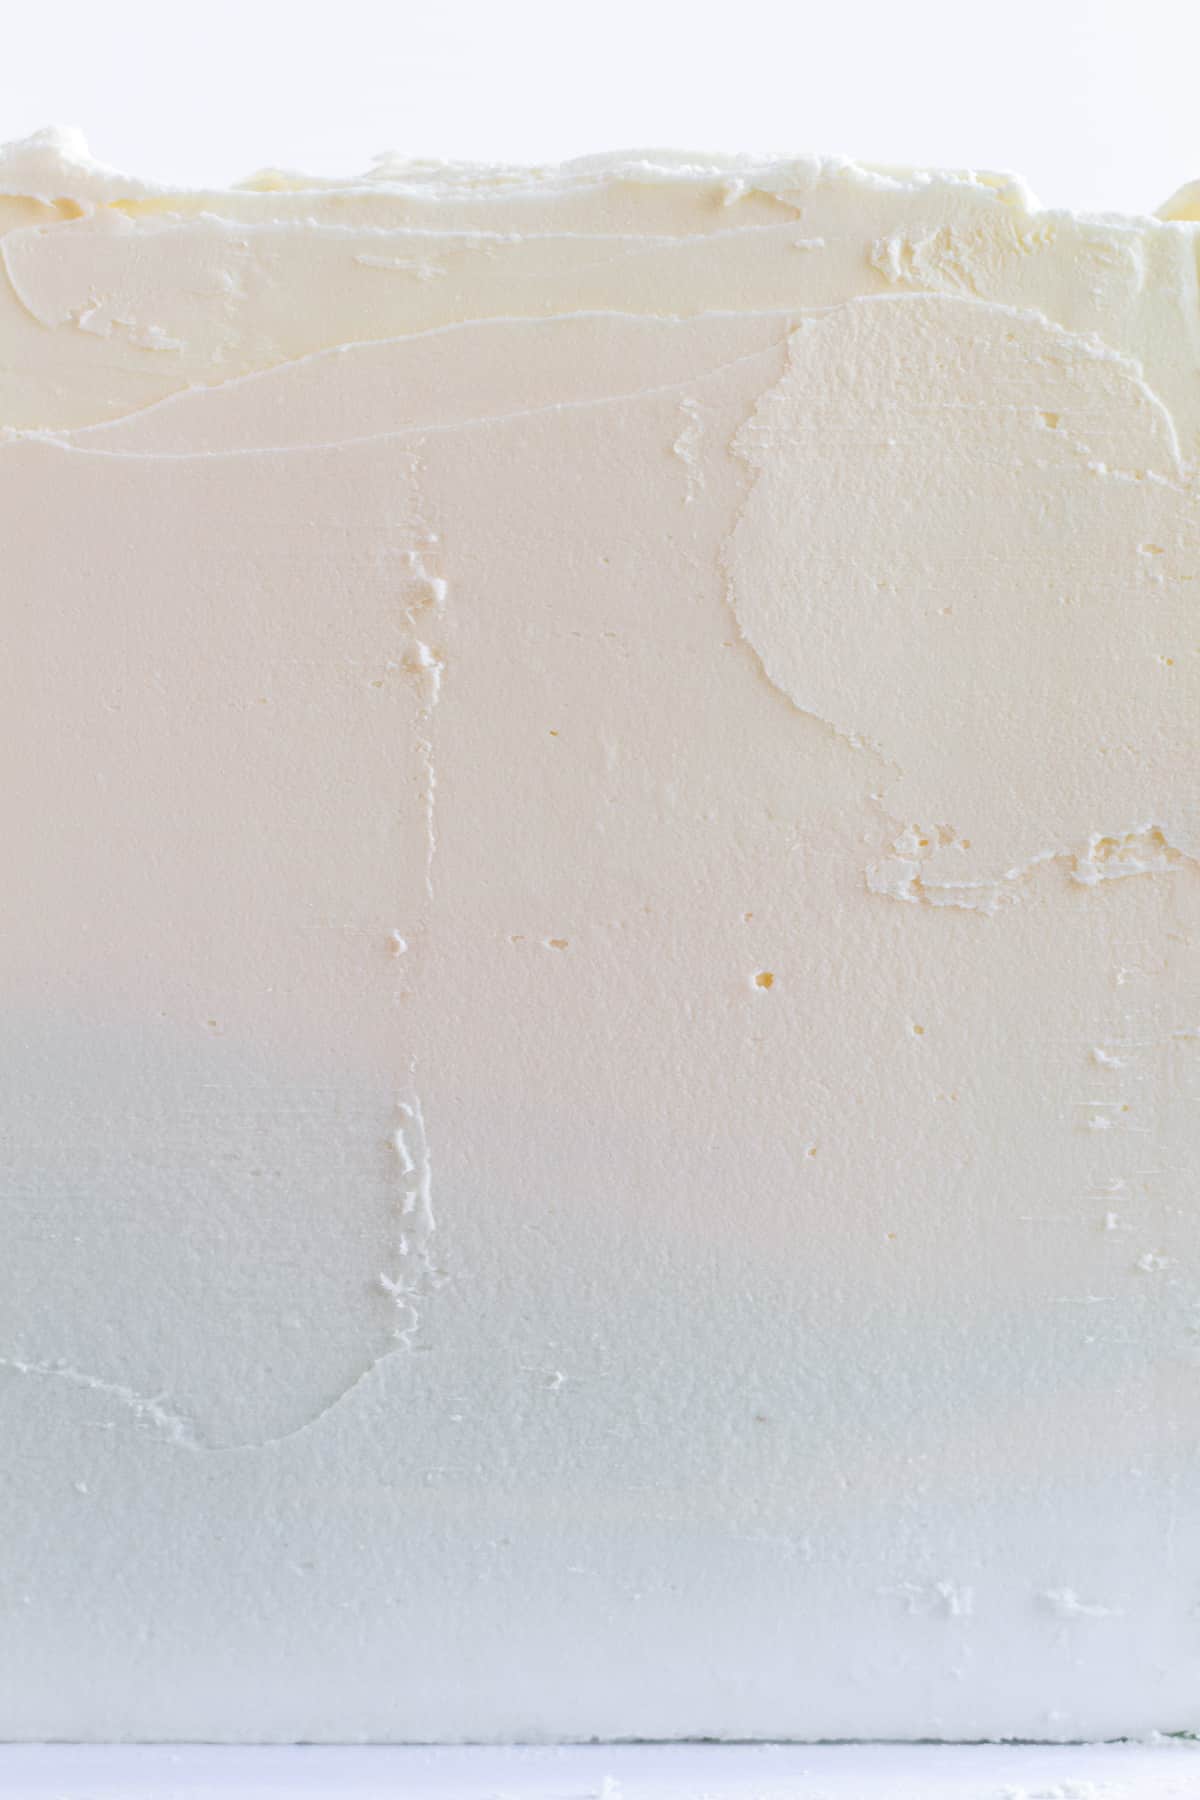
I've really been embracing the "messy" cake look lately. Appreciating flaws, and still making something gorgeous even if it isn't perfect. After years of making cakes with perfect buttercream and flawless fondant (perfect, perfect, perfect all the things), I'm really loving these intentionally rough edged, textured cakes. For this cake, I used white chocolate ganache. Ganache is a total dream to work with. I find that when I want a specific texture or a flawless finish, ganache is my cake covering of choice. On this cake, I wanted texture.
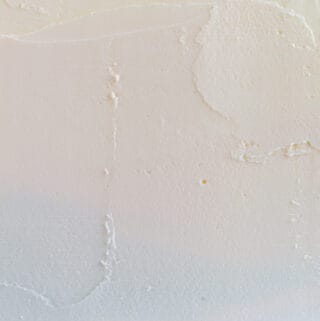
My preferred ganache ratio for covering a cake is 3:1. Three parts chocolate to one part cream. This makes a ganache that is firmer and spreadable, like peanut butter. I colored the ganache three different colors - cream, pale peach, and a soft, pale blue. I wanted the colors to be soft, muted and able to blend together well, so very little color is needed. Just add a little color with just the tip of a toothpick.
Covering and Texturing the Cake
1. Cover the tops of the cake and the upper third of the cake with the cream color ganache. Smooth out the cream colored ganache with a bench scraper. It doesn't have to be perfect.
2. Add the pale peach ganache to the middle of the cake. Smooth out the ganache with a bench scraper, blending the cream and the peach colors together as you scrape and even out the ganache.
3. Cover the lower third, or bottom of the cake with the blue ganache. Smooth out the ganache with a bench scraper, blending the peach and the blue as you scrape and even out the ganache. Even out and clean up the edges of the cakes with an offset spatula to define the square edges.
4. Let the ganache firm up for 5 - 10 minutes or so, just so that it's not wet to the touch. Use a bench scraper to lightly scrape the cake. This will create a light stucco-like, sandy texture in the ganache.
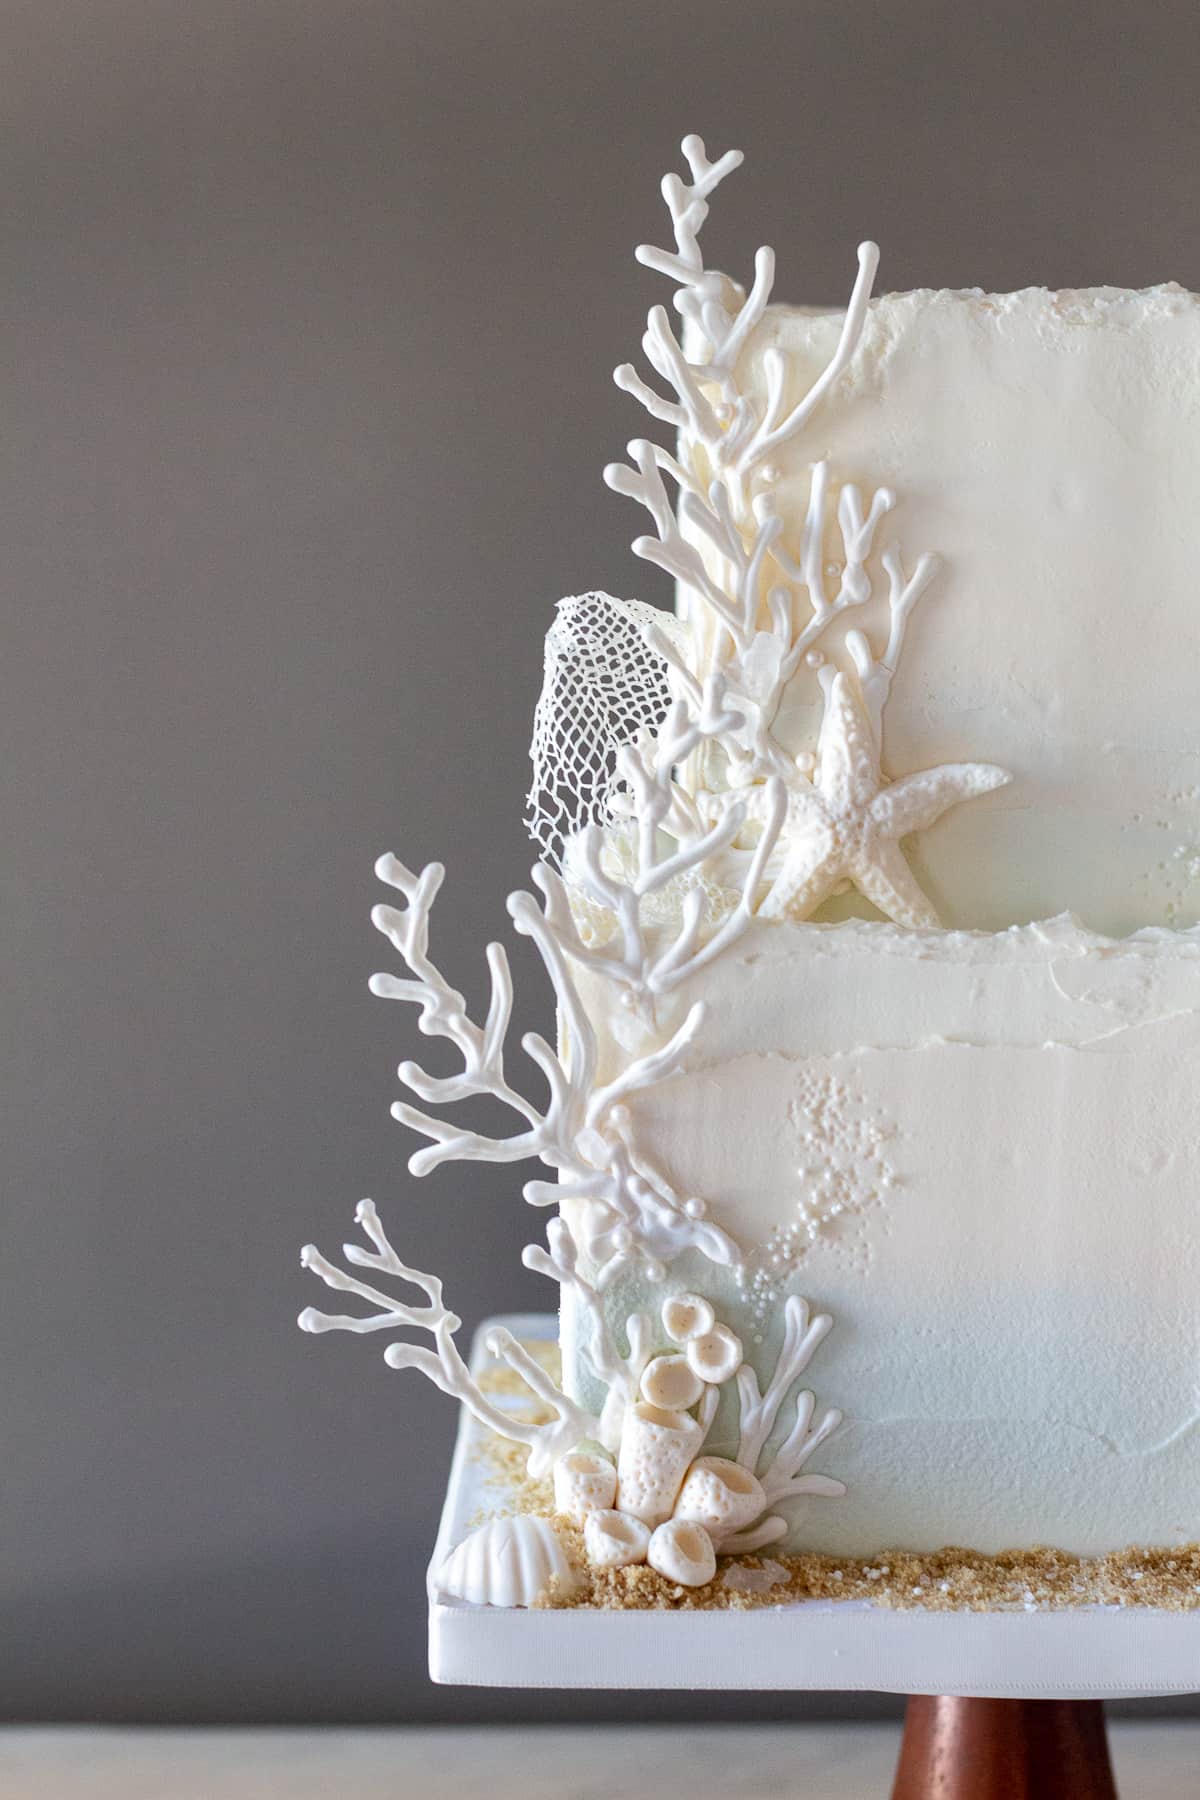
The Coral
I made three different types of coral for the Under the Sea cake. I made piped coral pieces with white chocolate, mesh coral pieces with cake lace, and sculpted coral with modeling chocolate. I made the edible lace coral with white cake lace and a cake lace mat with a mesh design. You only need a small batch of cake lace for this cake (I used SugarVeil). The mat I used is the SugarVeil Mesh Mat. Any white edible lace will work, and any mesh/netting type mat will work as well. Follow the instructions on the package to make the lace. Let the lace dry on the mat overnight, so that it's still pliable but also firm enough to hold its shape. You can also bake it, according to the package directions if you wish to speed up the process. Tear pieces from the large sheet of lace, in round-ish shapes, with jagged edges to create coral-like pieces. Use piping gel to attach these to the cake, shaping some them to give them a bit of movement, while leaving others flat.
For the chocolate coral, place a piece of parchment paper or waxed paper over a printed off coral template. I found one in a google search for "coral template". Any template you like when you search will work. Alternatively, you can pipe some freehand chocolate coral shapes, without a template. Then, pipe onto the parchment, over the template, with melted white chocolate. Make several of these as they are fragile and break easily. I found that the pieces I liked and used the most were mostly just fragments rather than whole piped pieces. Let the chocolate set up completely before using. Carefully place the coral onto the cake with more melted chocolate, and lightly hold in place for a few seconds. Overlap and leave gaps when placing your coral.
I created the shells and the starfish using moulds. Any seashell moulds will work just be sure they're not too large. I used cream/peach colored modeling chocolate for my shells, starfish and sculpted coral, but fondant will also work too.
How to make sculpted coral
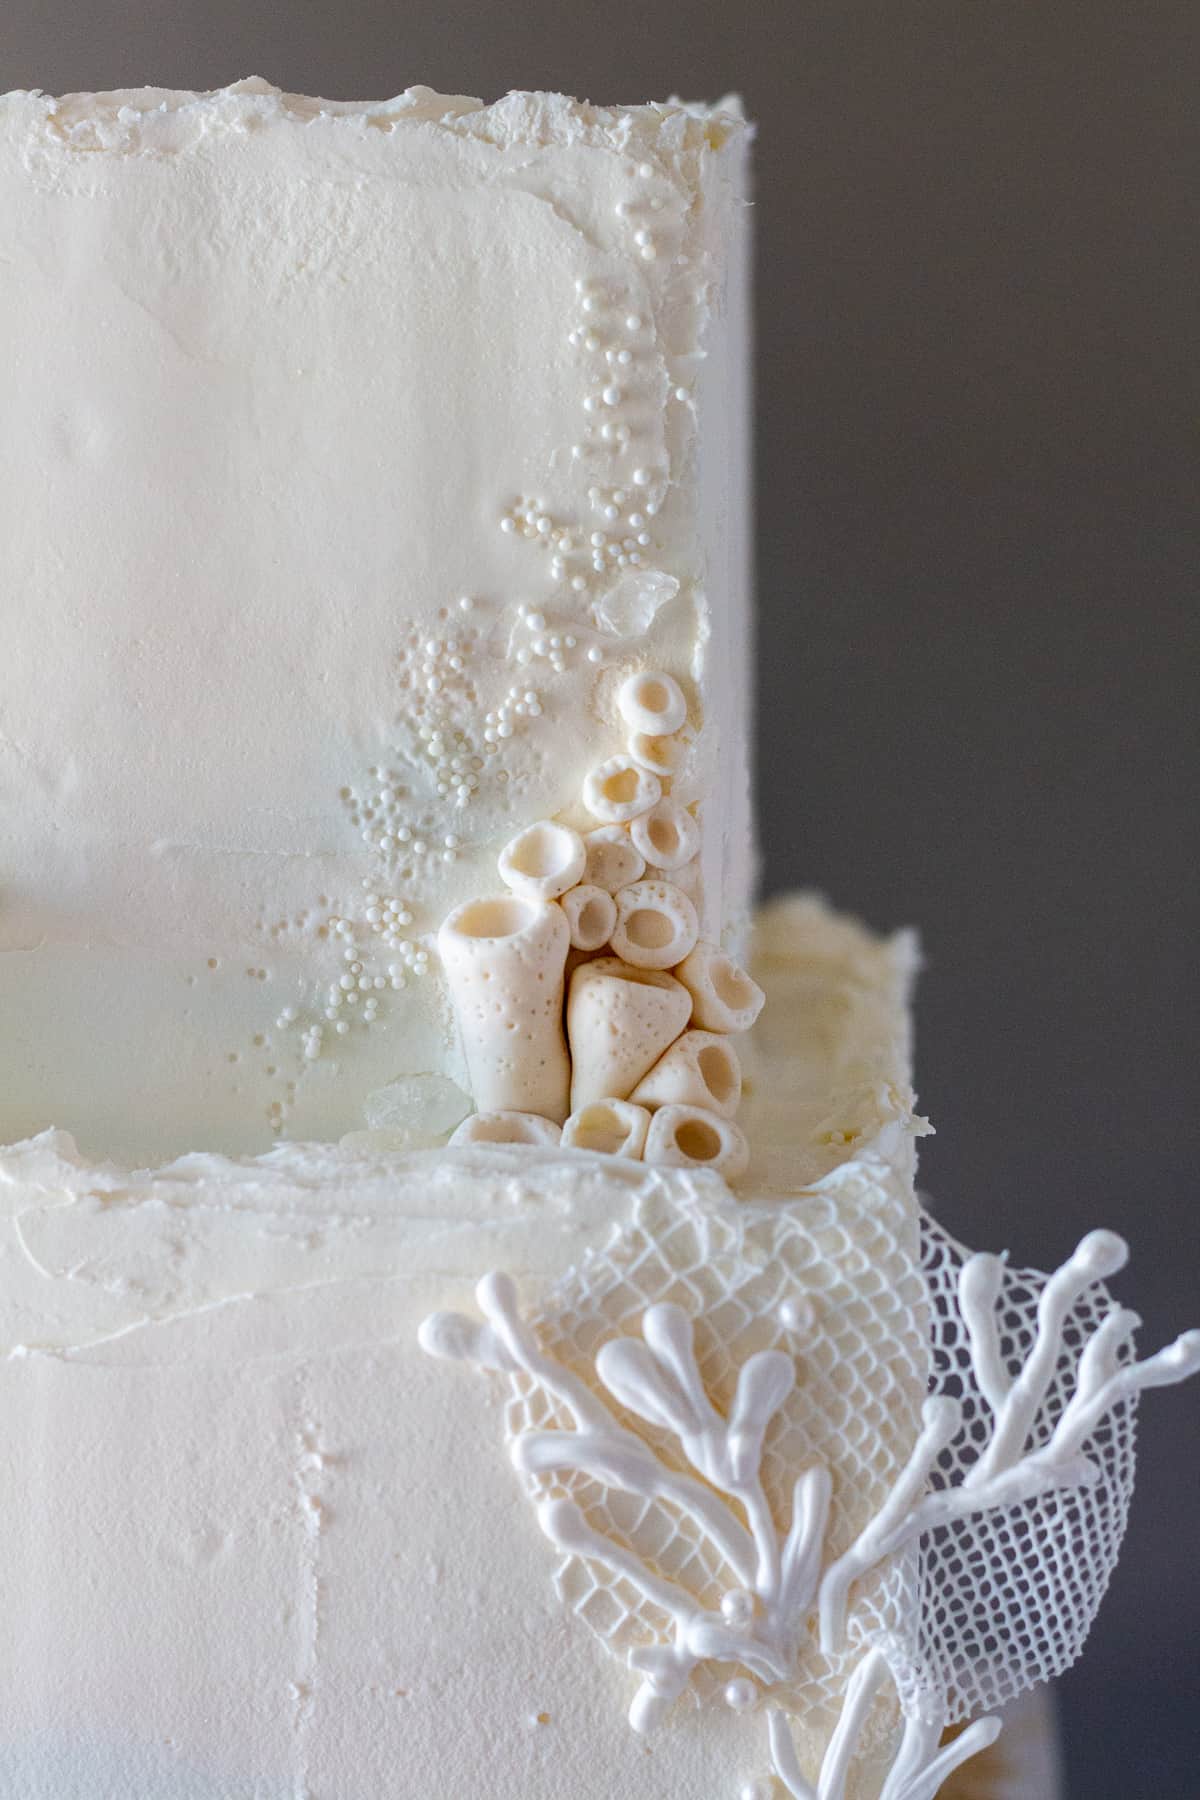
1. Roll the modeling chocolate into different size teardrop shapes. You want them to be various lengths and sizes.
2. With a ball tool, press into the large, rounded side of the teardrop shape to create an indentation.
3. Place them in clusters on the lower left bottom tier, and the lower right top tier, attaching to the cake with melted chocolate or piping gel. Place them close together, even sort of squeezing them together, so that they look like a mass of coral. Make 5-7 per tier.
4. For the smaller coral attached to the cake, roll out small pea size balls with modeling chocolate. Use the ball tool to make indentations.
5. Use piping gel to attach these close together to the side of the cake, trailing upwards from the clusters sculpted coral on the lower left bottom tier and lower right top tier. Make as many or as few as you would like.
6. Use the thin side of a dresden tool to make small indentations all over to give the coral some texture.
Finishing Touches
Once all of the of coral is placed on the cake, place the starfish on with piping gel or melted chocolate. Place the shells onto the cake or cake board. I only ended up using two shells and placed them on the cake board with the edible sand. To make the edible sand, mix together ¼ cup of finely ground butter crackers, or Ritz crackers, and 3 tablespoons of light brown sugar.
Place some white rock candy in the sand on the cake board, but also attach some along with the coral with melted chocolate to fill any gaps, cover any big breaks, or to fill out the design. Add some white pearlized dragées around the coral with piping gel. I think these look like little bubbles or pearls, and I like the pearlized look they contribute to the cake.
I also used some white nonpareils to add some bubble like detail as well. Brush a little bit of piping gel onto the cake to attach them. I had a happy decorating accident when placing the nonpareils. You can see that in some areas I pushed in the nonpareils but they didn't stick, leaving little holes in the cake. I had hoped they'd just stick to the ganache but no luck. Well, I totally loved the little holes and thought they added great texture so I left them.
One of the great things about this cake design is that you can really make it your own by rearranging the different coral, creating different shaped corals, adding more or less of a type of coral or shell, using different color palettes or adding some cool features - like octopus tentacles, oysters, and fish.
Please feel free to leave any questions you have below, and if you make this cake, be sure to tag me on Instagram so I can see your amazing cake!
Ash xx
For more cake decorating tutorials, check out these posts:
Woodland Tree Stump Cake Tutorial
Vintage Gilded Buttercream Cake Tutorial
Mini Tutorial: Romantic Roses Cake
Recipe
White Chocolate Ganache
Ingredients
- 1 cup (227ml) heavy whipping cream
- 3 cups (680g) white chocolate, chopped or chips
Instructions
- Place the heavy cream in a small saucepan and bring to a simmer over medium low heat.
- Meanwhile, place the chocolate in a medium size bowl.
- When the cream begins to bubble around the edges, remove from the heat, and pour over the white chocolate. Let the mixture sit for 5 minutes.
- Gently whisk the chocolate and cream from the center of the bowl to the outer edges of the bowl. Do not mix too fast as you want to avoid incorporating air.
- If the chocolate isn't melted all the way, place in the microwave in 15 second increments, whisking after each session, until smooth. Do not overheat.
- Let the chocolate ganache firm up until it's the consistency of peanut butter before using.



T
Can I just say,
Wow
Wow
And wow!
This is amazing. I’m going to be making my daughters 5th birthday cake for her birthday on New Year’s Eve and I’m totally inspired by this ❤️