Buttery, tender shortbread crust with jammy, sweet blackberries, topped with an almond crumble topping, these blackberry pie bars are so delicious, super simple to make and are such a crowd pleaser.

This recipe has the all the best qualities of a blackberry pie without all the fuss. The shortbread crust and topping are made with one dough. These bars are the perfect way to use up those ripe, summer blackberries.
Why You Will Love This Recipe
- The blackberries create this thick and juicy deep purple jam as they bake. Fresh or frozen blackberries will work.
- The crust is buttery, crumbly, and a bit caramel-y from the brown sugar. The blackberries make the crust around edges of the bars sticky, chewy and caramel-like - easily my favorite part.
- Quicker and simpler then making fruit pies. No peeling, chopping or rolling pie crusts.
- Easy to follow recipe with step by step photo instructions.

Recipe Ingredients
Almonds - sliced
All purpose flour
Brown sugar
Granulated sugar
Fine sea salt
Lemon - zest and juice
Unsalted butter
Cinnamon
Blackberries - fresh or frozen
Cornstarch

Recipe Instructions
Before beginning the recipe, line a 8x8 square pan with two sheets of parchment paper, making sure the parchment extends over the sides of the pan to form a "sling". Secure the sides with binder clips to secure the parchment in place. Preheat the oven to 375F.
- Place the almonds in a dry skillet over medium heat. Cook for 4 to 5 minutes, until toasted stirring often.
- In the bowl of a food processor, pulse to combine the flour, brown sugar, granulated sugar, salt, and lemon zest.
- Scatter the butter cubes over the flour mixture. Pulse until the mixture starts to clump together but is still sandy. Remove 1 cup of the mixture, and set aside.
- Continue to pulse until the mixture starts to stick together. Turn out the remaining mixture into the prepared, lined pan.
- Press the dough evenly into the pan. Use the bottom of a glass or measuring cup to ensure the dough is evenly spread.
- Bake the crust until golden brown, about 25 minutes.
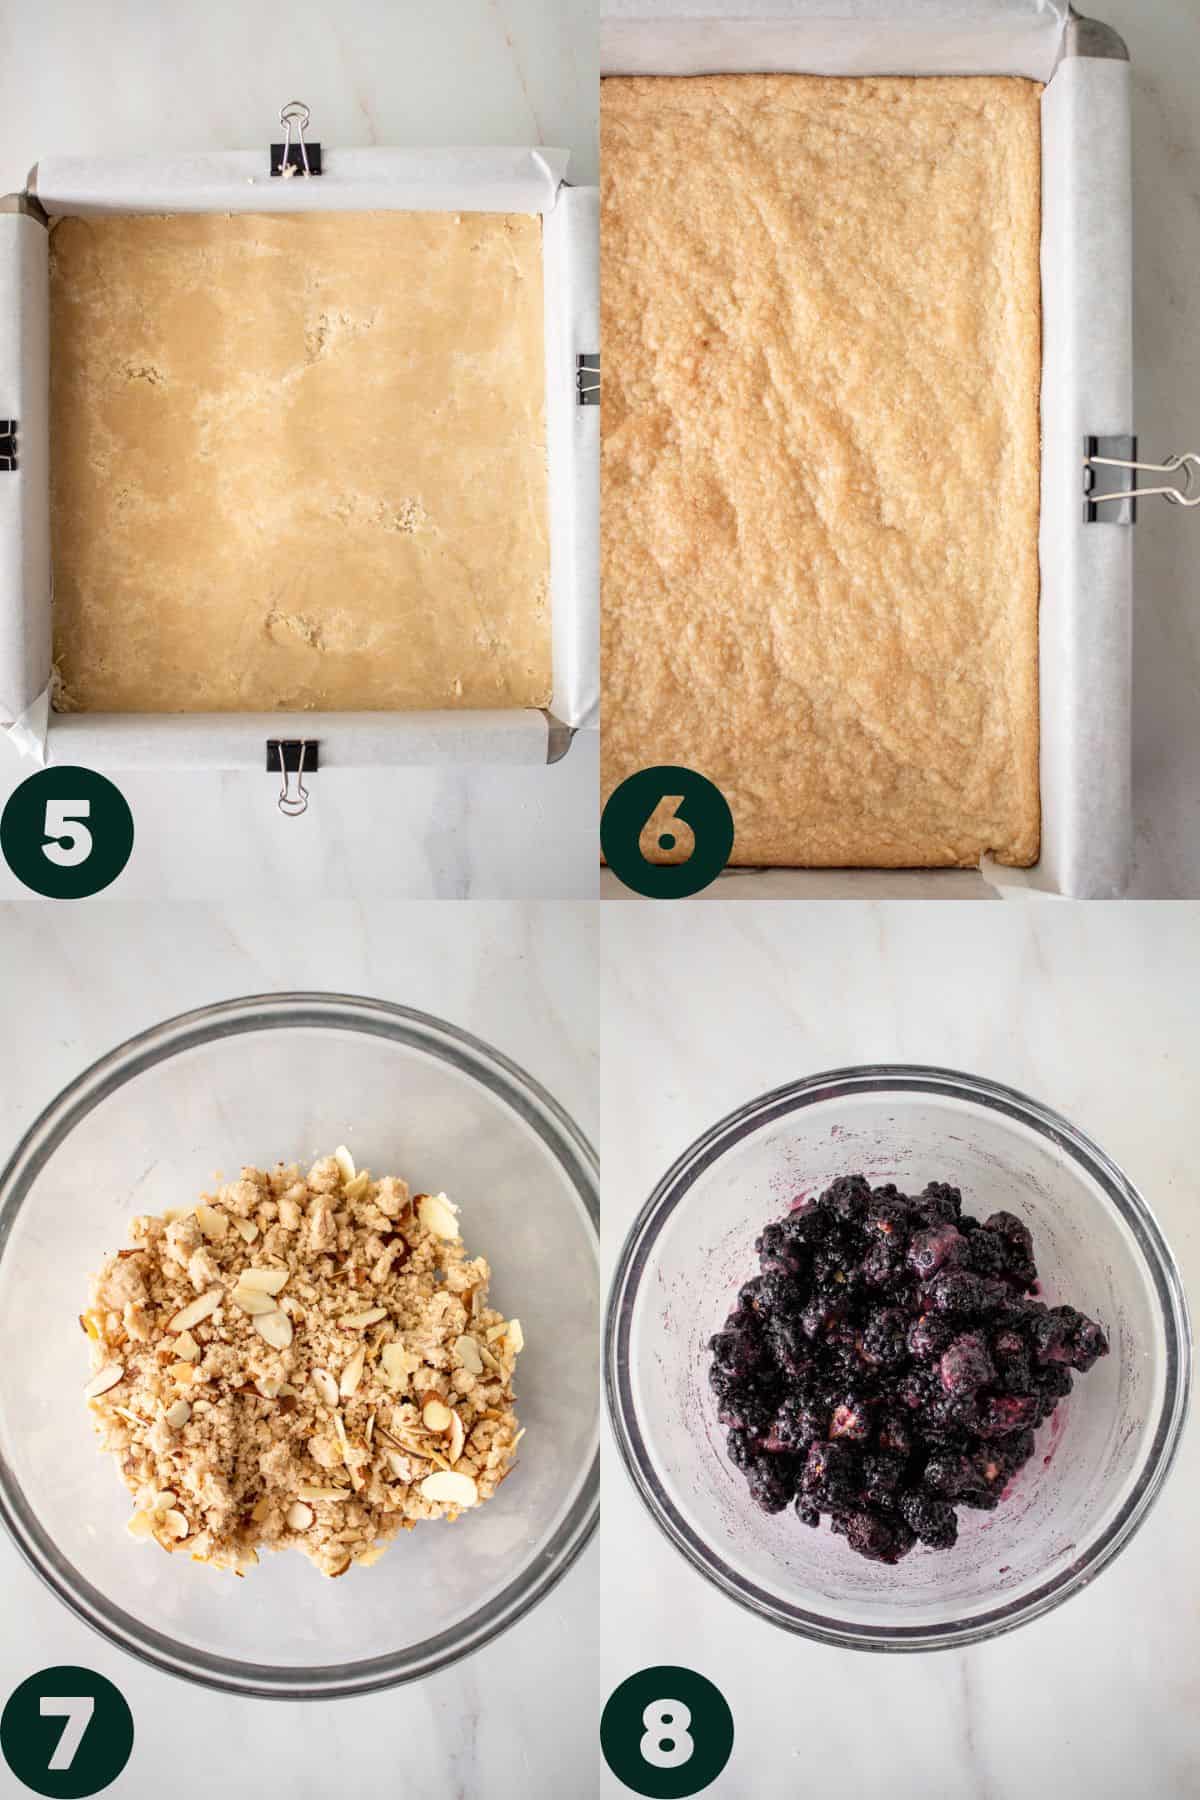
- To the reserved one cup shortbread mixture, add the cinnamon and almonds. Use the tips of your fingers to squeeze the dough together to make large crumbs for the topping.
- Toss together blackberries, lemon juice, and sugar in a medium bowl. Let the blackberries macerate while the crust cools.
- Once the crust just warm, stir the cornstarch into the blackberries.
- Pour the blackberries evenly over the crust.
- Sprinkle the crumble over the blackberries.
- Bake the bars for 35-45 minutes until golden brown and bubbling. Cool, then slice into bars to serve.

Baking Tips
- These bars are the easiest to slice when they are chilled. Pop the bars into the freezer for 15 minutes. Remove the bars from the pan with the parchment handles. Use a sharp, non-serrated knife to slice into squares. Wipe the knife off on a damp towel between slices for the neatest cuts.
- Serve these bars with vanilla ice cream, a dusting of confectioner's sugar, or whipped cream.
Storage and Freezing
Store any leftover blackberry bars in the refrigerator in an airtight container for up to 3 days.
These bars can also be frozen for up to 3 months. You can freeze them whole before slicing into portions, wrapped with plastic wrap, foil and stored in a zip top bag. They can also be frozen as individual squares. After chilling the bars, cut into individual bars and place on a baking sheet. Freeze for one hour, then wrap each one with plastic wrap and place in a zip top freezer bag. Defrost the bars in the refrigerator before serving.

FAQs
Absolutely. Blueberries, raspberries and peaches work especially well with this recipe.
Switch out the almonds for your favorite nut. Pecans, walnuts and macadamia nuts work especially well with these bars. Nuts can also be omitted.
There is cornstarch in this recipe to thicken the blackberry filling, so to ensure that the bars are finished cooking and the cornstarch has worked properly, the mixture should be bubbling before removing from the oven. You may only see a bubble or two and that's totally fine. The crumble mixture should also be a golden brown when done baking.
If you make these blackberry pie bars, let me know! Drop a comment below or tag me on Instagram.
Enjoy!
Ash xx
More Summer Recipes to Try
Strawberry Rose Buttermilk Cake
Recipe
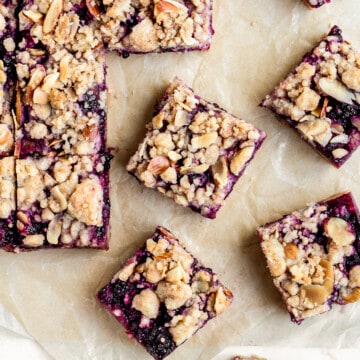
Blackberry Pie Bars
Equipment
Ingredients
Crust and Topping
- ¼ cup sliced almonds
- 2 ¼ cup all purpose flour
- ½ cup light brown sugar, packed
- ¼ cup (50g) granulated sugar
- ½ teaspoon fine sea salt
- 2 teaspoons lemon zest
- 1 cup unsalted butter, cold, cut into cubes
- ¼ teaspoon cinnamon
Blackberry Filling
- 2 ½ cups fresh blackberries, halved
- 1 tablespoon lemon juice
- ½ cup granulated sugar
- 1 ½ tablespoons cornstarch
Instructions
- Heat the oven to 375F. Line an 8x8 pan with parchment paper.
- Place the nuts in a dry skillet over medium heat. Cook for 4 to 5 minutes, until golden and fragrant stirring often.¼ cup sliced almonds
- In the bowl of a food processor, combine the flour, brown sugar, granulated sugar, salt, and lemon zest. Pulse to combine.2 ¼ cup all purpose flour, ½ cup light brown sugar, packed, ¼ cup (50g) granulated sugar, ½ teaspoon fine sea salt, 2 teaspoons lemon zest
- Add the butter cubes to the flour mixture. Pulse until the mixture starts to clump together but is still sandy.1 cup unsalted butter, cold, cut into cubes
- Remove 1 cup of the mixture, and turn out the remaining mixture into the prepared pan.
- Lightly press the dough evenly into the pan. Bake the crust for 20-25 minutes, or until light golden brown.
- Add the cinnamon and almonds to the reserved 1 cup of the flour mixture and combine. Use the tips of your fingers to squeeze the dough together to make clumps for the topping. Keep refrigerated until ready to use.¼ teaspoon cinnamon
- Place the blackberries, lemon juice, and sugar in a medium bowl. Toss to combine. Let the blackberries sit and macerate while the crust cools.2 ½ cups fresh blackberries, halved, 1 tablespoon lemon juice, ½ cup granulated sugar
- When the crust is just warm, add the cornstarch to the blackberry mixture and mix until combined.1 ½ tablespoons cornstarch
- Pour the blackberry filling onto the crust.
- Evenly sprinkle the crumb topping over the blackberry filling.
- Bake the bars for 35-45 minutes, until the blackberries and juices are bubbling around the edges and the topping is golden brown.
- Allow the bars to cool completely before serving.
Natalie Riggs says
Could oats be substituted for the almonds? I’m tree nut allergic but this looks great if I can substitute something!
Ashley says
Sure! Or you can just omit the almonds.