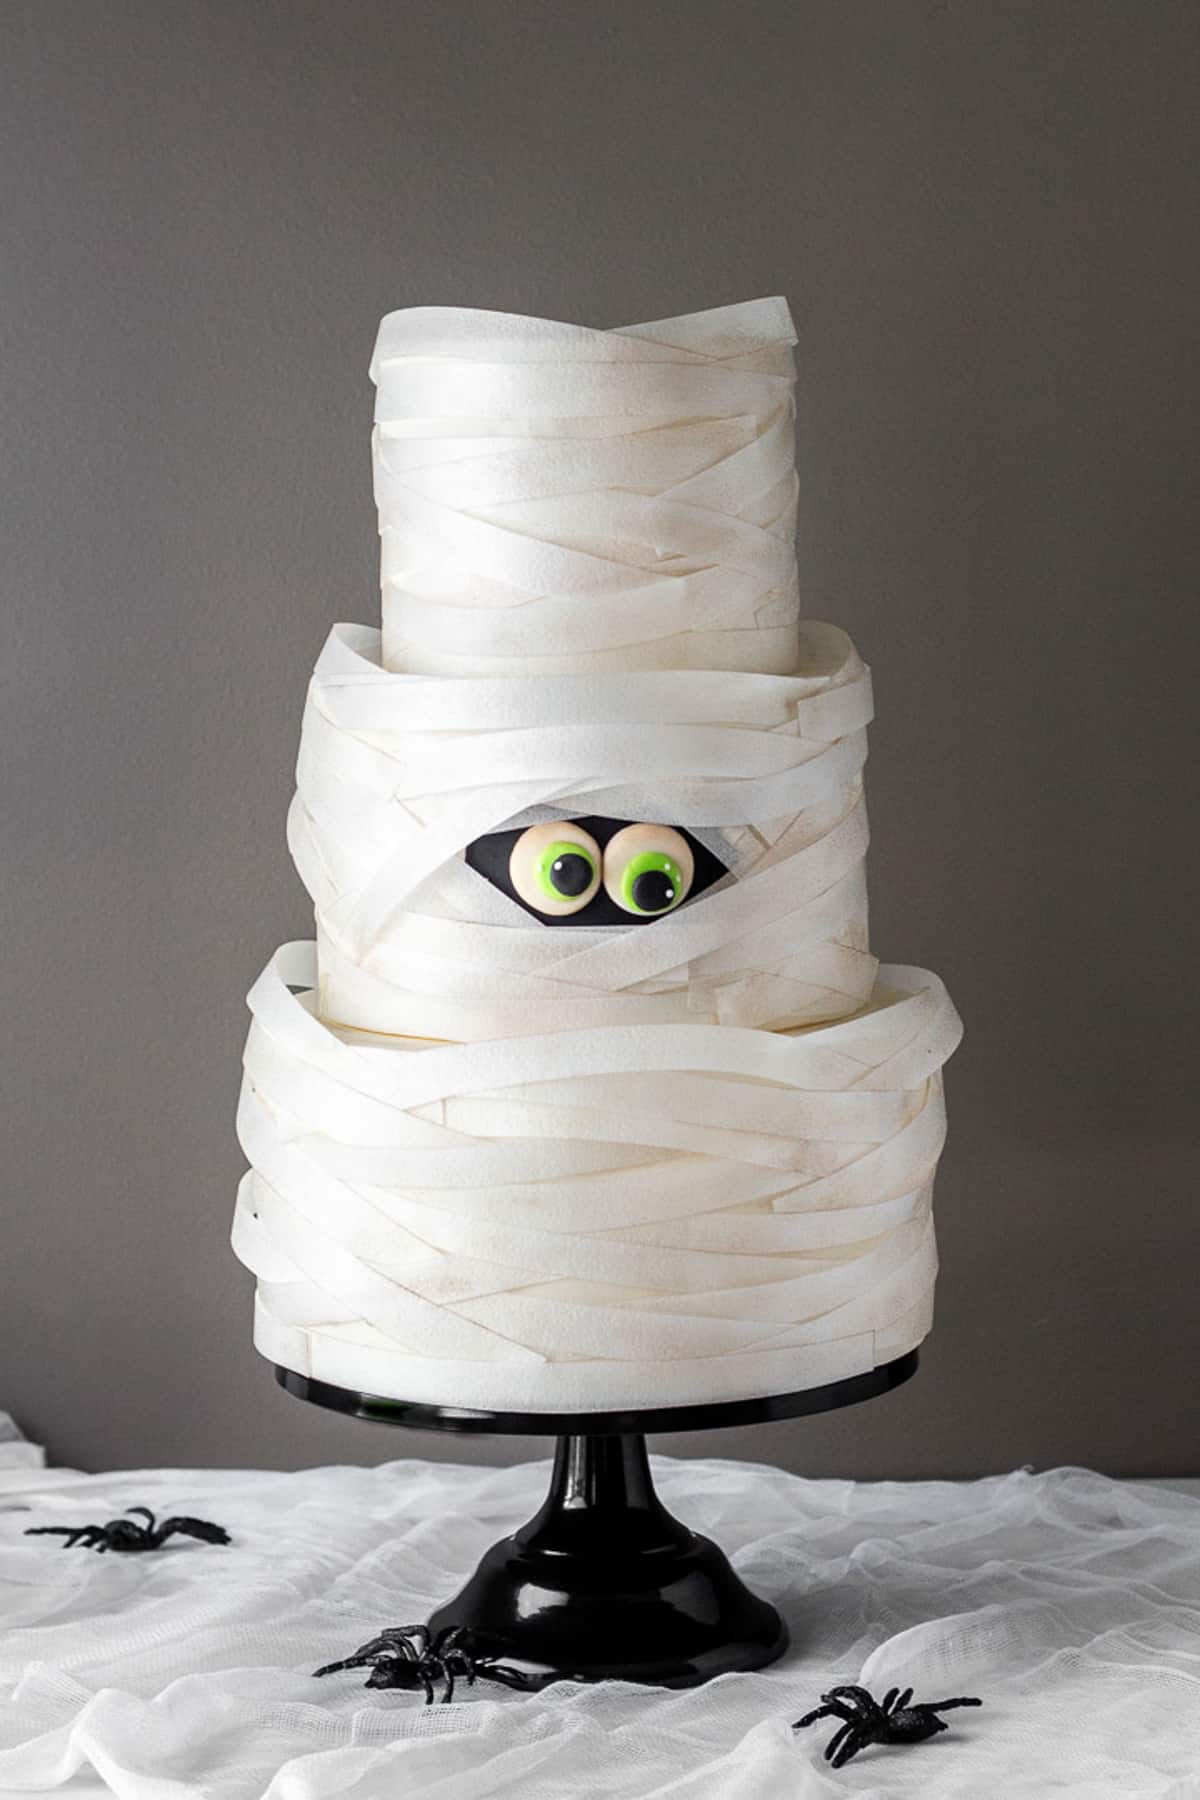
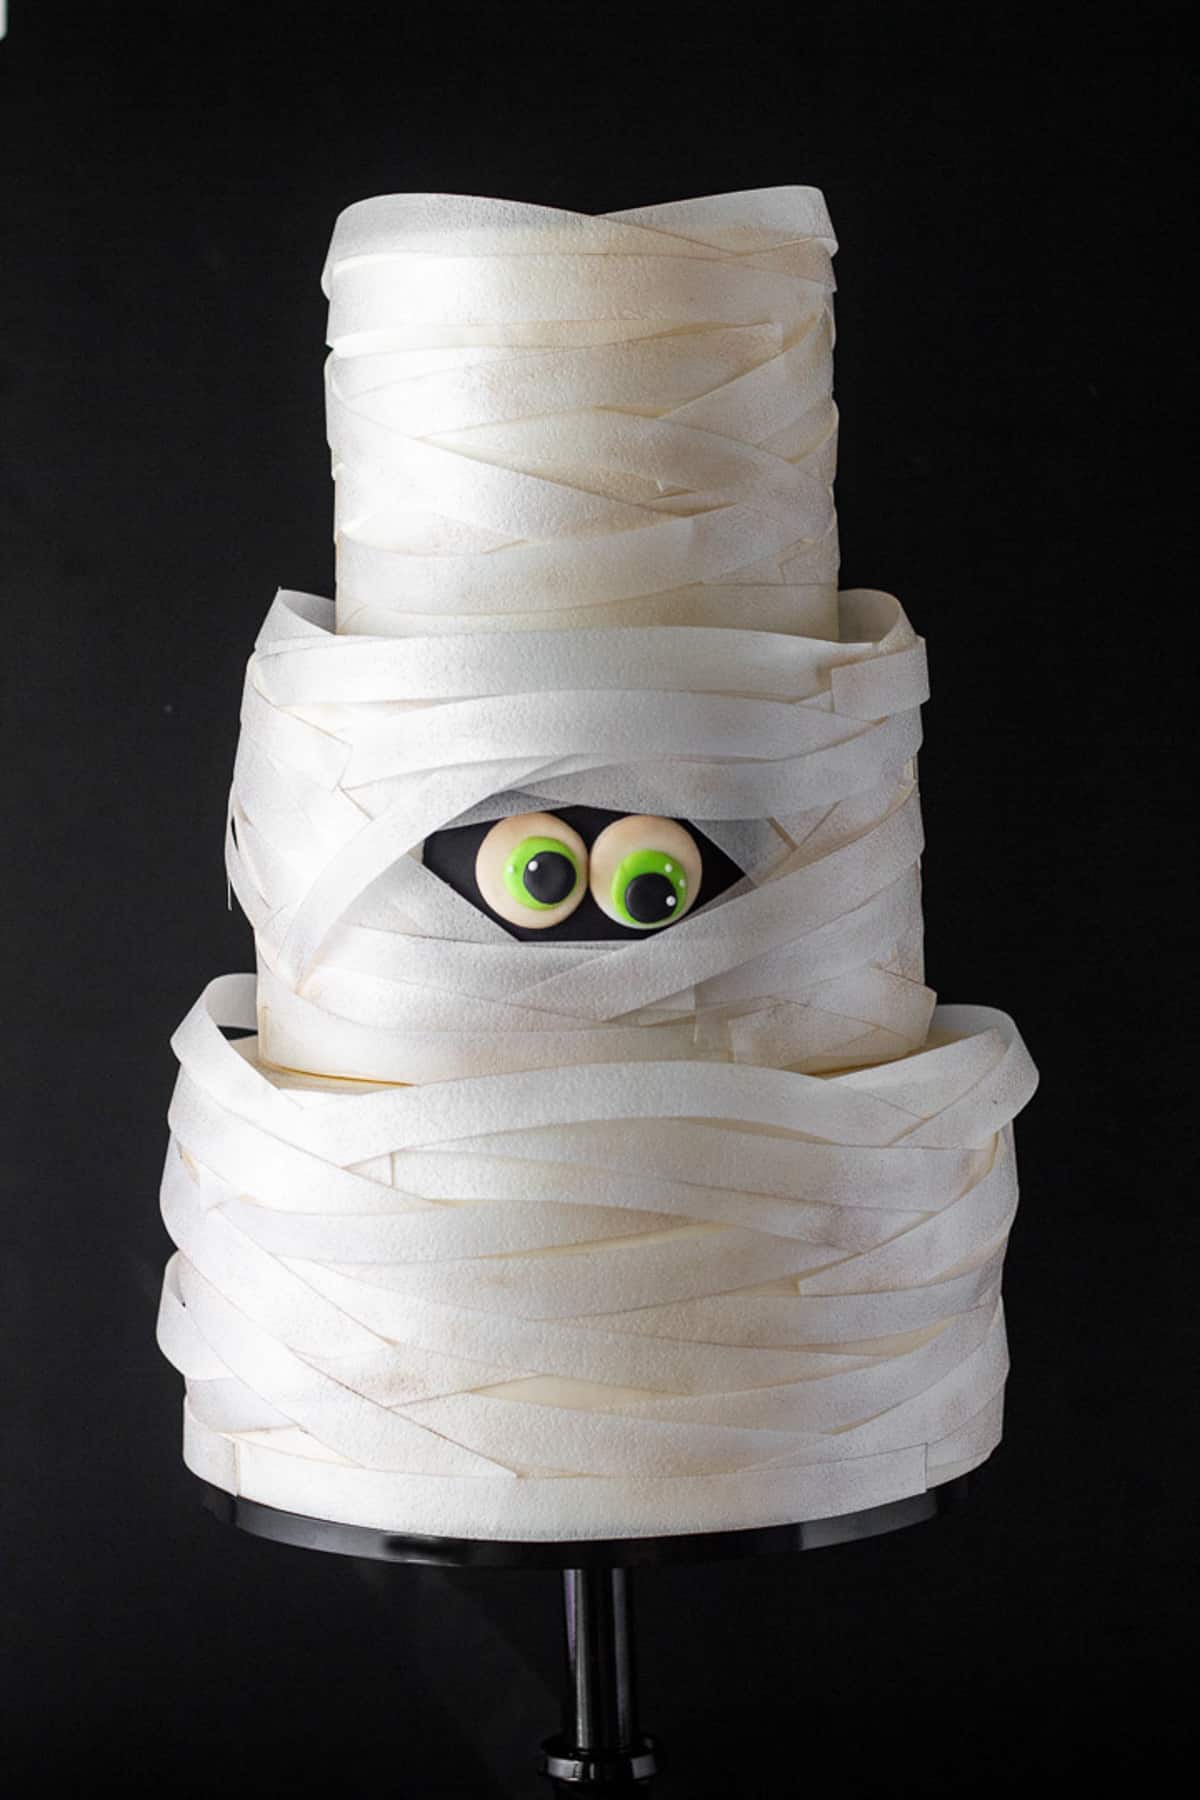
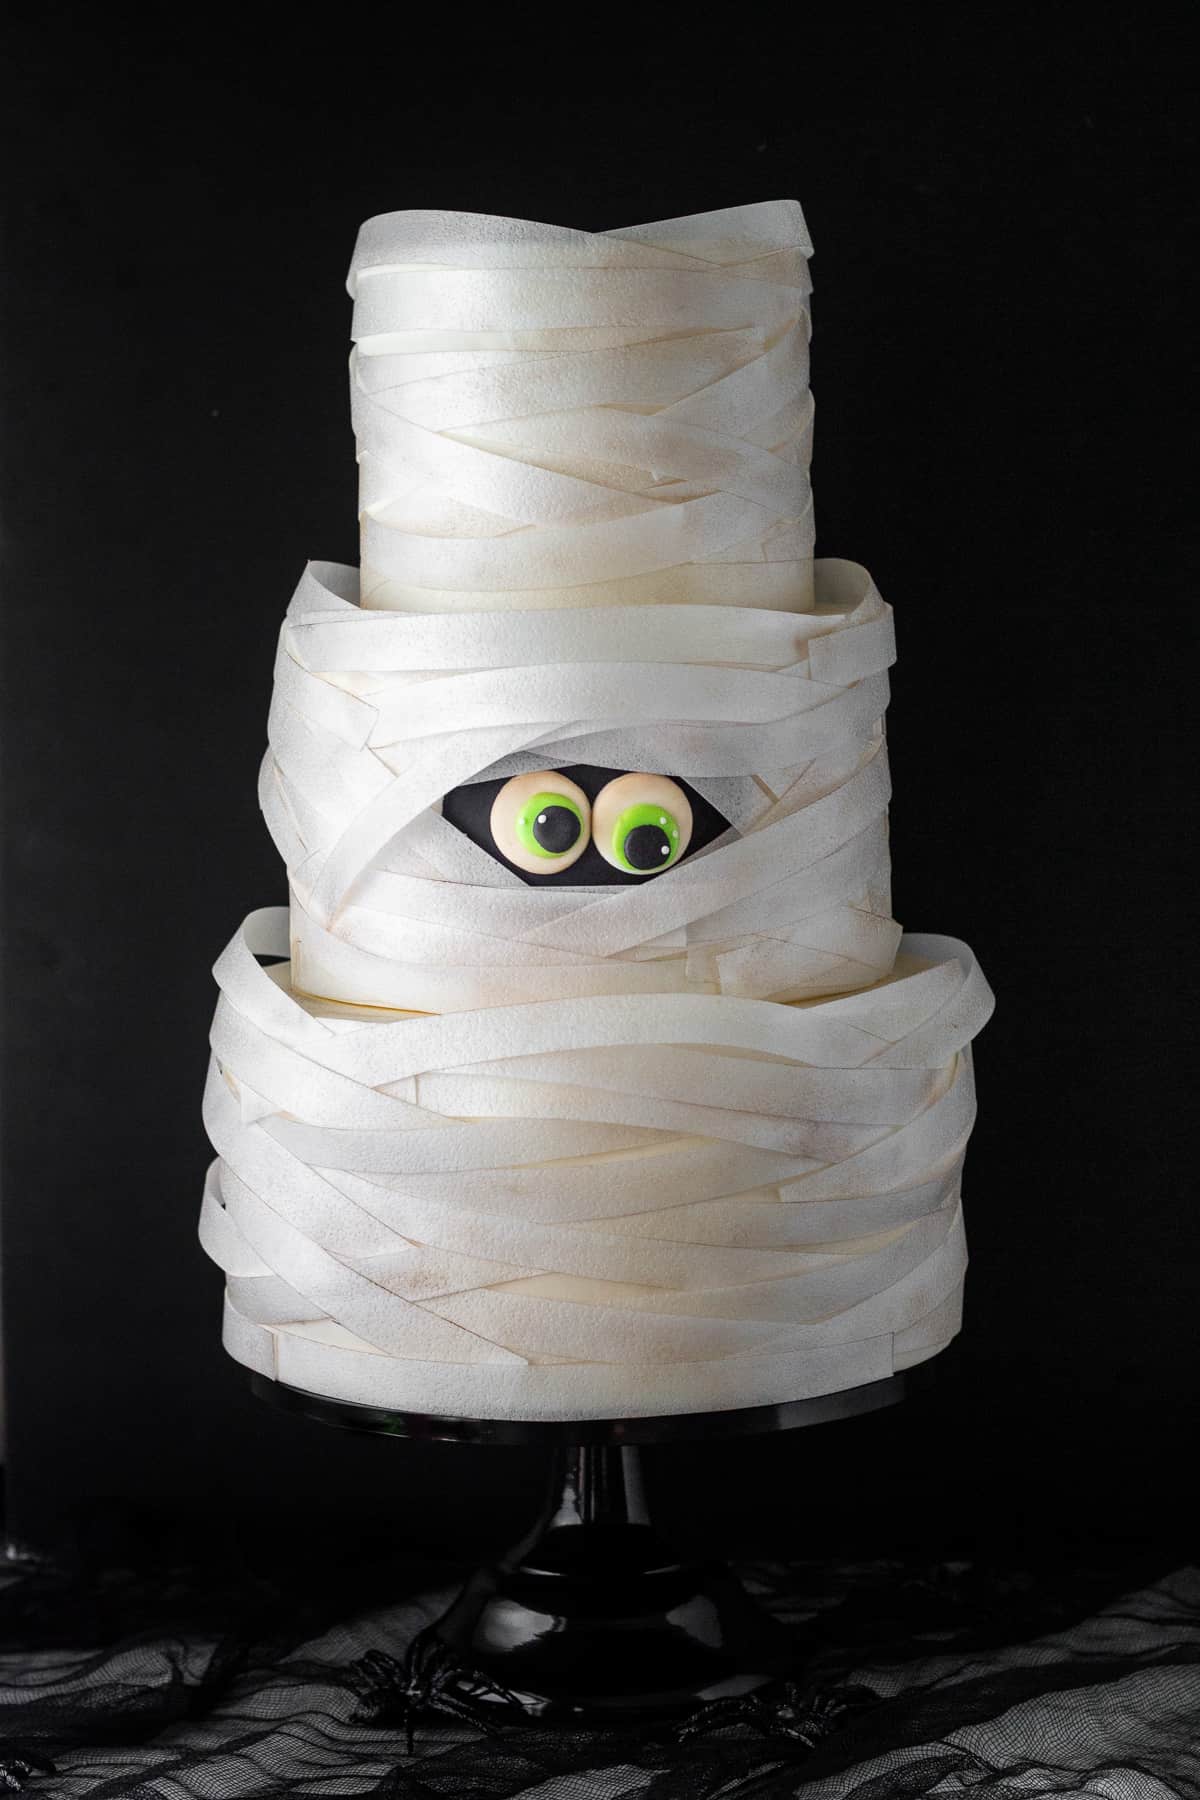
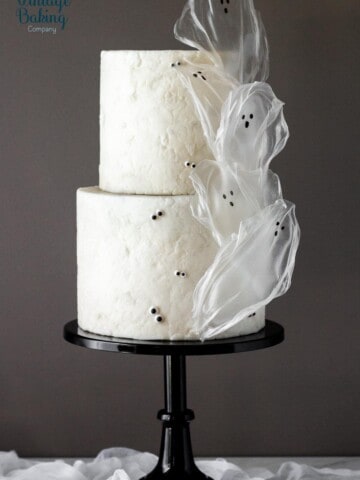
Not only is this Halloween mummy cake super cute, but it is also simple to make, only requiring a few supplies that can be found at your local craft store. It looks impressive and time consuming, but don't let that scare you off. This cake is perfect for beginners and kids. This mummy cake is sure to impress your guests for any Halloween event.
You don't need a three-tier cake to be able to make this cake. This technique also works on smaller layer cakes and cookies. Use your favorite cake recipe, covered in buttercream or ganache.
Jump to:
Why You Will Love This Cake
- Minimal supplies are needed for the decorations. Most, if not all, can be found at your local craft store or online.
- While this looks like it takes a long time, it's quite simple and quick to decorate.
- Loved by both adults and kids and makes for a spooky centerpiece for Halloween events.
- Fondant covered cakes are optional. Buttercream or ganache works just as well. Only a small amount of fondant is needed to make the eyes.
What is Wafer Paper?
Wafer paper is a starched based (usually potato starch) edible paper used in cake decorating. It has a very subtle flavor, mostly tasteless and can be eaten. It can be manipulated to make cake decorations and edible flowers. Wafer paper should be stored securely in a zip top bag, away from humidity. It typically will not spoil, unless exposed to water or humidity, so it will keep for years. Bonus, wafer paper is gluten free and vegan.
Supplies
Cake - One, or six tiers, it doesn't matter how many. I used three tiers (6x5, 8x5 and 10x5 tiers) covered in white/off-white fondant or white/off white buttercream or ganache
Fondant: bright green, white and black (alternatively, modeling chocolate will work here too) - I used Satin Ice
Circle cutters: 1 ½" (38mm), 1" (25mm), ⅝" (16mm)
Piping tip #3 OR piping tip #4
Light corn syrup
Plastic wrap - This helps to make the eyes have more rounded edges and more of a puffed look.
Rolling pin
Natural Cocoa powder
How to Make This Cake
I opted to go with more of a cartoonish look for my mummy eyes. Super creepy eyes would also be fun here. To make the eyes, you need a few different size round cutters, as well as black, white and green fondant.
Mummy Eyes
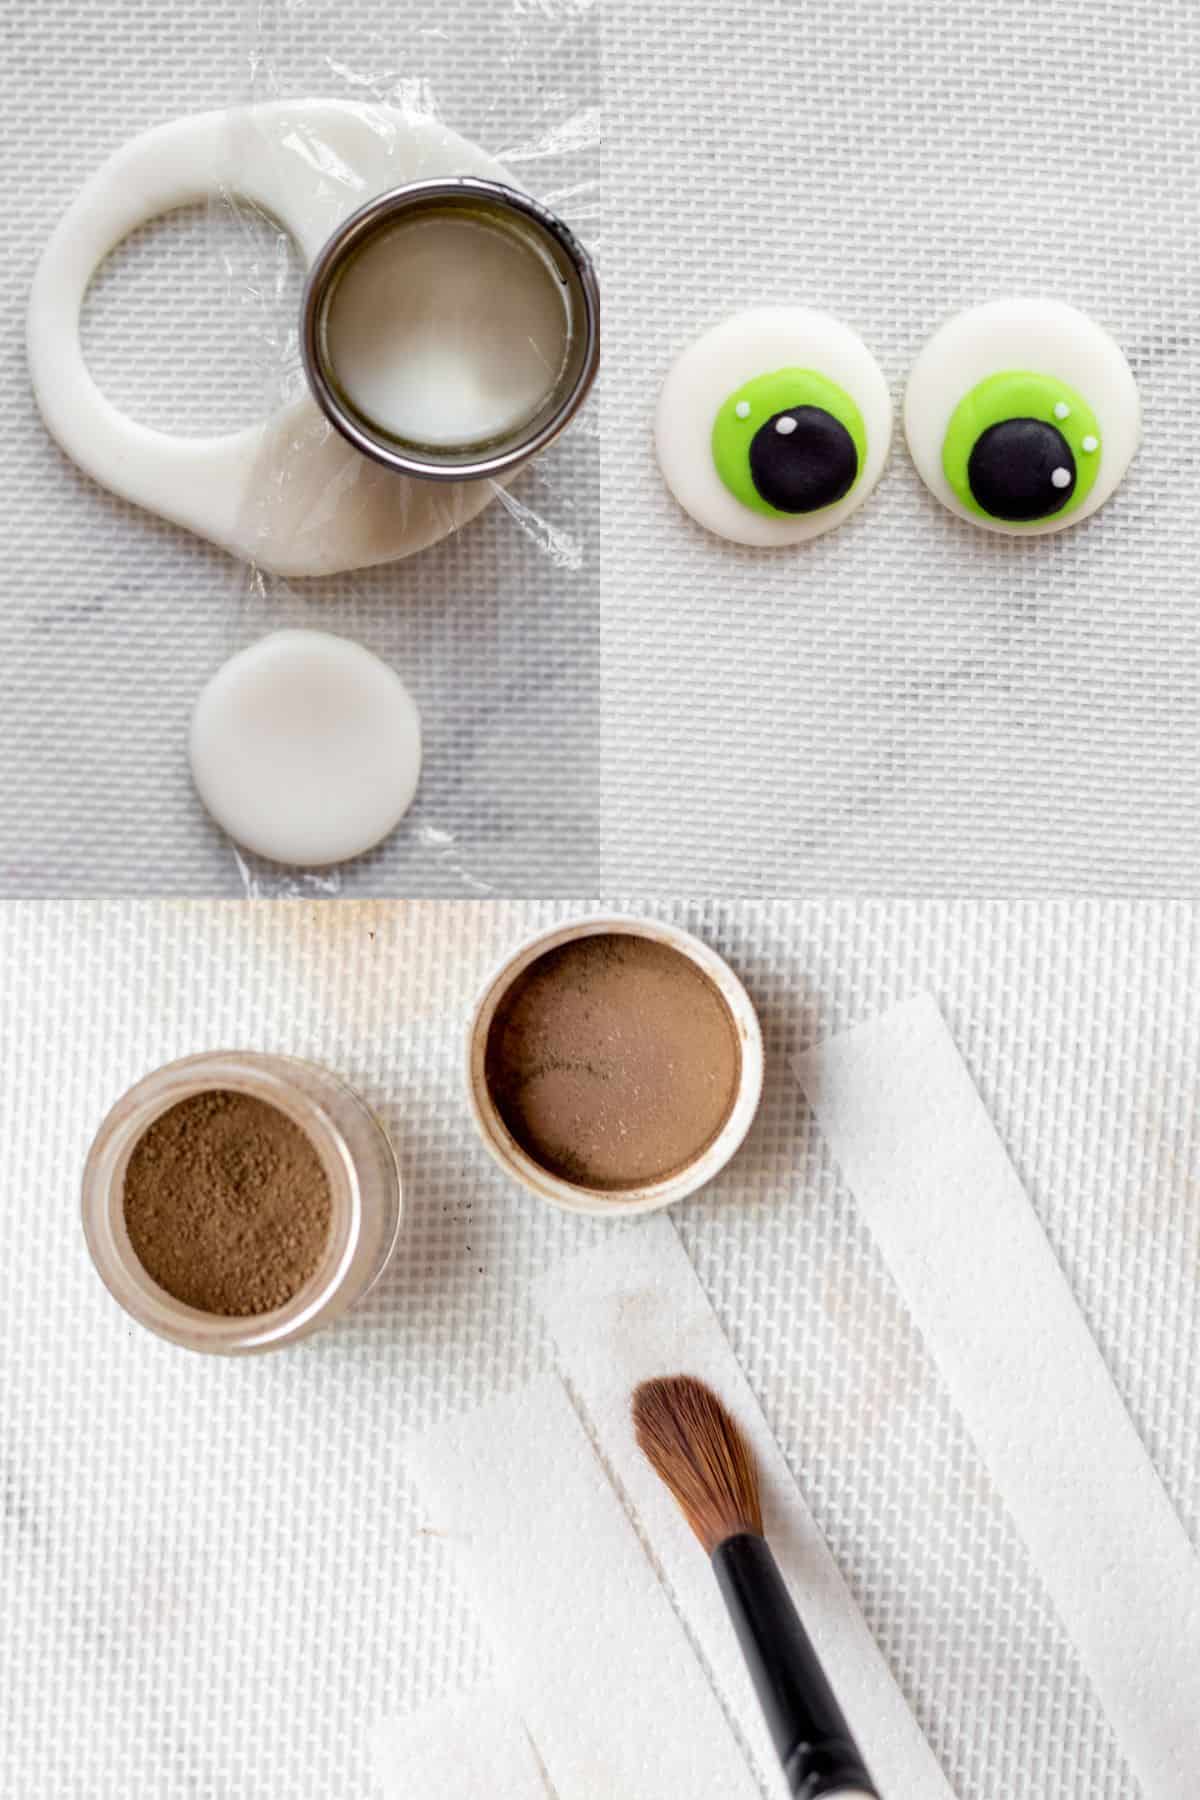
- Roll the white fondant out to ¼" thick. Lay the plastic wrap over the fondant. Cut out two rounds with the largest, 1 ½" cutter over the plastic wrap. Set aside.
- Roll the green fondant out to ¼" thick. Lay the plastic wrap over the fondant. Cut out two rounds with the medium sized, 1" cutter over the plastic wrap.
- Brush the back of the green circles with a small amount of corn syrup. Place the green circles onto the white rounds. I placed mine on randomly.
- Roll the black fondant out to ¼" thick. Lay the plastic wrap over the fondant. Cut out two rounds with the smallest, ⅝" cutter over the plastic wrap.
- Brush the back of the black circles with a small amount of corn syrup. Place circles onto the green rounds. Again, I placed mine sort of randomly.
- Thinly roll out some white paste. Use a piping tip size 3 or 4 to cut out 2-3 small circles for each eye. One of the circles goes on the black round, or pupil, and the others are placed the randomly on the green part. Use just a tiny amount of corn syrup to attach.
- With a dusting brush, lightly dust cocoa powder over the white parts of the eye. You want just a little bit of color.
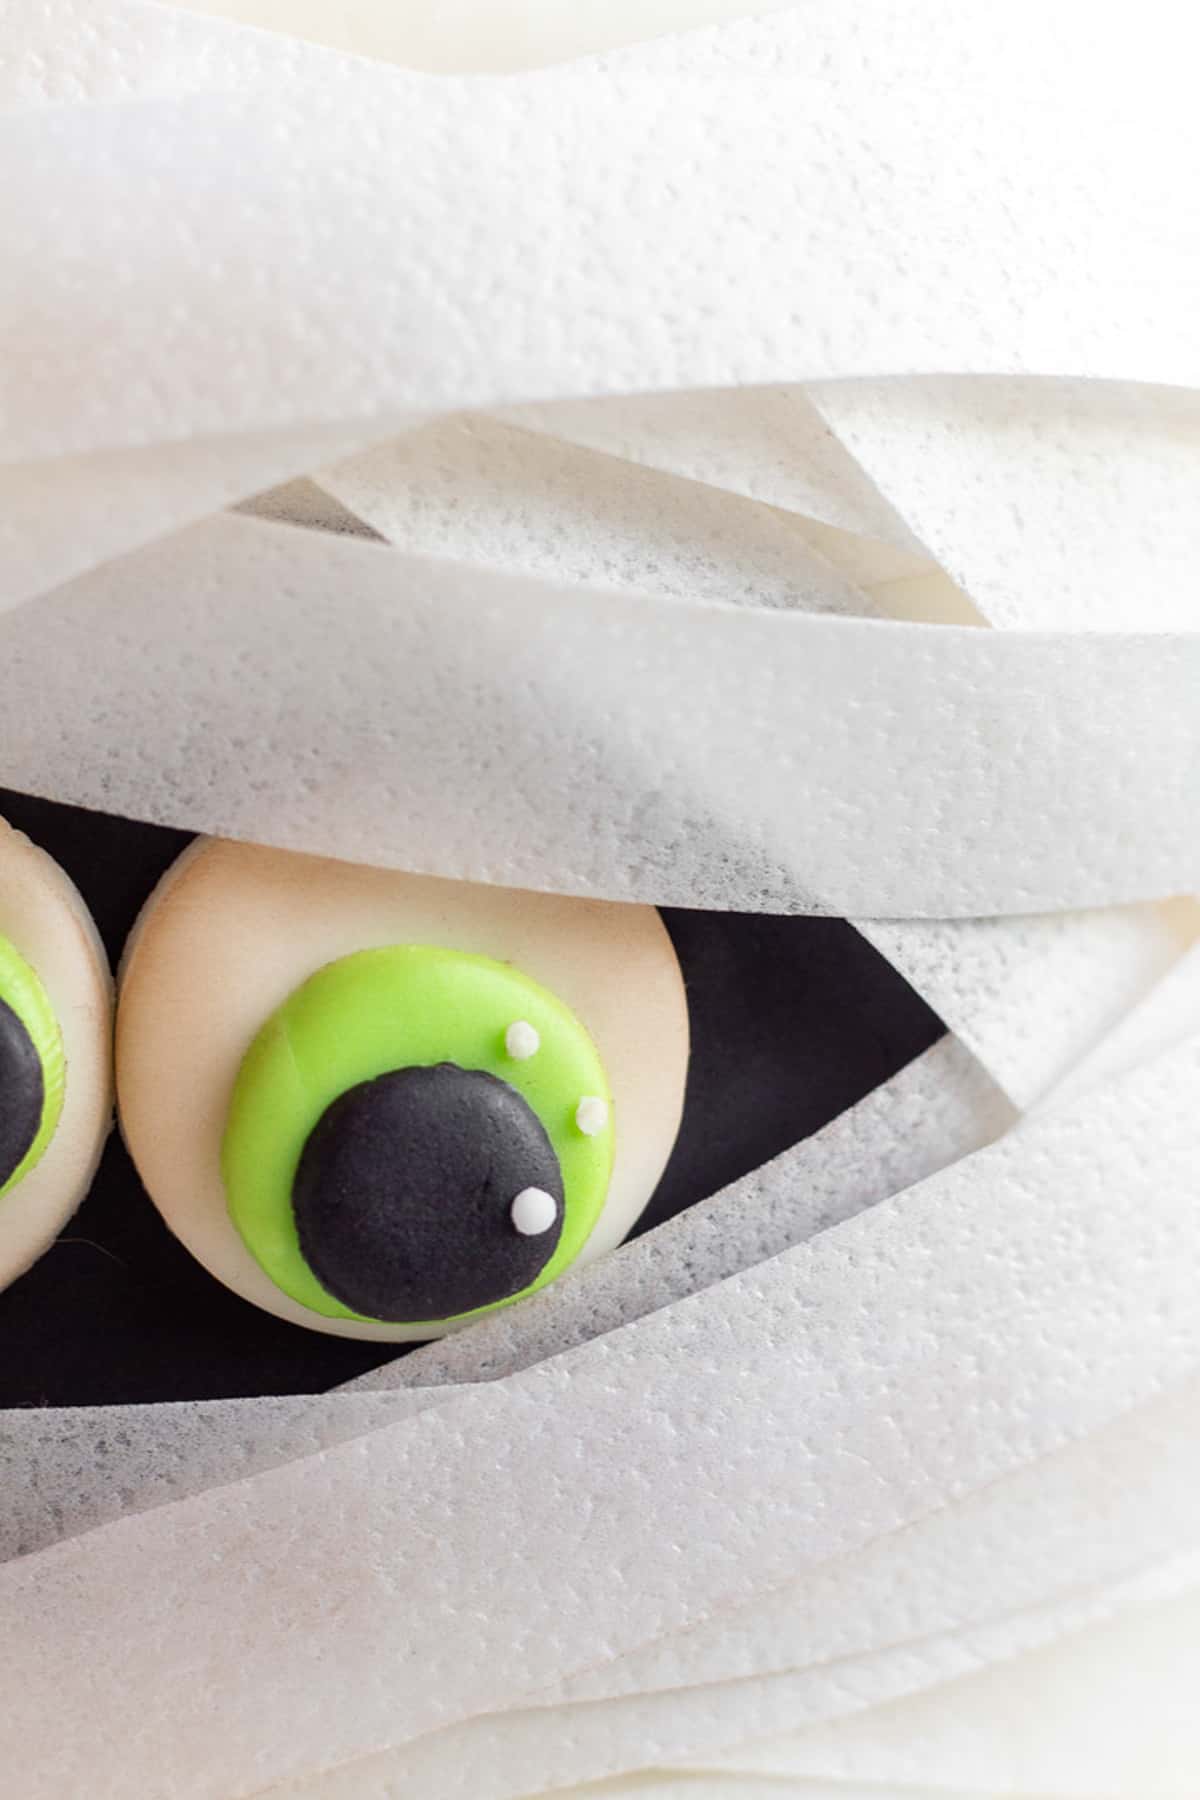
Now, the black background for the eyes needs to be placed on the cake before attaching the eyes.
- Cut out a section of fondant in the center of the middle tier, that is just a little bit bigger than the size of the eyes.
- Roll out some black fondant the same thickness as the fondant on your cake, and place into the hole. Cut off any overhanging black fondant. The idea here is to make the black fondant flush with the cake, rather than adding an additional layer of fondant on top.
If you are using buttercream or ganache, skip step 8. Proceed with step 9 but roll out the black paste as thin as possible. Cut out an oval shape that will fit both of the eyes. Attach the fondant to the cake with piping gel or corn syrup.
- Brush the back of the eyes with piping gel and place them onto the black fondant.
Mummy Wrapping
This part of the cake, while it looks time consuming, is really not. Once the wafer paper strips are cut and lightly dusted, it takes no time to put them on the cake.
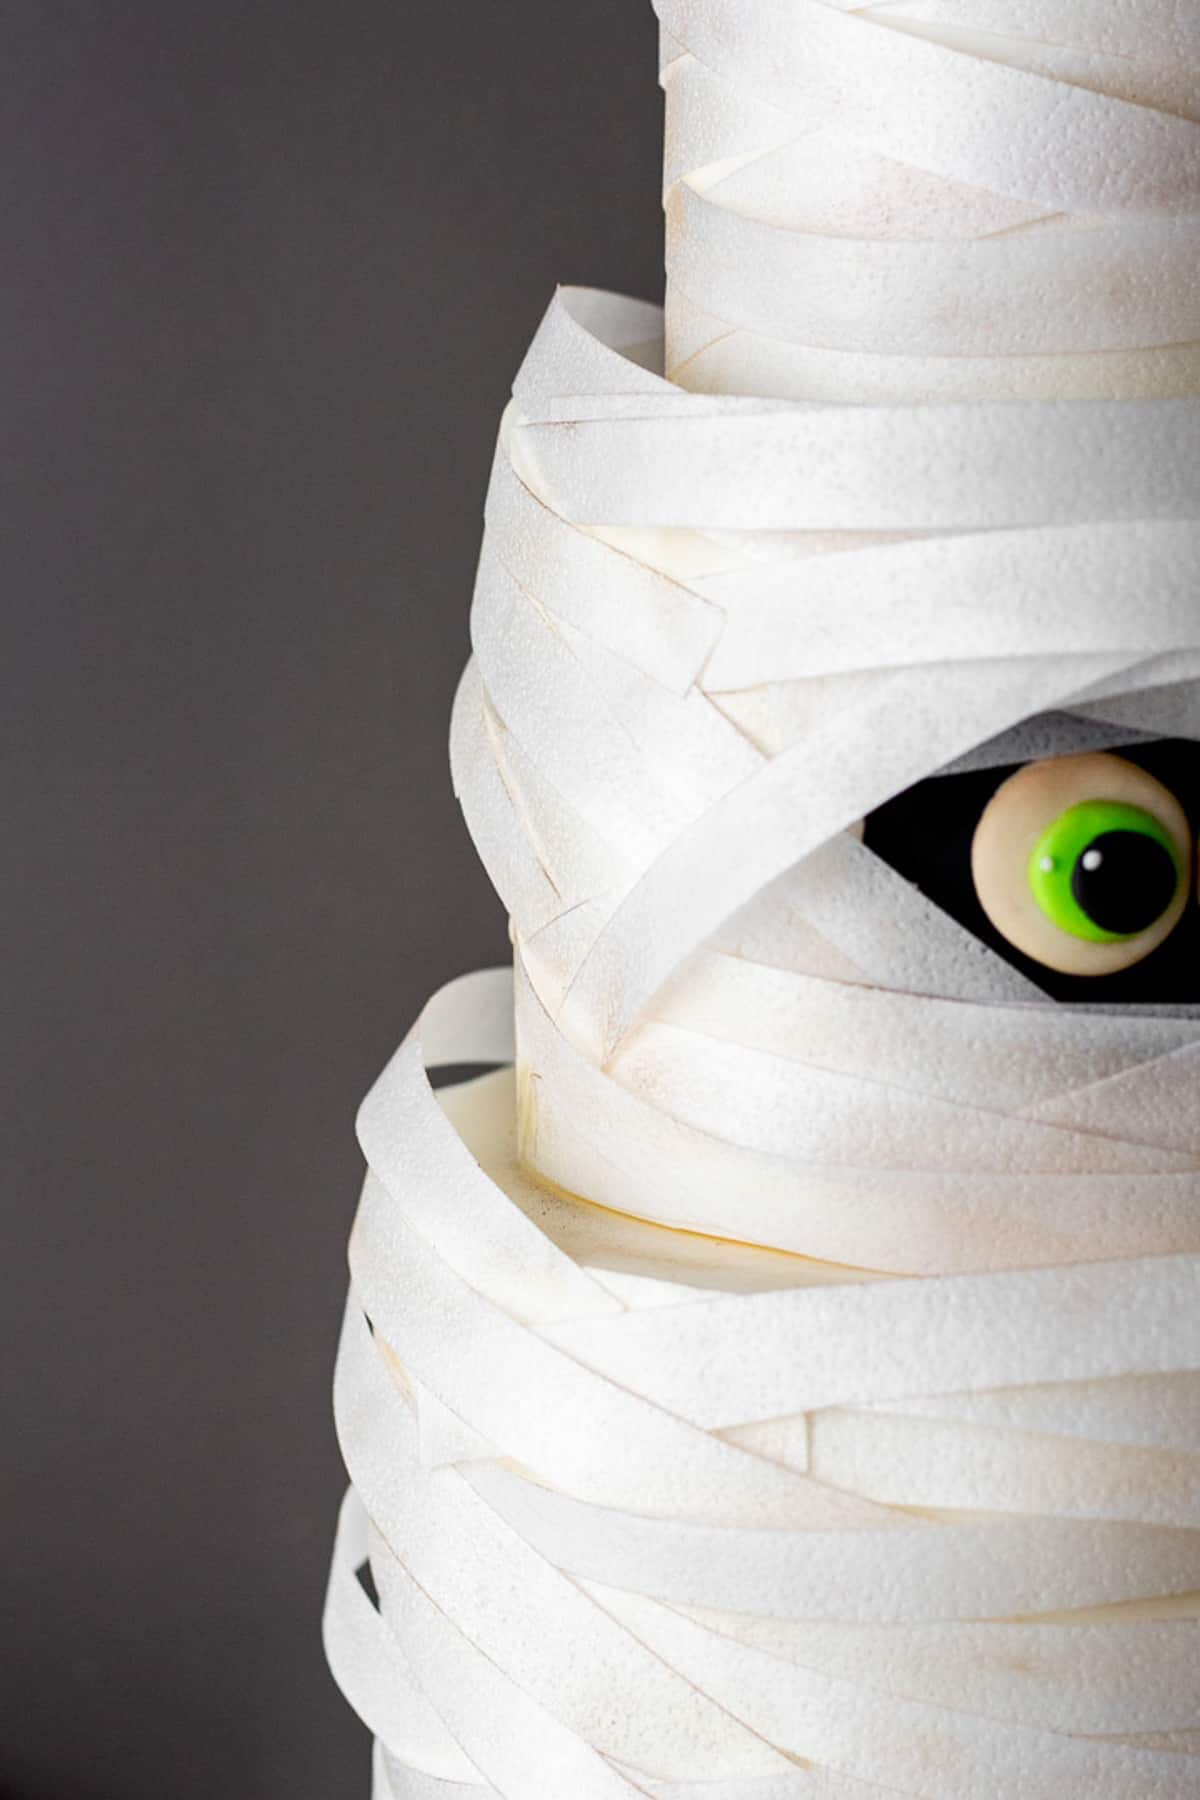
- Cut the strips on the long side of the wafer paper with a pair of scissors, cutting them from ½" to 1". I didn't measure my strips at all so no need to be exact, nor do they need to be perfectly straight.
No worries if the wafer rips, or is damaged in any way - use it! I used 15-20 wafer sheets for my strips, but this amount will vary from person to person.
- With a dusting brush, on the rough side of the wafer paper, lightly brush the cocoa powder on random areas of the strips to give them an aged look and give them depth.
Make sure to keep a variety from strip to strip. You don't want them to all look the same. If you would like more of an aged, darker and dirty mummy, use more cocoa powder to dust on the strips.
Assembly
- Brush a little bit of corn syrup to the ends of the strips. You want the paper to be able to stick to the cake but not for the gel to be so saturated on the wafer that you can see through it.
Try to hide most of the ends of the wafer strips, overlapping strips in areas so it has more of a wrapped look, and doesn't look so segmented. You can definitely keep some of the ends revealed as I did in some areas.
Also note that you do not have to cover every inch of the fondant/buttercream. A few areas peeking through is no big deal. It still blends in and looks cohesive.
- Once all the strips are on the cake, go back with your dusting brush and add some more color to the strips if you would like. Also, dust over the exposed fondant so that it blends in more with the wafer paper strips.
Storing and Serving
Wafer paper is edible, but people don't generally want to eat it. It's dry and tasteless. It's also not easy to try to cut through. Before serving this cake, I recommend removing the wafer as you slice and serve it. It will come off fairly easily.
Wafer paper does dissolve and is easily affected by humidity and water. I don't recommend refrigerating this cake once it has the wafer strips attached because condensation can develop, and the wafer paper will melt from the moisture. Add the wafer strips just before displaying and serving the cake.
Decorating FAQs
New brushes or brushes only used for food are recommended. I like to use make up brushes. Some brands have fairly inexpensive brushes that are less expensive than paint brushes. A pastry brush will also work just as well.
Natural cocoa powder is what I used for this cake, but darker Dutch processed cocoa powder can also be used. It's a bit darker than natural cocoa, so add little powder at a time.
Wafer paper can be found at cake stores and online. I have also seen it listed on the Walmart website. I haven't seen it at Michael's or Hobby Lobby. I get my wafer paper off of Amazon.
Did you make these cookies? Share it with us! Tag @littlevintagebaking on Instagram and leave a star rating below if you LOVED this recipe. For more baking and decorating ideas follow me on Pinterest.
Comments
No Comments