These matcha sugar cookies taste amazing, rolls out like a dream and doesn't distort or spread when baking. Matcha is earthy, with a hint of sweetness and umami flavor. My matcha sugar cookies are not too sweet, with a hint of almond to compliment the green tea.
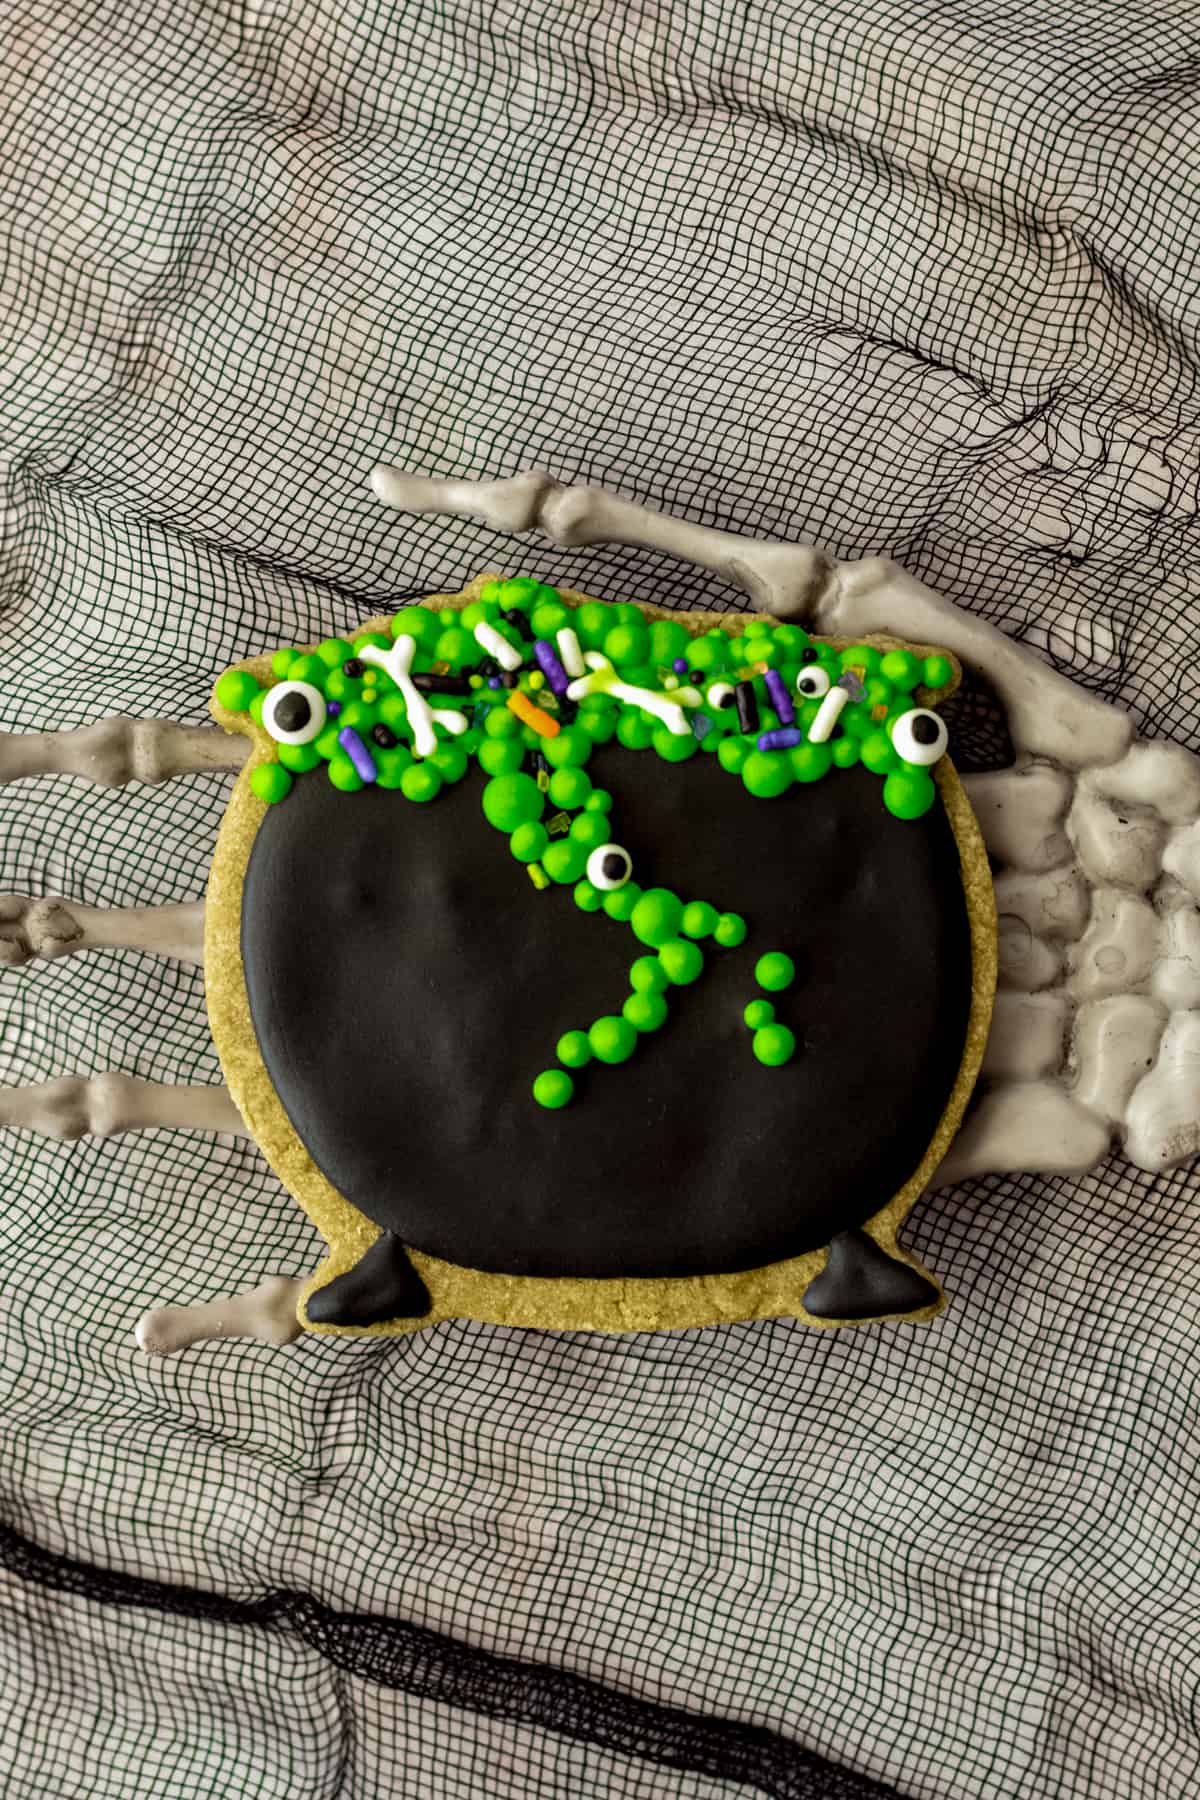
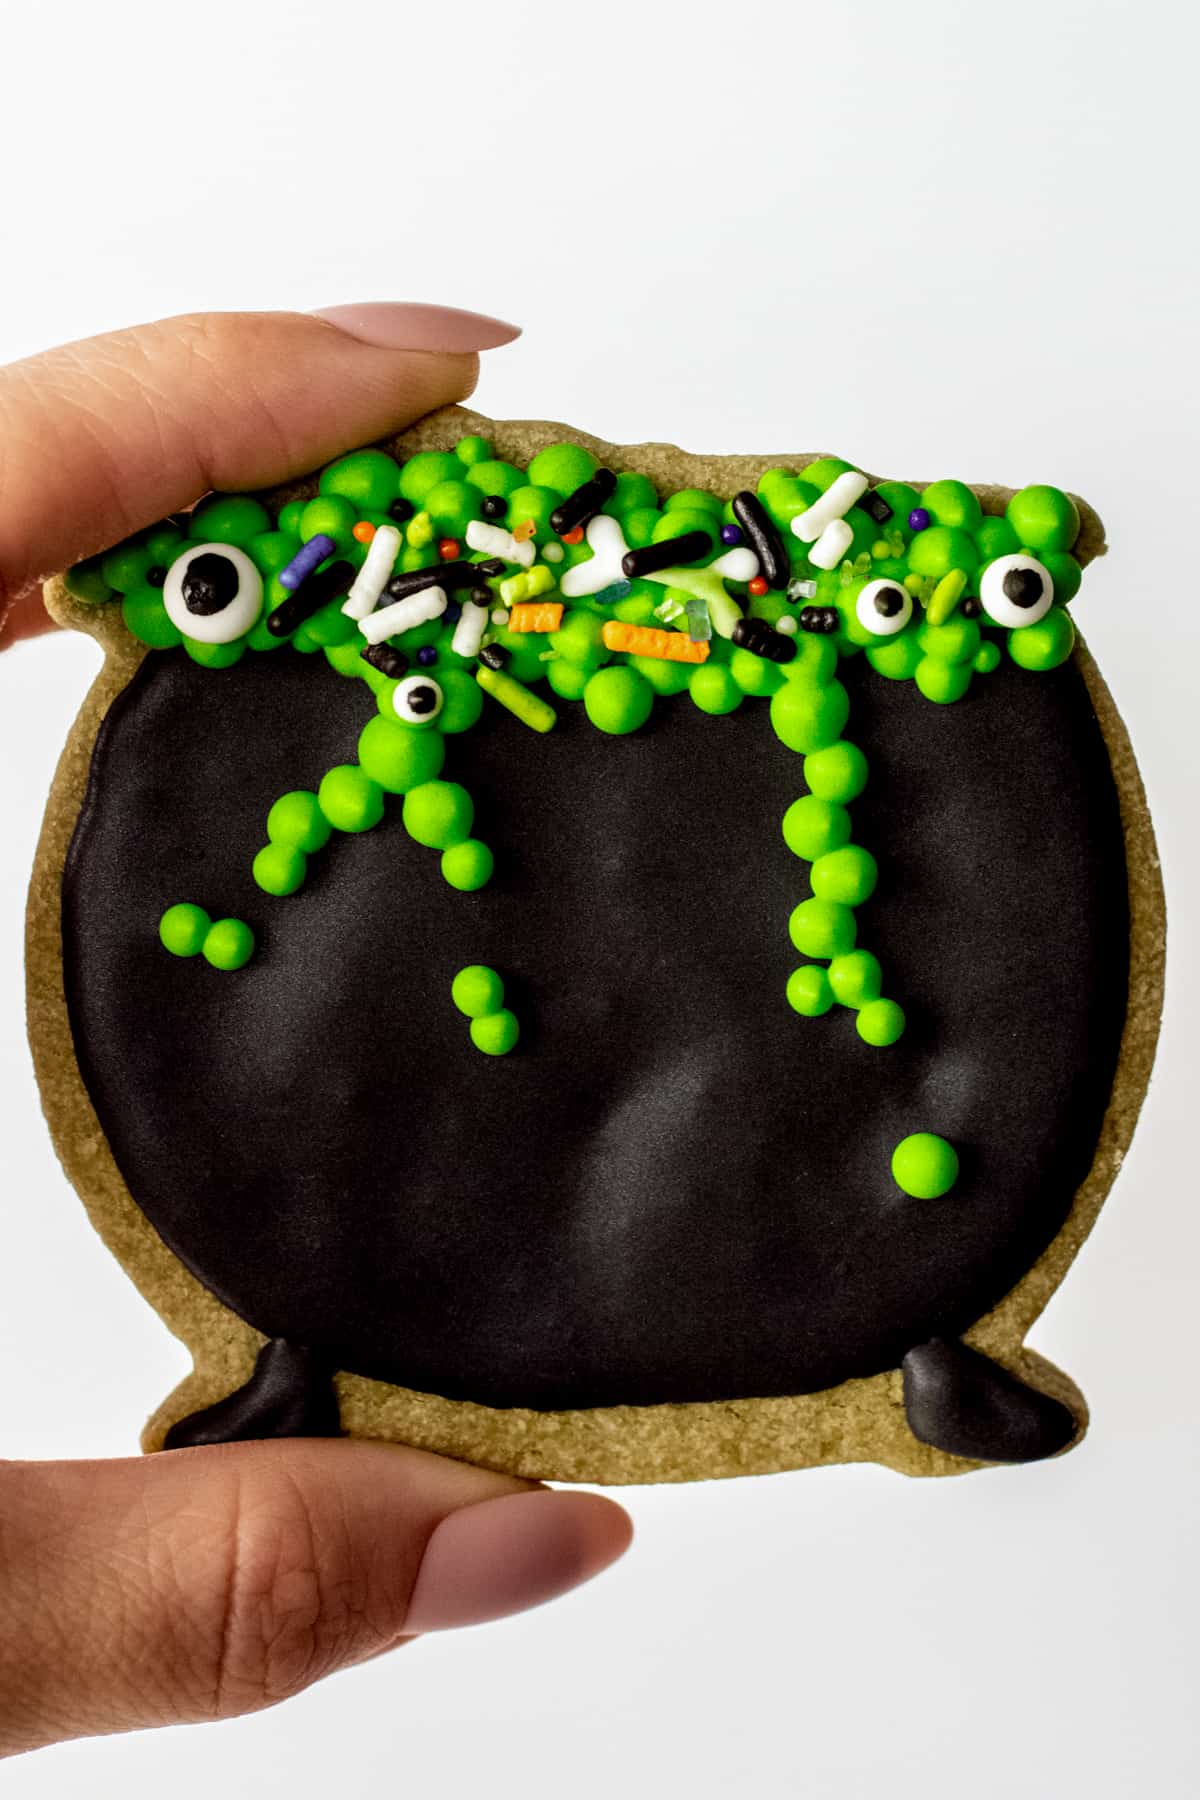
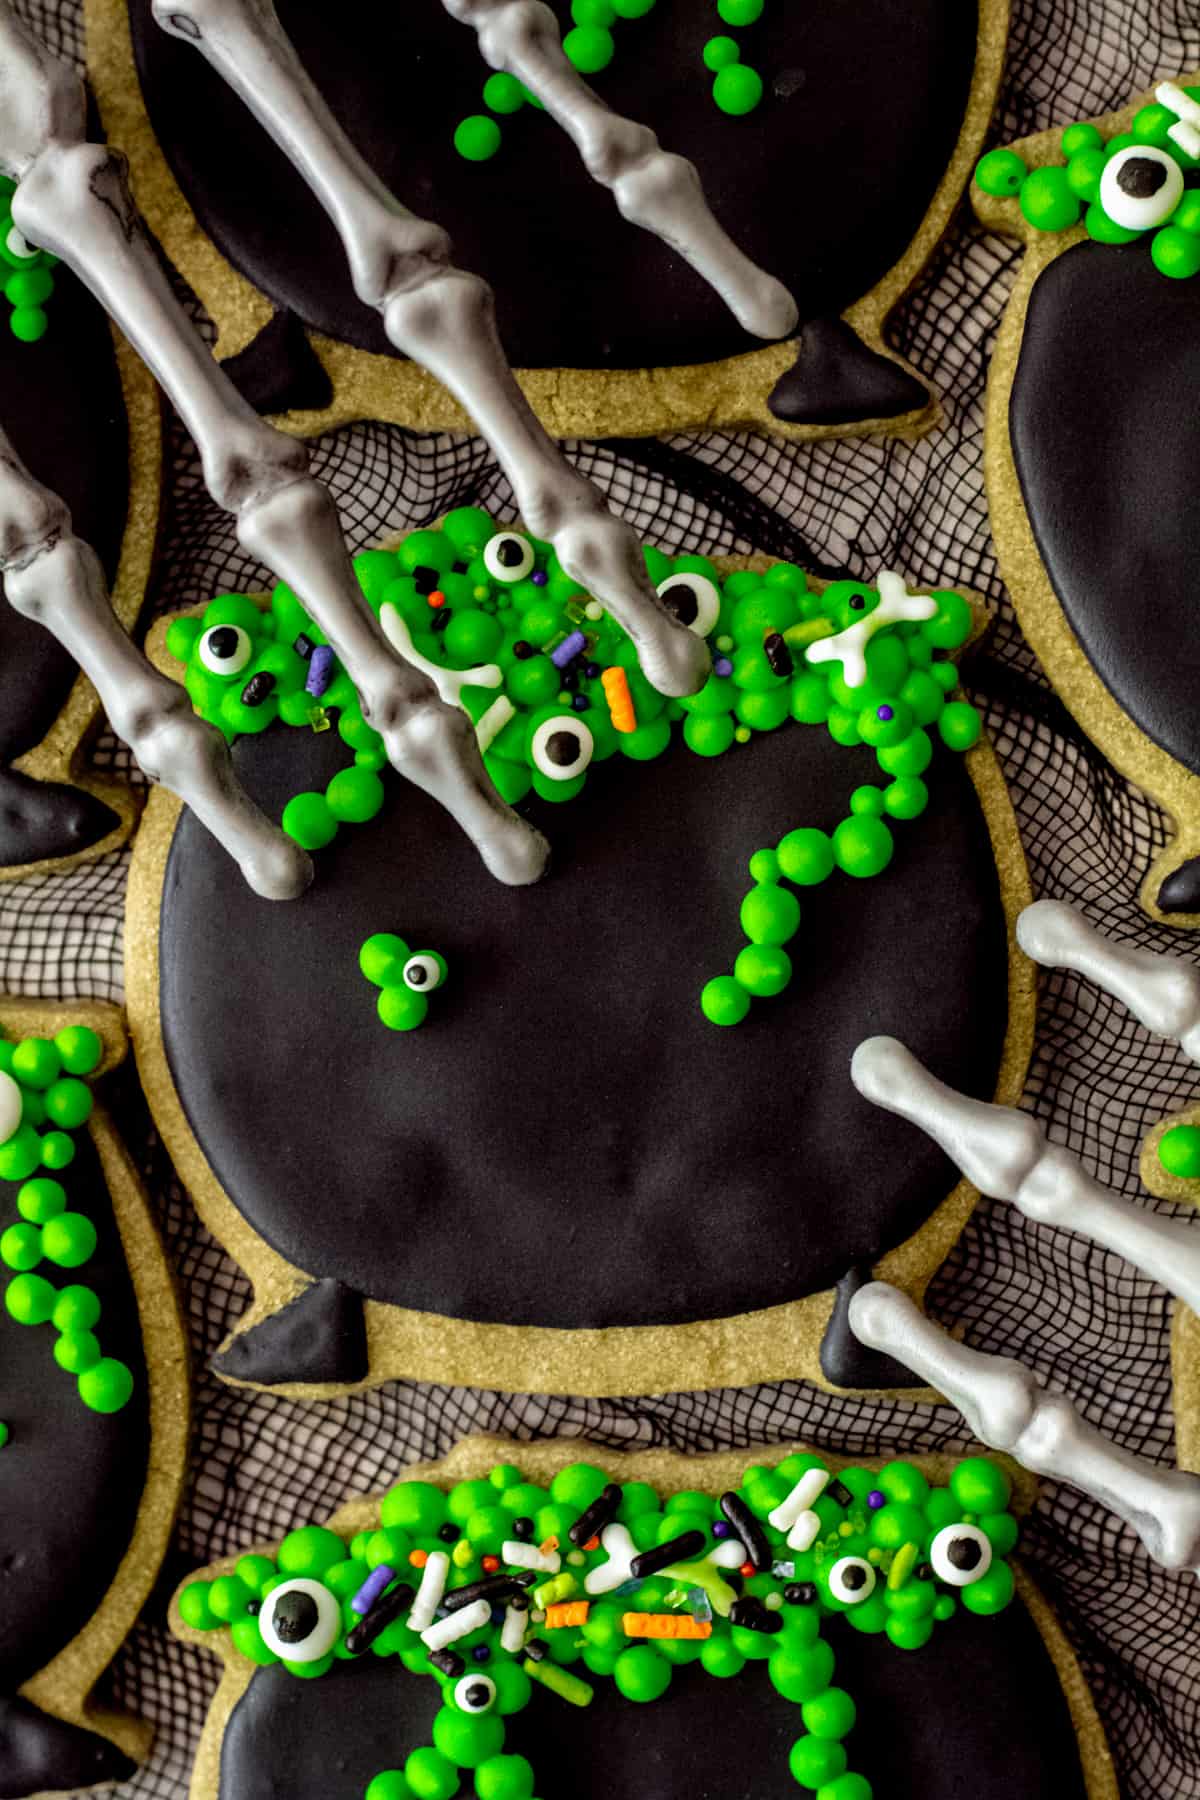
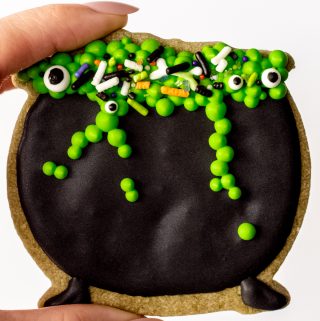
When making these cookies, I thought, what better way to highlight a green cookie than with a Halloween theme decoration. This witchy cauldron cookie with glowy green potion bubbles with some sugar eyeballs, bones and sprinkles. But the options to decorate these cookies are endless.
Jump to:
What is Matcha?
Matcha is a high-quality green tea ground into powdered form. Matcha is a green tea that is known for being a powerful antioxidant, with a lot of health benefits. With traditional green tea, the leaves are steeped in hot water, but with matcha, the dried leaves are actually ground into a powder and mixed with water or a drink. The tea has a unique, smooth, grassy taste and bright green color and is known for being the most aromatic form of green tea. Matcha is very important and ceremonial in Japanese culture, but is also popular around the world and used in drinks, like lattes, lemonades, and boba tea and as a baking ingredient in everything from donuts, cakes, and cookies to ice creams and candy.
Why You Will Love This Recipe
- These cookies don't lose their shape when baking.
- Matcha green tea is nutty, fresh, and earthy and tastes amazing in these buttery cut out cookies. The flavor and sweetness of the cookie is so good topped with icing or buttercream.
- This cookie dough is easy to roll and cut out.
- The matcha can be increased or decreased to taste.
- Cookies are crisp on the outside and softer towards the center, just like a sugar cookie should be.
Recipe Ingredients
All purpose flour
Matcha tea - culinary grade.
Fine sea salt
Unsalted butter
Granulated sugar
Egg
Vanilla extract
Almond extract - Just a small amount to compliment the matcha tea flavor.
Recipe Instructions
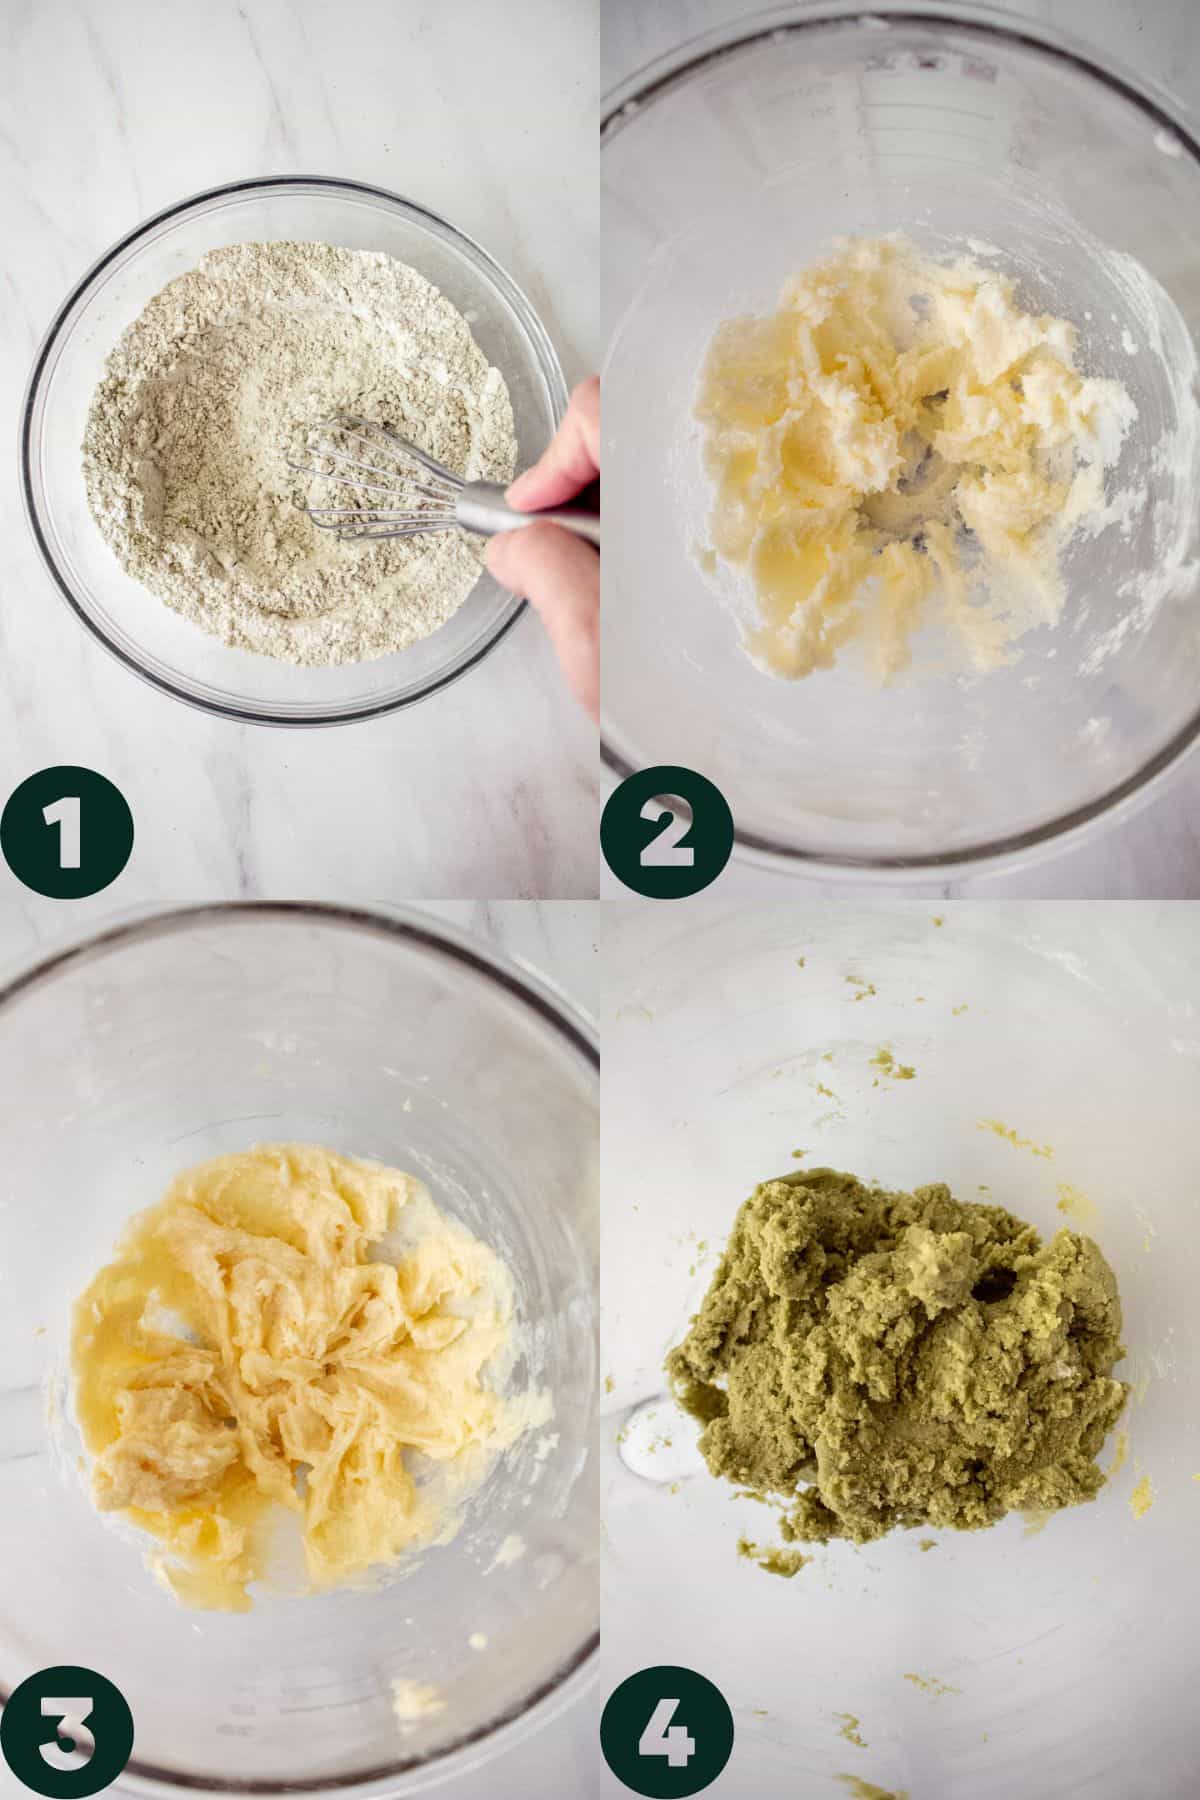
- Whisk together the flour, matcha and salt.
- Beat together the butter and sugar until well combined.
- Beat in the egg, vanilla and almond extract.
- Beat in the flour mixture until just combined.
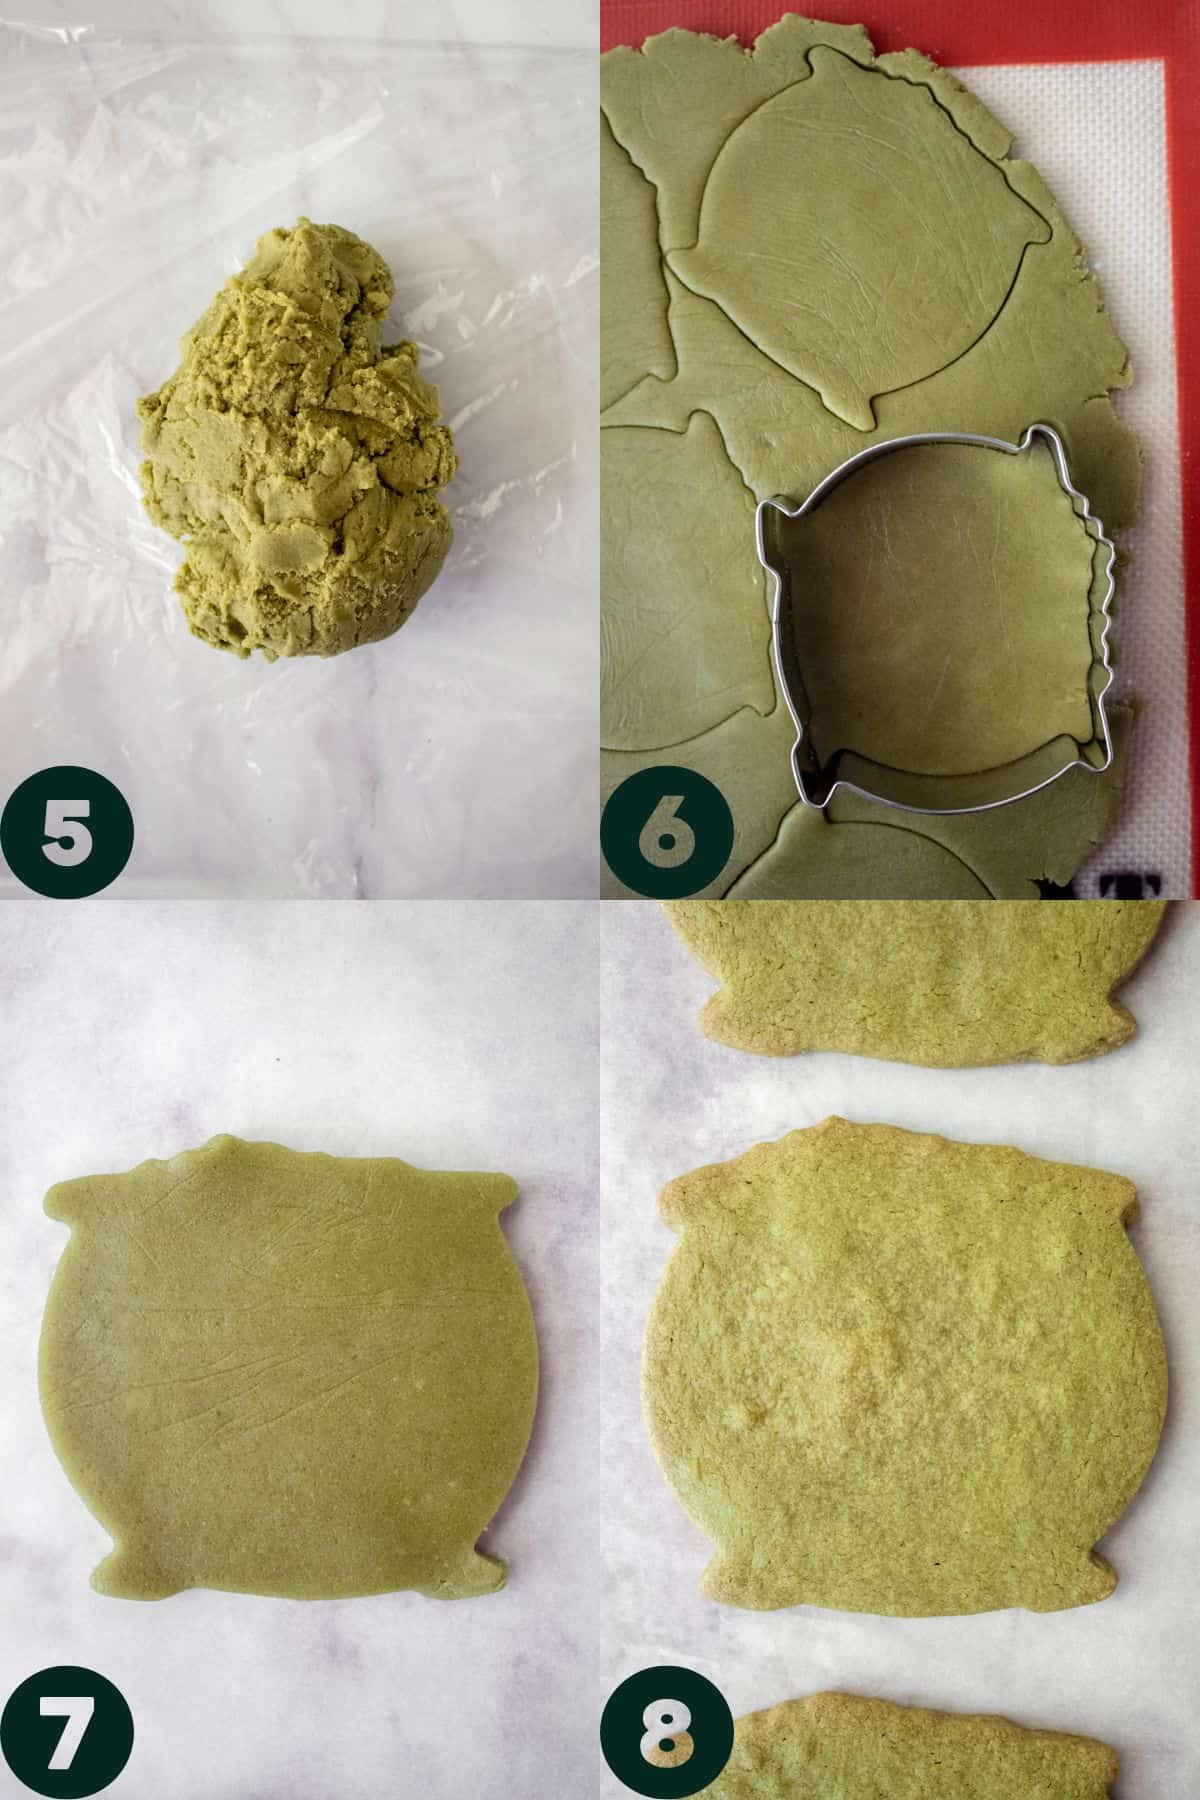
- Turn the dough out onto a work surface sprinkled lightly with confectioner's sugar. Pat the dough into a disc shape. Wrap tightly with plastic wrap and place in the refrigerator for at least 30 minutes.
Preheat the oven to 350F. Line two cookie sheets with parchment paper.
- Roll out the dough to ⅛" - ¼" thick. The thinner the cookie the crispier it will be after baking. ¼ inch is best for softer cookies
- Cut out desired shapes and place the cookies 2" apart on the cookie sheets. Chill for 30 minutes.
- Bake the cookies for 15 minutes, or until the edges start to start to turn golden. Cool completely before icing.
Decorating Supplies
Royal icing - ½ of batch of prepared royal icing, 15 second consistency, colored black, bright green
Toothpick or scribe tool
Piping tips 2 - #2 piping tips (optional)
Couplers - 2 (optional)
Piping bags - 2
*Piping tips and couplers are optional. You can decorate these without piping tips and tumblers if you have tip-less piping bags.*
Decorating Instructions
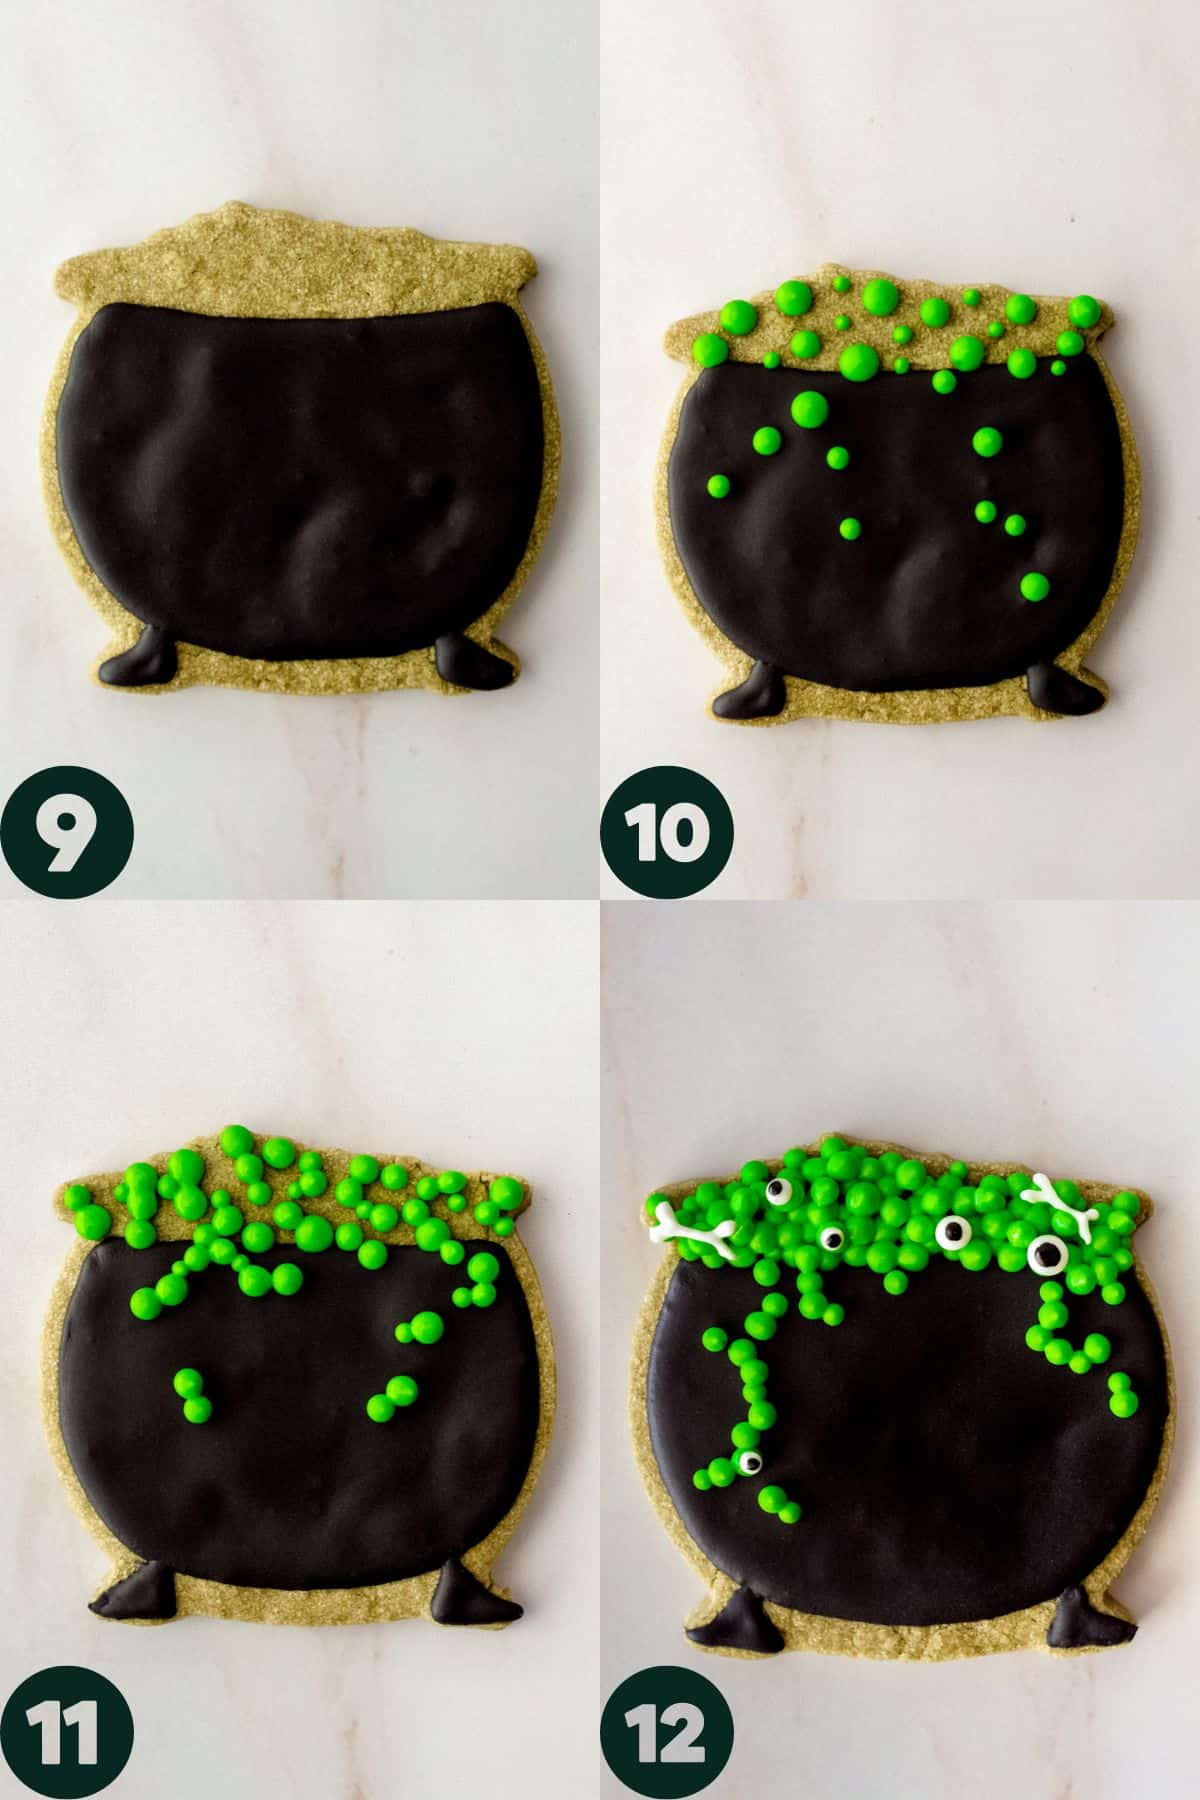
- To give these cauldrons a used, dinged up look just to kind of make them look old and witchy, outline the cauldron shape on the cookie with black icing. Fill the outline with black icing (#2 piping tip), leaving some areas more sparse than others. This will give the icing an uneven look when they're completely filled in with icing. If you want a more solid look not-so-banged-up look, flood the cookie evenly and wiggle it back and forth on your work surface to even out the icing. Pipe "feet" onto the cauldron and fill with black icing.
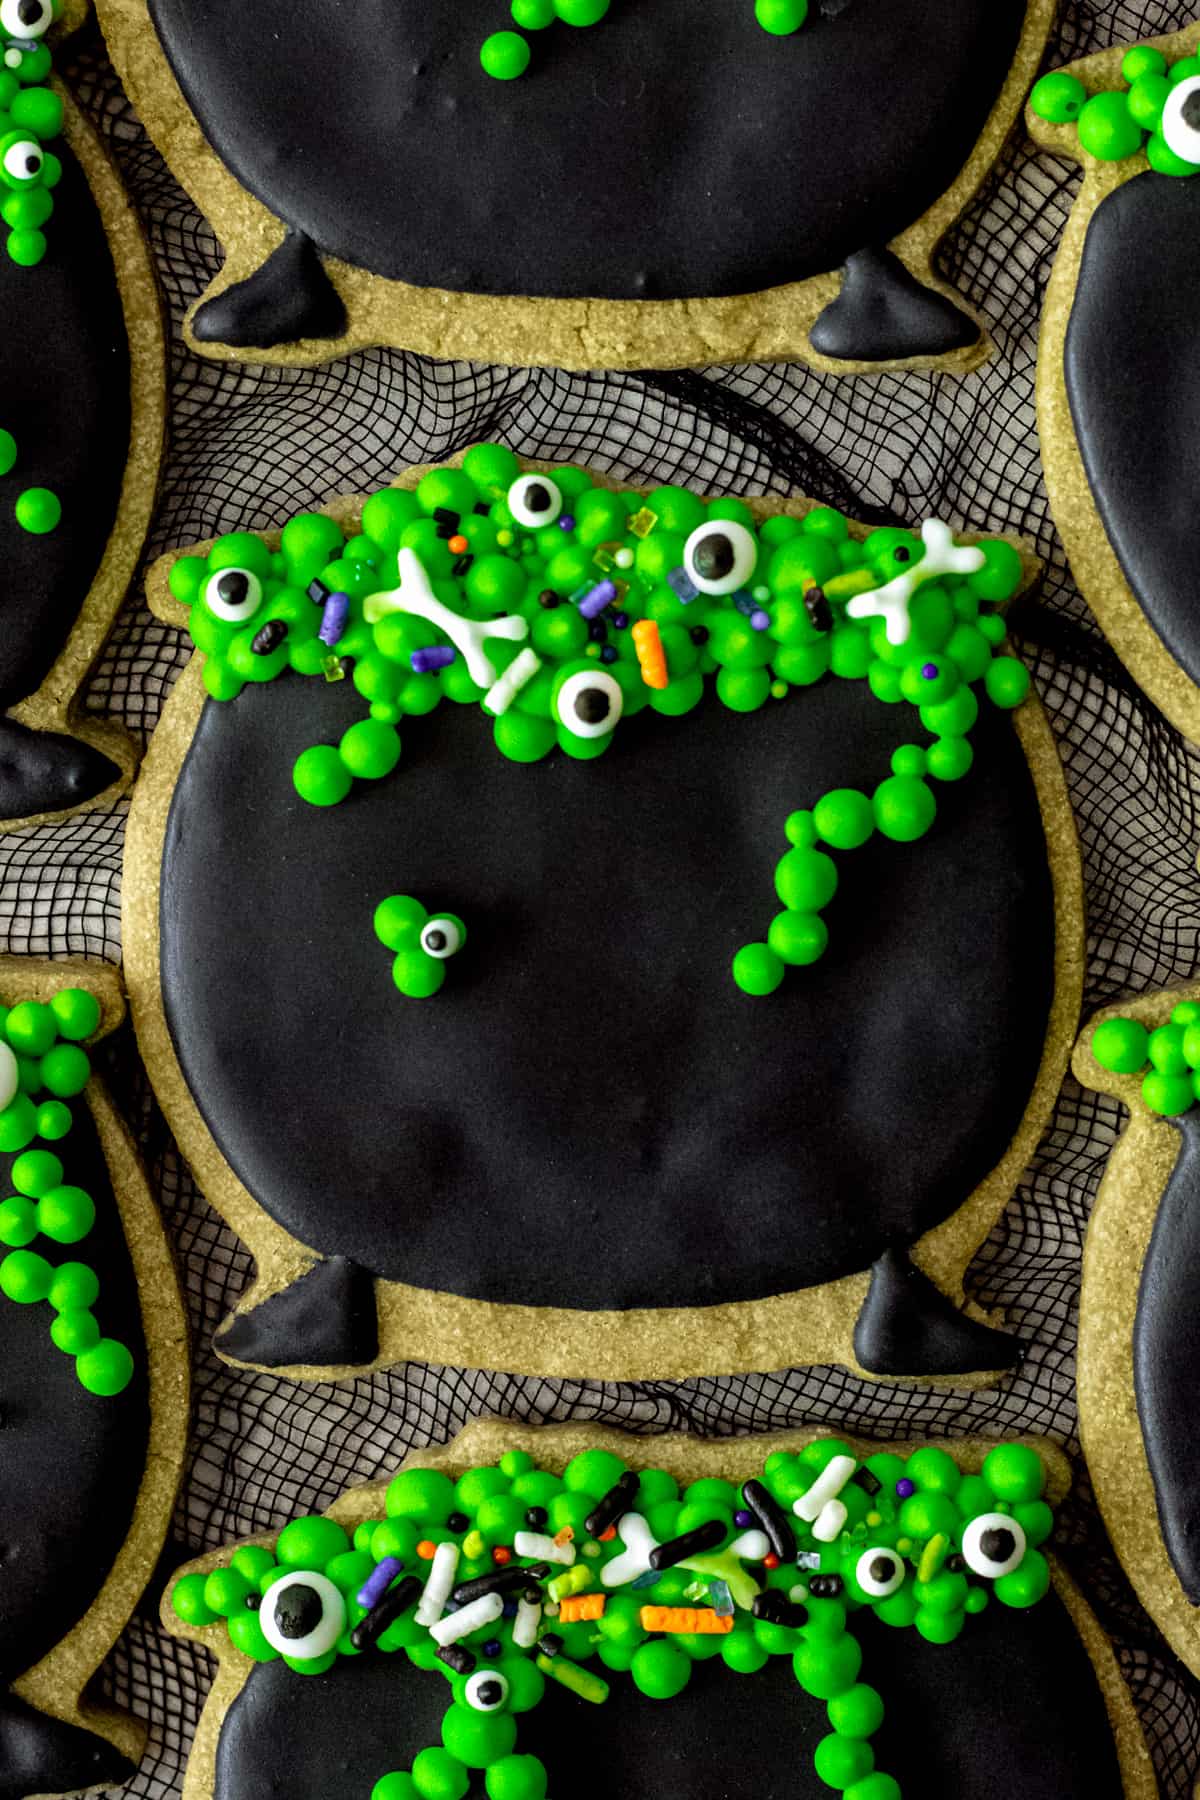
- Once the black icing has mostly dried, with a piping bag fitted with a #2 tip, pipe the bubbles. Pipe various sized dots along the top area of the cookie, with some also on the cauldron pot. Be sure the dots do not touch otherwise they will run together.
- Wait for the bubbles to crust over and dry a bit, then add a second layer. Repeat this step 2 or 3 more times.
- While the dots are still wet, place the eyeball and bone sprinkles, followed by Halloween themed sprinkles. Let the cookies dry completely before storing and packaging.
Expert Tips
- Beat together the butter and sugar until just combined. Overbeating can cause the cookies to puff up or distort when baking.
- Rolling the cookies between two pieces of parchment paper makes clean up easier and keeps the dough from sticking.
- For a brighter green cookie color, add a couple drops of leaf green gel color to the dough.
- You can make the candy bones and eyeballs using white royal icing. To make the eyes pipe different small sized rounds on a parchment paper. Keep them small but varying in size. Let them dry completely, then use an edible marker or black gel food color to paint the black centers. To make the bones, use a #1 tip to pipe a "Y" shape, then pipe an upside down "V" on the bottom of the Y. Let them dry completely.
Storage and Freezing
Cookie dough can be kept in the fridge for up to two days. Dough and unbaked cookie cut outs can also be frozen for up to three months.
Unfrosted, baked cookies can be frozen for up to three months.
Frosted cookies can be left at room temperature for up to 2-3 weeks. These cookies are perfect for bagging individually once iced, for party favors or gifts.
I don't recommend freezing decorated cookies.
Recipe FAQs
10-12 large 3"- 4" cookies or 25 - small 2"-2.5" cookies
For smaller cookies, reduce the baking time to 8-10 minutes.
Matcha green tea powder can be found in most grocery stores and online. There are to different grades - ceremonial and culinary grade. Culinary grade is less expensive, with a slightly lower quality than ceremonial grade. Culinary grade is used most often in drinks, baking and cooking. Ceremonial grade is super high quality, used in Japanese tea ceremonies and meant to be consumed on its own.
Did you make this recipe? Share it with us! Tag @littlevintagebaking on Instagram and leave a star rating below if you LOVED this recipe. For more baking and decorating ideas follow me on Pinterest.
More Cookie Recipes to Try

Recipe
Matcha Sugar Cookies
Equipment
- Electric Stand Mixer (or hand mixer)
Ingredients
- 2 ½ cups all purpose flour
- 2 tablespoons matcha tea
- ½ teaspoon fine sea salt
- 1 cup unsalted butter, room temperature
- 1 ⅓ cup granulated sugar
- 1 large egg, room temperature
- 2 teaspoons pure vanilla extract
- ⅛ teaspoon almond extract
- ½ batch Royal icing
Instructions
- In a medium bowl, whisk together the flour, matcha and salt until combined. Set aside.2 ½ cups all purpose flour, 2 tablespoons matcha tea, ½ teaspoon fine sea salt
- In the bowl of a stand mixer fitted with the paddle attachment, beat together the butter and sugar until thoroughly combined.1 cup unsalted butter, room temperature, 1 ⅓ cup granulated sugar
- Add the egg, followed by the vanilla and almond extracts beating until just combined.1 large egg, room temperature, 2 teaspoons pure vanilla extract, ⅛ teaspoon almond extract
- Scrape down the bowl. With the mixer on low speed, gradually add the flour and beat until just combined.
- Turn the dough out onto a work surface sprinkled lightly with confectioner's sugar. Pat the dough into a disc shape.
- Wrap tightly with plastic wrap and place in the refrigerator for at least 30 minutes.
- Preheat the oven to 350F. Line two cookie sheets with parchment paper.
- Place the chilled dough on a work surface that has been sprinkled with confectioner's sugar. Sprinkle the top of the dough and the rolling pin lightly with confectioner's sugar to prevent any sticking.
- Roll out the dough to ⅛-1/4" thick, depending on your preference, rotating the dough as you roll to prevent the dough from sticking.
- Cut out desired shapes and place the cookies 2" apart on the cookie sheets.
- Place the cookie sheets into the refrigerator for 20-30 minutes to chill.
- Bake the cookies for 15-20 minutes. Rotate the cookie sheets, halfway through baking. You're looking for the cookies to be soft when touched in the center, but fully cooked. Baking the cookies longer will result in a crispier cookie while baking them to just cooked will keep them soft.
- Let the cookies cool on the cookie sheets for 10 minutes, before transferring them to a cooling rack to cool completely before decorating.½ batch Royal icing
Comments
No Comments