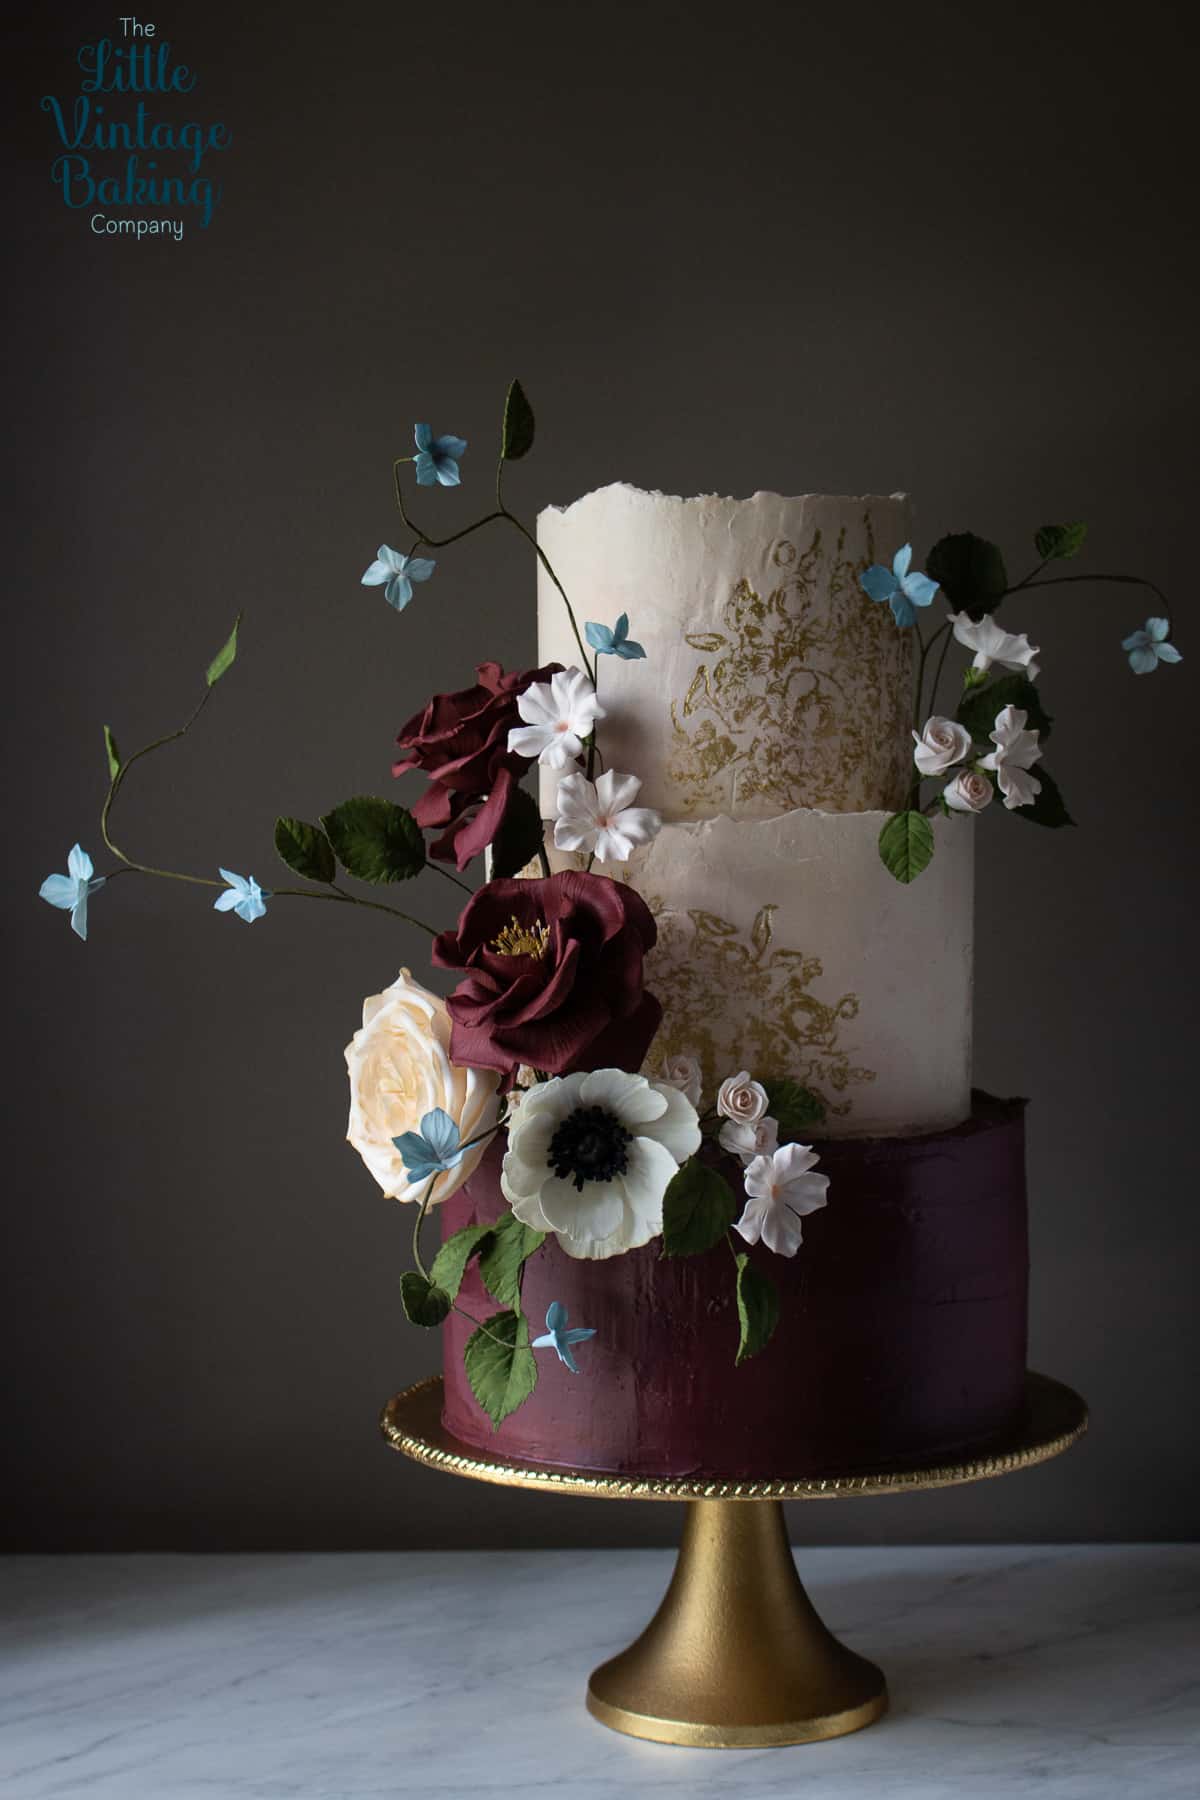
After working with mostly fondant over the years, I've been playing around with buttercream a lot lately, and I'm loving it. I love the messy nature of buttercream, where flaws and rustic application can make a design look stunning. Buttercream doesn't take itself too seriously. It's delicious and adaptable, and wild like nature, imperfect, and more often than not, celebrated for its messiness. Perfectly iced buttercream cakes won't be found in this post - in a different post another time, I'm sure. And so, I've created this buttercream beauty for a giveaway with Iron Orchid Designs over on my Instagram feed. I know you guys have heard me talk about these fab products before, but this time, I'm using them on buttercream. My vintage gilded buttercream cake incorporates easy and fast buttercream techniques that can be adapted to almost any buttercream cake design.
How to create rough edge buttercream
The color of this bottom tier is one of my favorites. I'm obsessed with this wine color buttercream. I have made this color plenty of times using gum paste, and I wanted to recreate the color to use as the bottom tier of my cake. To color this tier, I used both oil based candy color and gel color. I mixed equal parts of red and purple candy color, and added a touch of black gel color. Mix the purple and red first and let the buttercream develop for a few hours. Check out my post on How to Color Buttercream to see my techniques on how to achieve dark and vibrant colors. Then add a bit of black to just darken the buttercream a few shades. Keep in mind, the buttercream will darken a bit as it sits.
The top two tiers have a base color of dusty cream. To achieve this color, I mixed small, equal amounts of Americolor soft brown and ivory. My ivory gel color has a bit of an orange hue, so I mix the ivory with the soft brown to lessen the warm undertones.
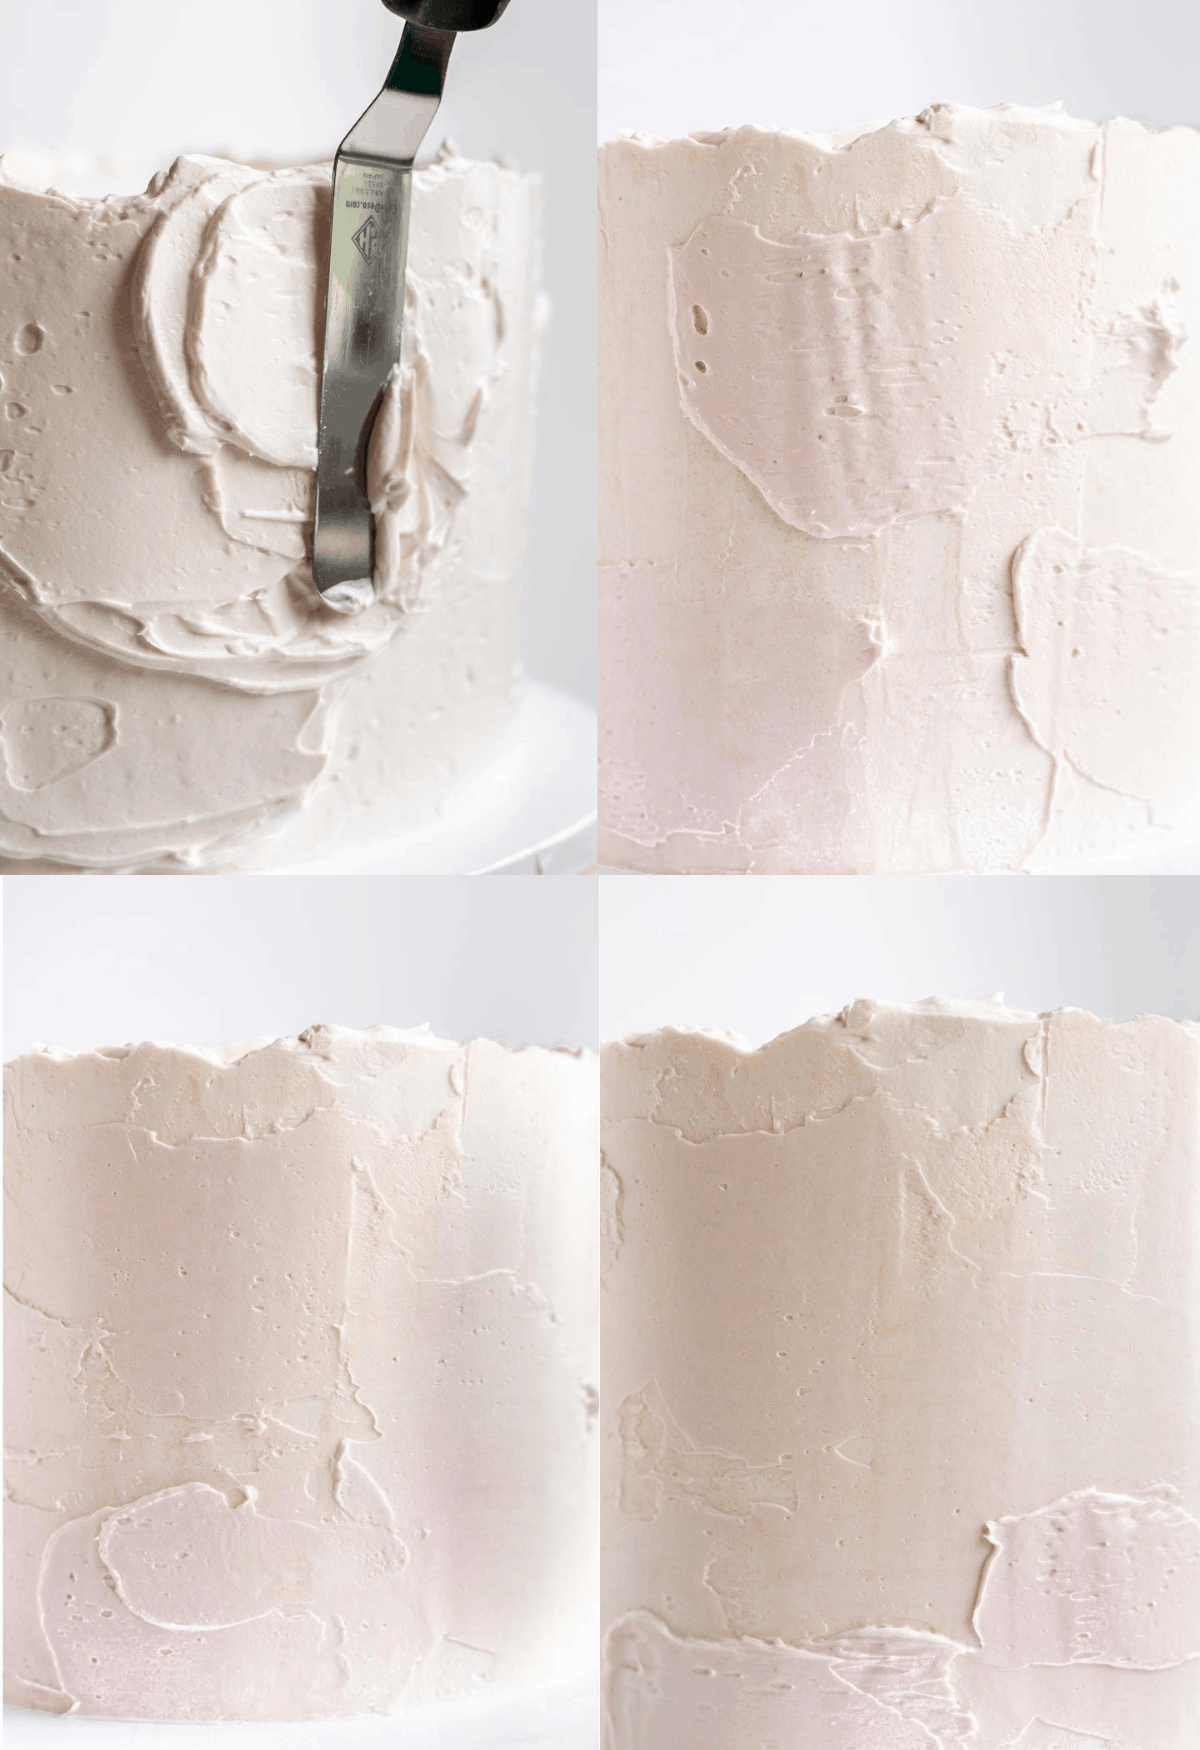
The rough edge buttercream look has been super popular since Megan and Harry's royal wedding cake. It's also super easy to achieve. Rough edged buttercream is a total time saver - no need to use acrylics or the upside down method for a perfectly smooth top.
After filling and crumb coating the cake, chill the cake until it's firm, for a couple hours or so. Smooth buttercream over the top of the cake, smoothing it out past the edges. Coat the sides of the cake with buttercream, layering it on, especially towards the top. How much buttercream you bulk up at the top edges of the cake will determine how tall and thick the rough edges are. Use a bench scraper to scrape off the excess and smooth the sides. Don't worry about perfectly smooth buttercream, as I said before, imperfect is what we're going for in this design. Chill the cakes, only chilling the top two tiers for about 5 minutes. You want the buttercream to set just slightly to keep it in place when adding additional colors on top. You do not want the buttercream to fully set up, as it can change color when scraping the cake. This is particularly true with buttercream based buttercream.
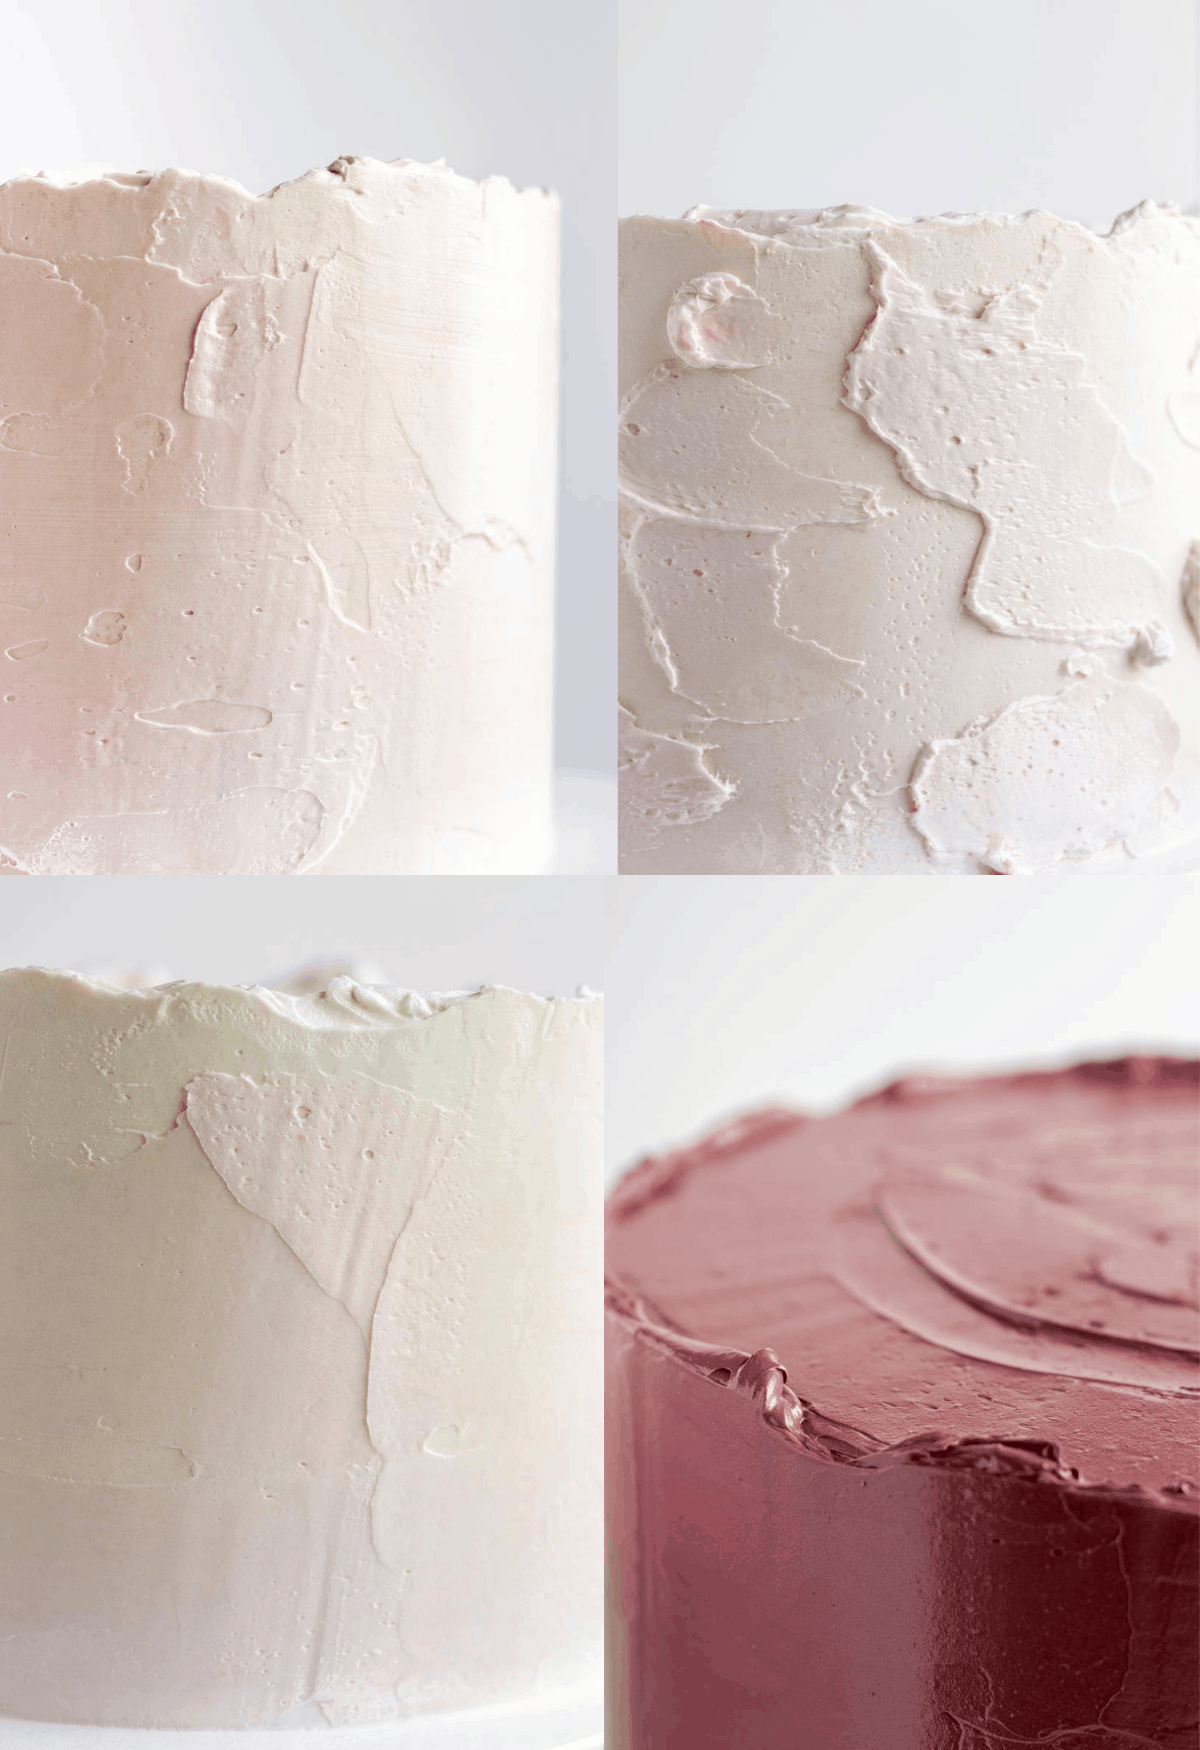
Creating the watercolor buttercream effect
On the top two tiers, under the gold stamped design, is a minimal buttercream watercolor effect. Both shades were created using very little amounts of claret gel color by ProGel. With a small offset spatula or a palette knife, place patches of buttercream around the cake, starting with the darker color. Use a bench scraper to even out the color around the cake. Add the lighter color, then repeat with the darker color until you're satisfied with the color. I chose lighter colors for this cake so that the colors sort of blend together for a minimal, blended watercolor effect.
When choosing colors for the watercolor technique, you want to be sure that the colors look good together and will also blend well. You don't want the colors to mix together and turn strange and unappetizing colors. I like to use buttercream colors that are made with the same combination of gel colors, or colors that are made by combining different buttercream colors together. Chill the watercolor cakes until the buttercream is firm. The buttercream needs to be thoroughly cold in order to stamp the pattern onto the cake, otherwise the buttercream will stick to the stamp, or squish out the sides.

Creating the vintage stamped effect
The stamp set that I used is the rose toile stamp from Iron Orchid Designs. I also used a craft brayer roller, mine is from Iron Orchid, but this one works well too. You will need parchment paper, or wax paper, and gold edible paint. I recommend this one, or you can create a gold paint with edible gold dust and a clear alcohol. If you choose to make your own, you will need more than half of a small pot of gold dust. Mix the alcohol with the dust until you it's a thicker liquid. It needs to be thick enough to coat the stamp, but thin enough to be able to easy transfer to the cake.
Roll the craft roller through the edible paint. Roll off any excess, then roll over the stamp to coat. Do not saturate the stamp so that's dripping, but ensure that the stamp is damp with color. Carefully lift the stamp and place against the cake. Carefully, and lightly press to the cake, taking care not to press IN to the cake, though it's likely you will get some pressed in impressions. This is totally ok - it goes with the vintage design. Gently and lightly run your fingers over the stamp to stamp the pattern onto the cake.
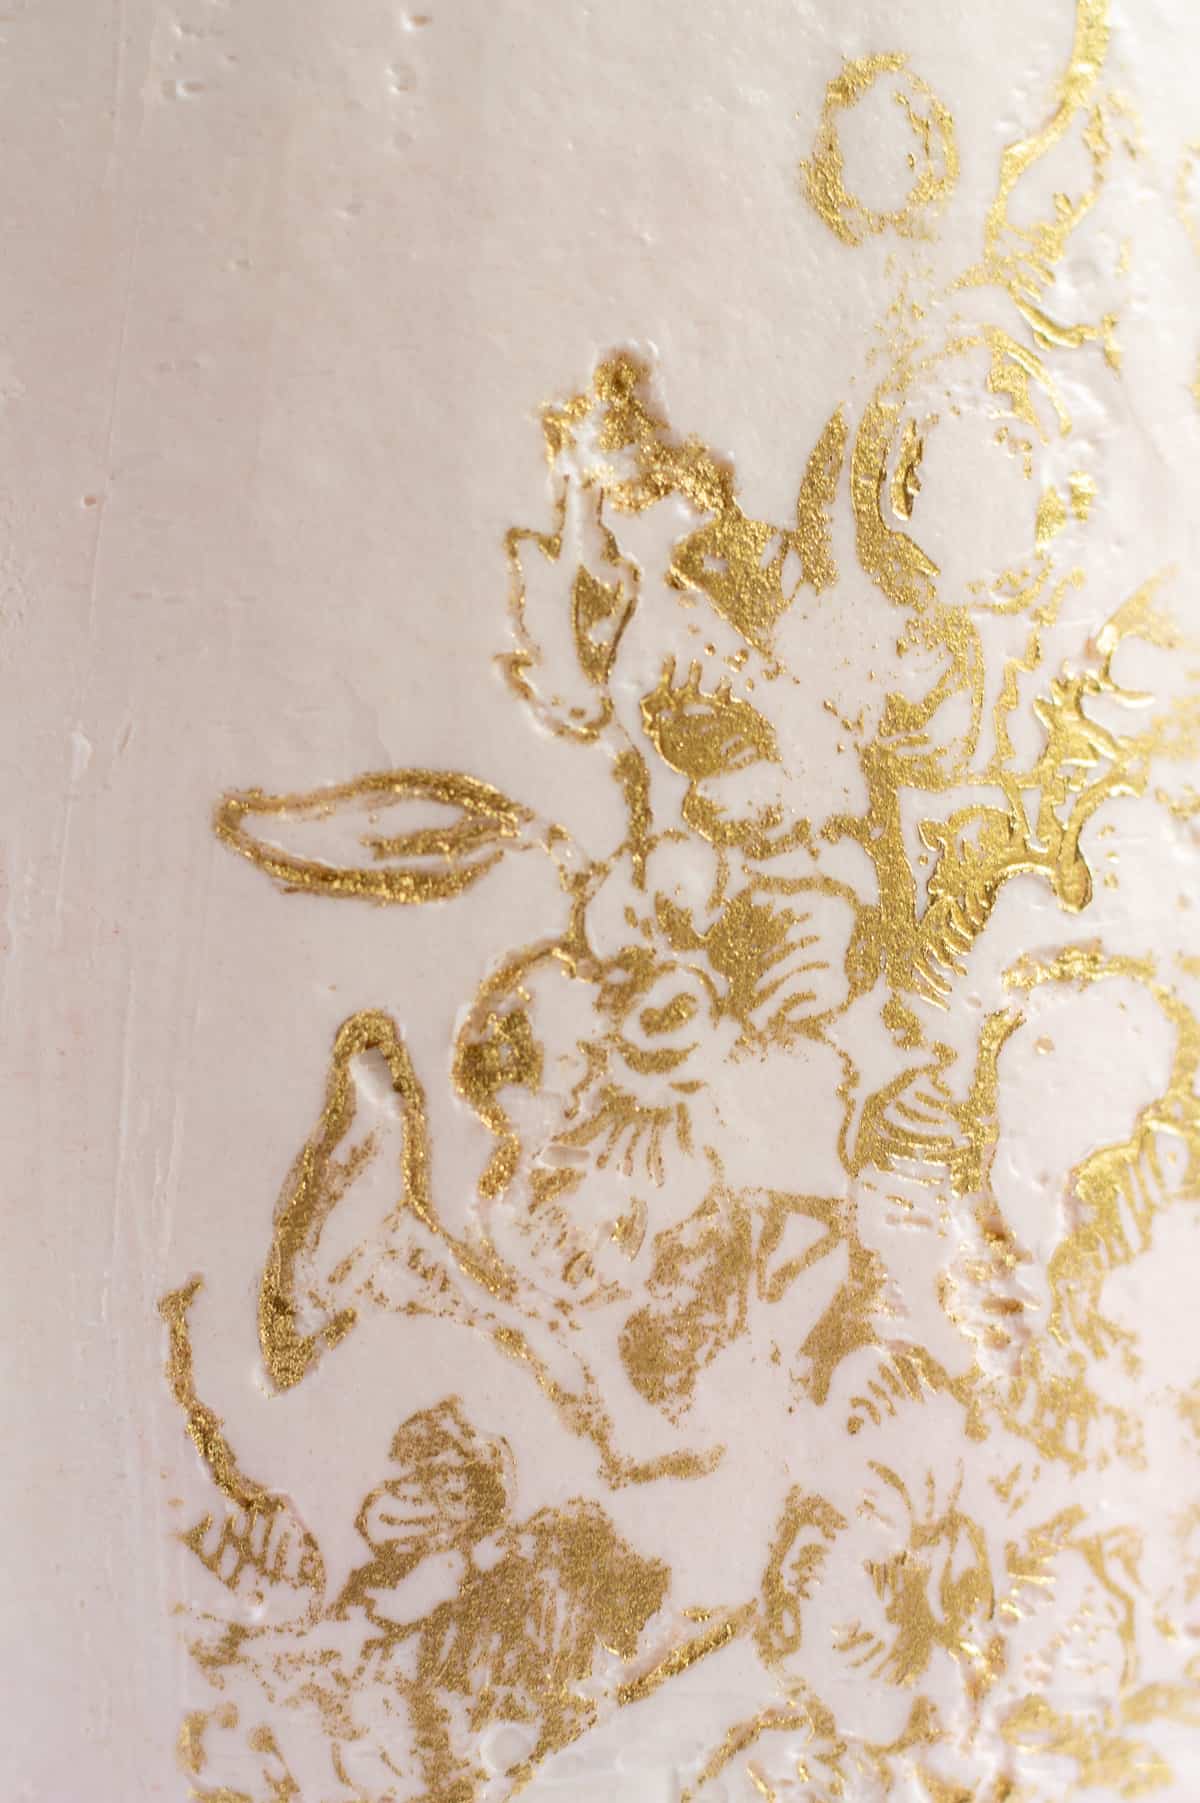
You can also use the roller to roll over the stamp. I use this method when using the stamp on a flat surface, like a cookie, or paneled fondant or if I am trying to achieve full design coverage with the stamp. For this cake, I went with a more aged, almost peeling vintage-y look. I achieved this look by pressing over the stamp in select areas, leaving some spots light or bare. Then take a fine paintbrush and go over any areas you would like darkened, or more filled in.
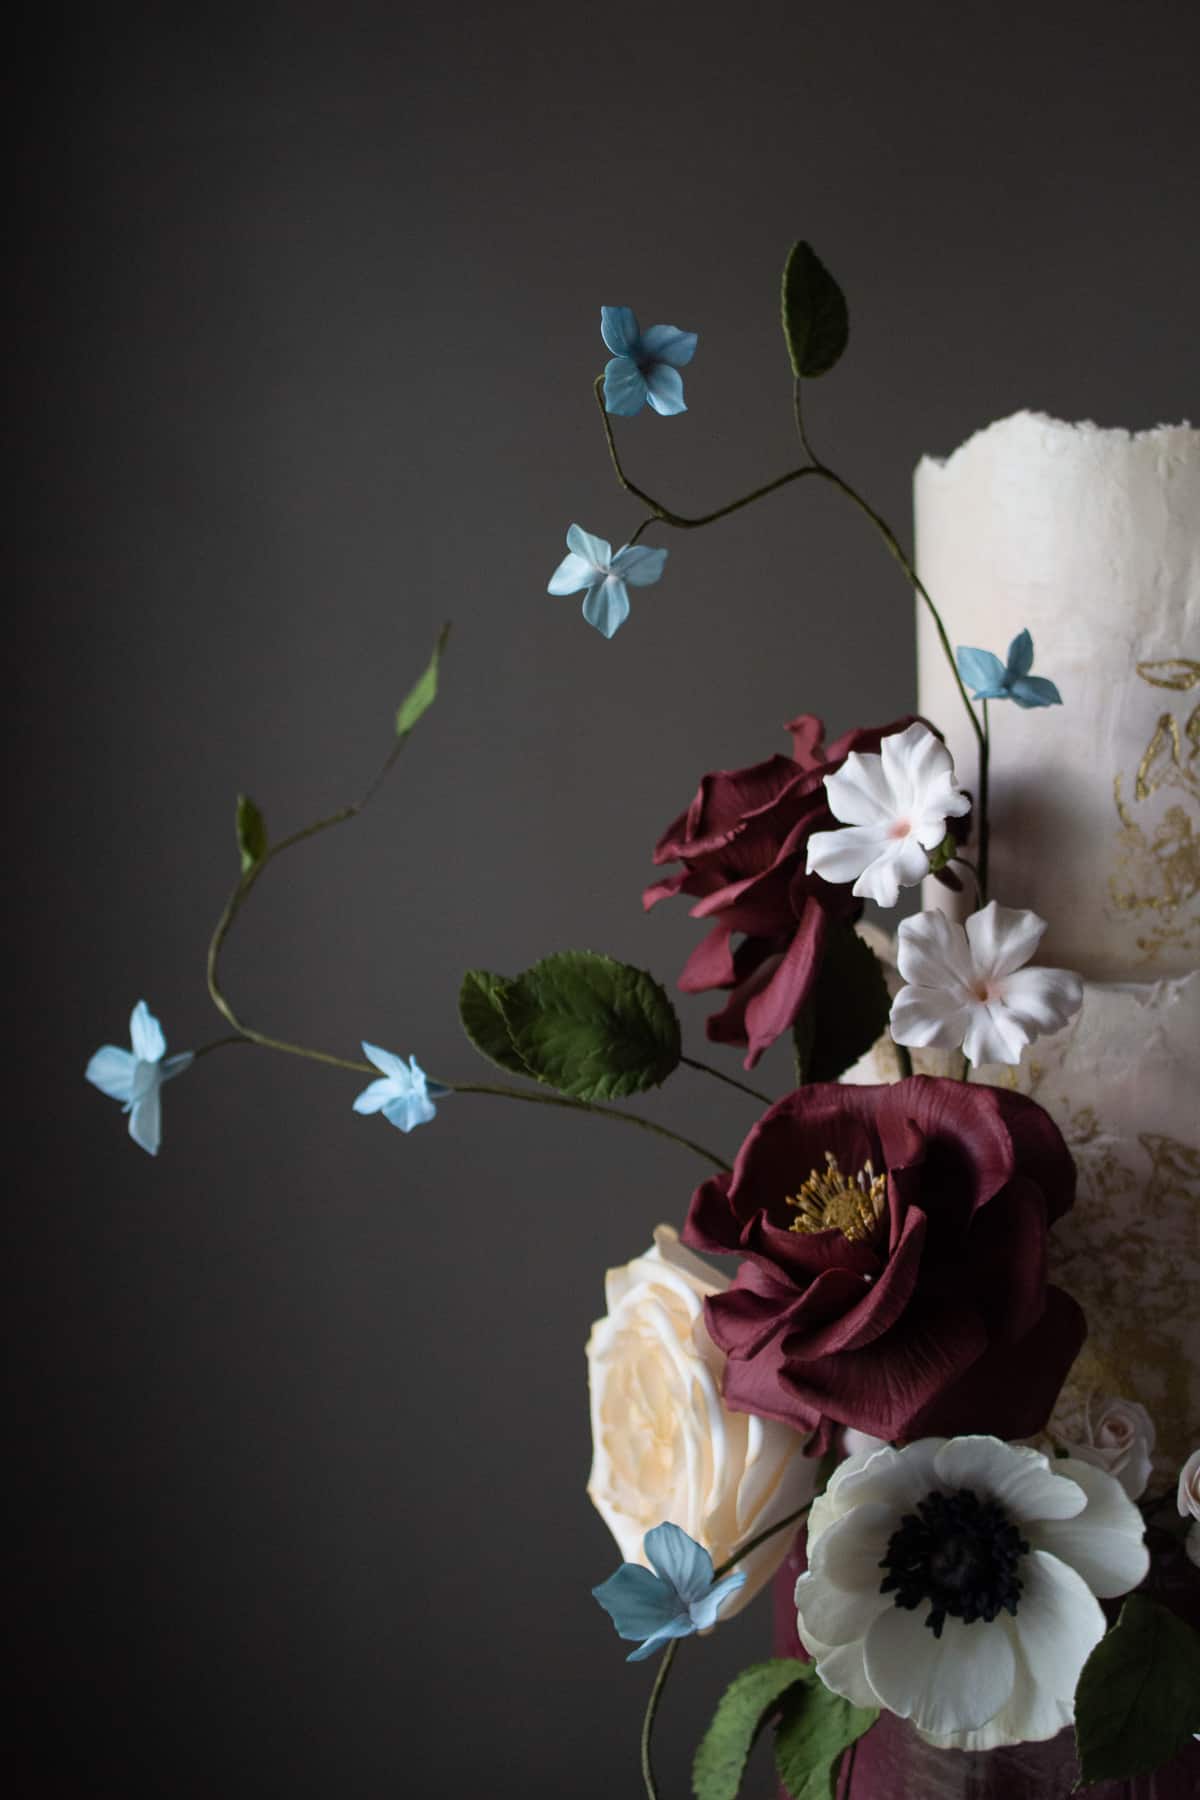
Let the stamped impressions dry before stacking the cakes. After stacking the cakes, add any florals. For this cake, I used gum paste/sugar heirloom roses, anemones, roses, heritage roses, petunias, blossoms, and rose leaves. Use any flowers that compliment your color scheme, or even skip flowers - the cake is beautiful enough on its own!
For more cake tutorials, check out these posts:
Mini Tutorial: Romantic Roses Cake
Mini Tutorial: White on White Baroque Cake
Fon Sprinkle says
I love your page. It’s very useful.