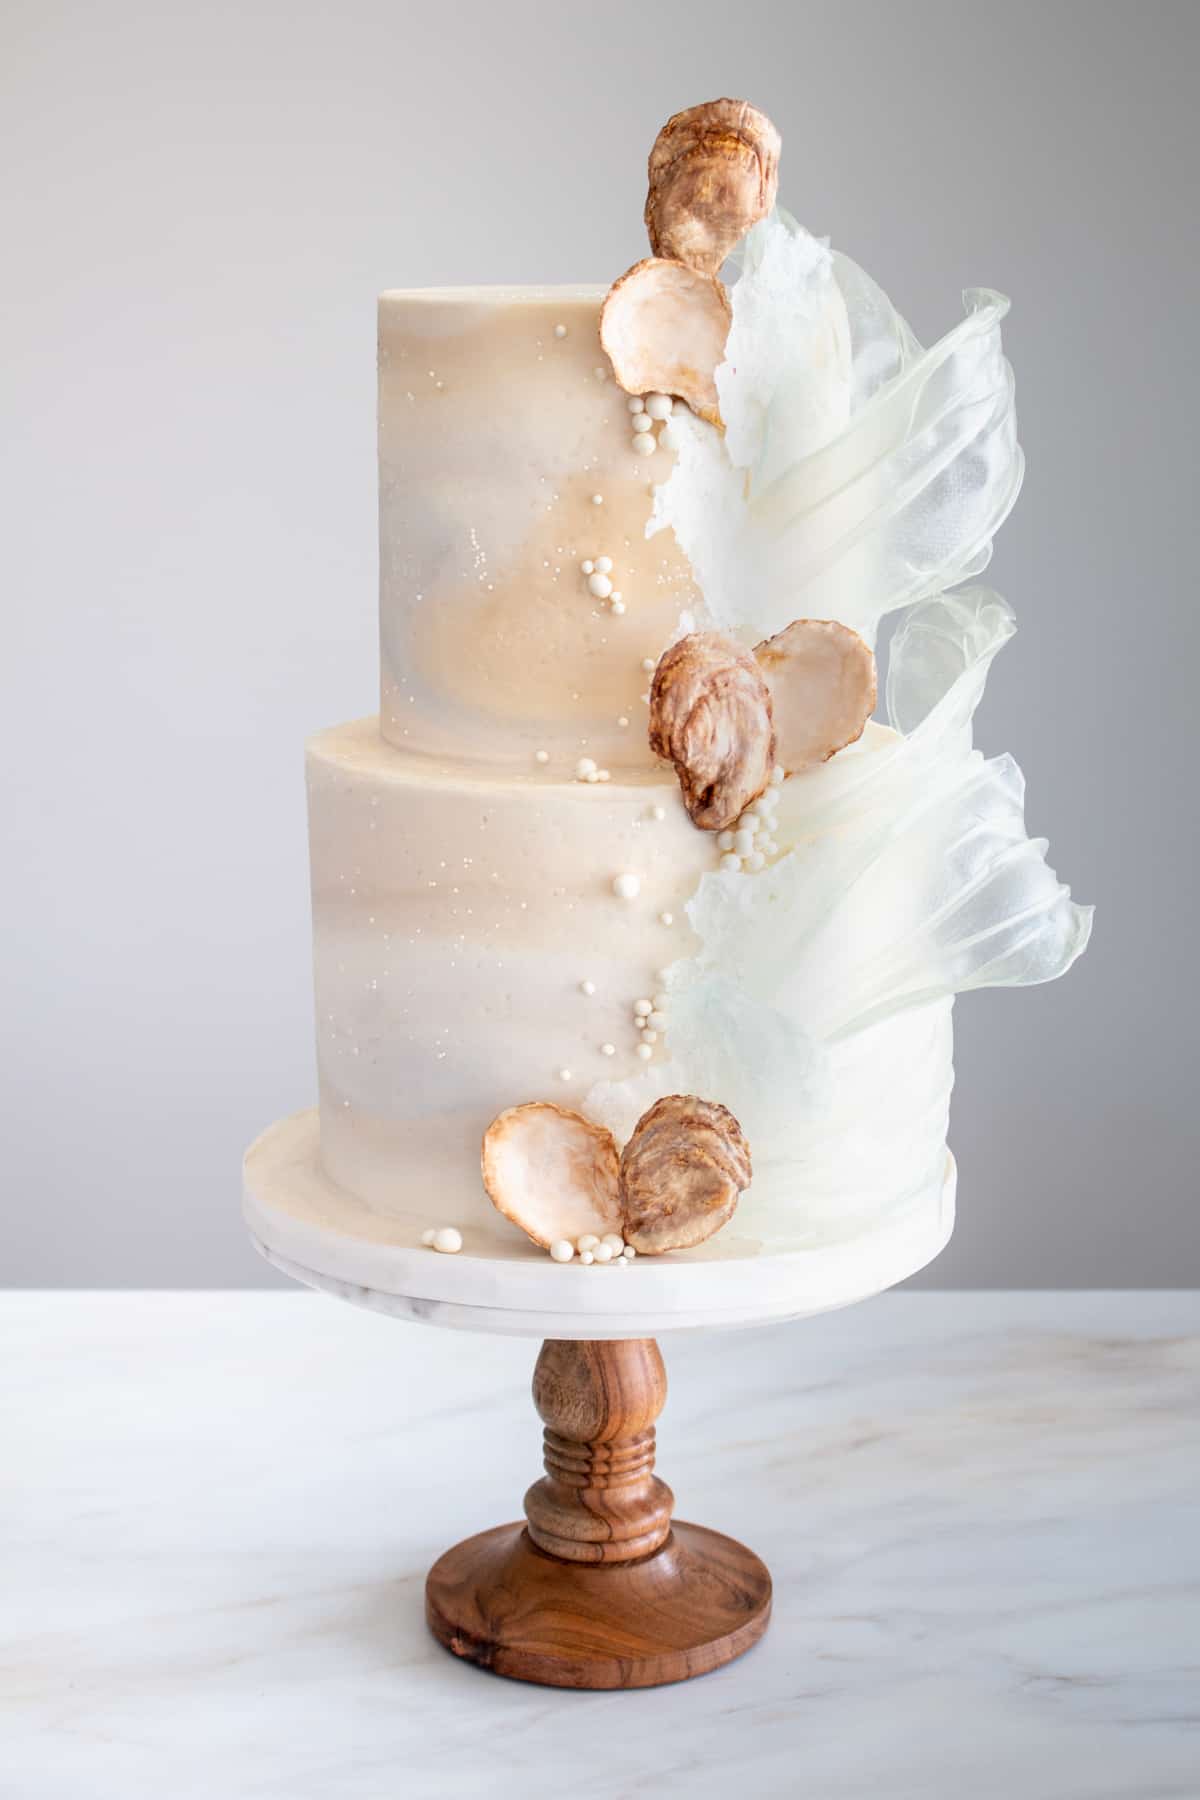
This beach cake is the perfect beachside wedding cake, or birthday cake for someone who loves the ocean, the beach and everything about it. This cake decorating tutorial features multiple techniques that are simpler than they look, including fondant marbling, rice paper waves, wafer paper sea foam, sugar pearls and realistic oyster shells.
What is Rice Paper?
Rice paper is made out of tapioca starch, rice flour, and salt. It is the same rice paper that is used to make spring rolls. Rice paper is translucent and has a specific criss cross patter on it. To make it flexible for shaping, it needs to soak in water. Once soft, it can be shaped to make waves, sails and other decorations. Rice paper is fairly inexpensive and can be found in most grocery stores and online.
What is Wafer Paper?
Wafer paper is a starched based (usually potato starch) edible paper used in cake decorating. It has a very subtle flavor, mostly tasteless and can be eaten. It's seemingly similar to printer or copy paper in texture, but it can be manipulated to make cake decorations and edible flowers. It typically will not spoil, unless exposed to water or humidity, so it will keep for years in a zip top bag.
Jump to:
Supplies
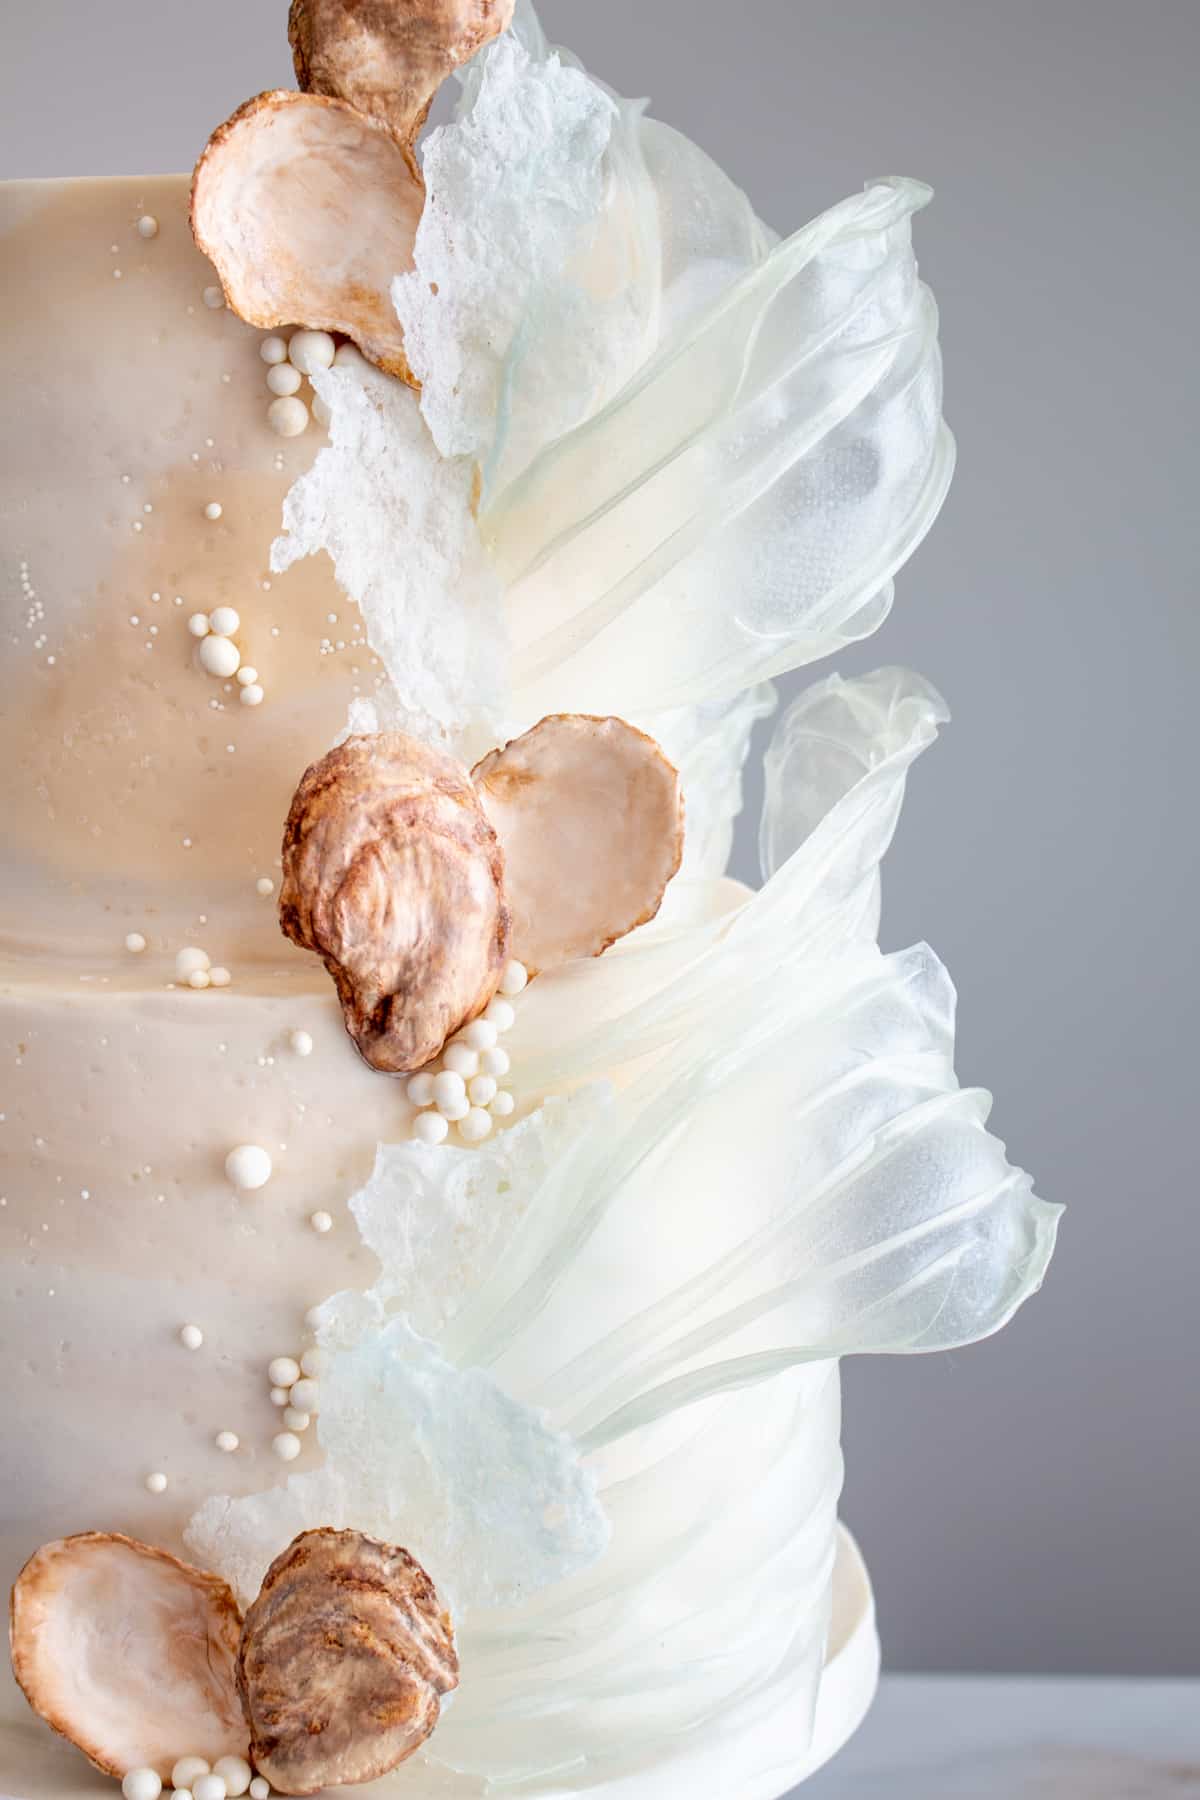
Cake tiers - fully covered in ganache or buttercream (I used a 6x5" and an 8x5" cake.)
Fondant - white, ivory, nude, and light grey
Gel Color - sky blue
Rolling pin
Silicone mats - for rolling fondant and shaping waves (alternatively, you can use wax paper)
Prepared gum paste oyster shells
White chocolate - melted and room temperature
Toothpicks
Freeze spray - optional
Craft tweezers - for applying pearls
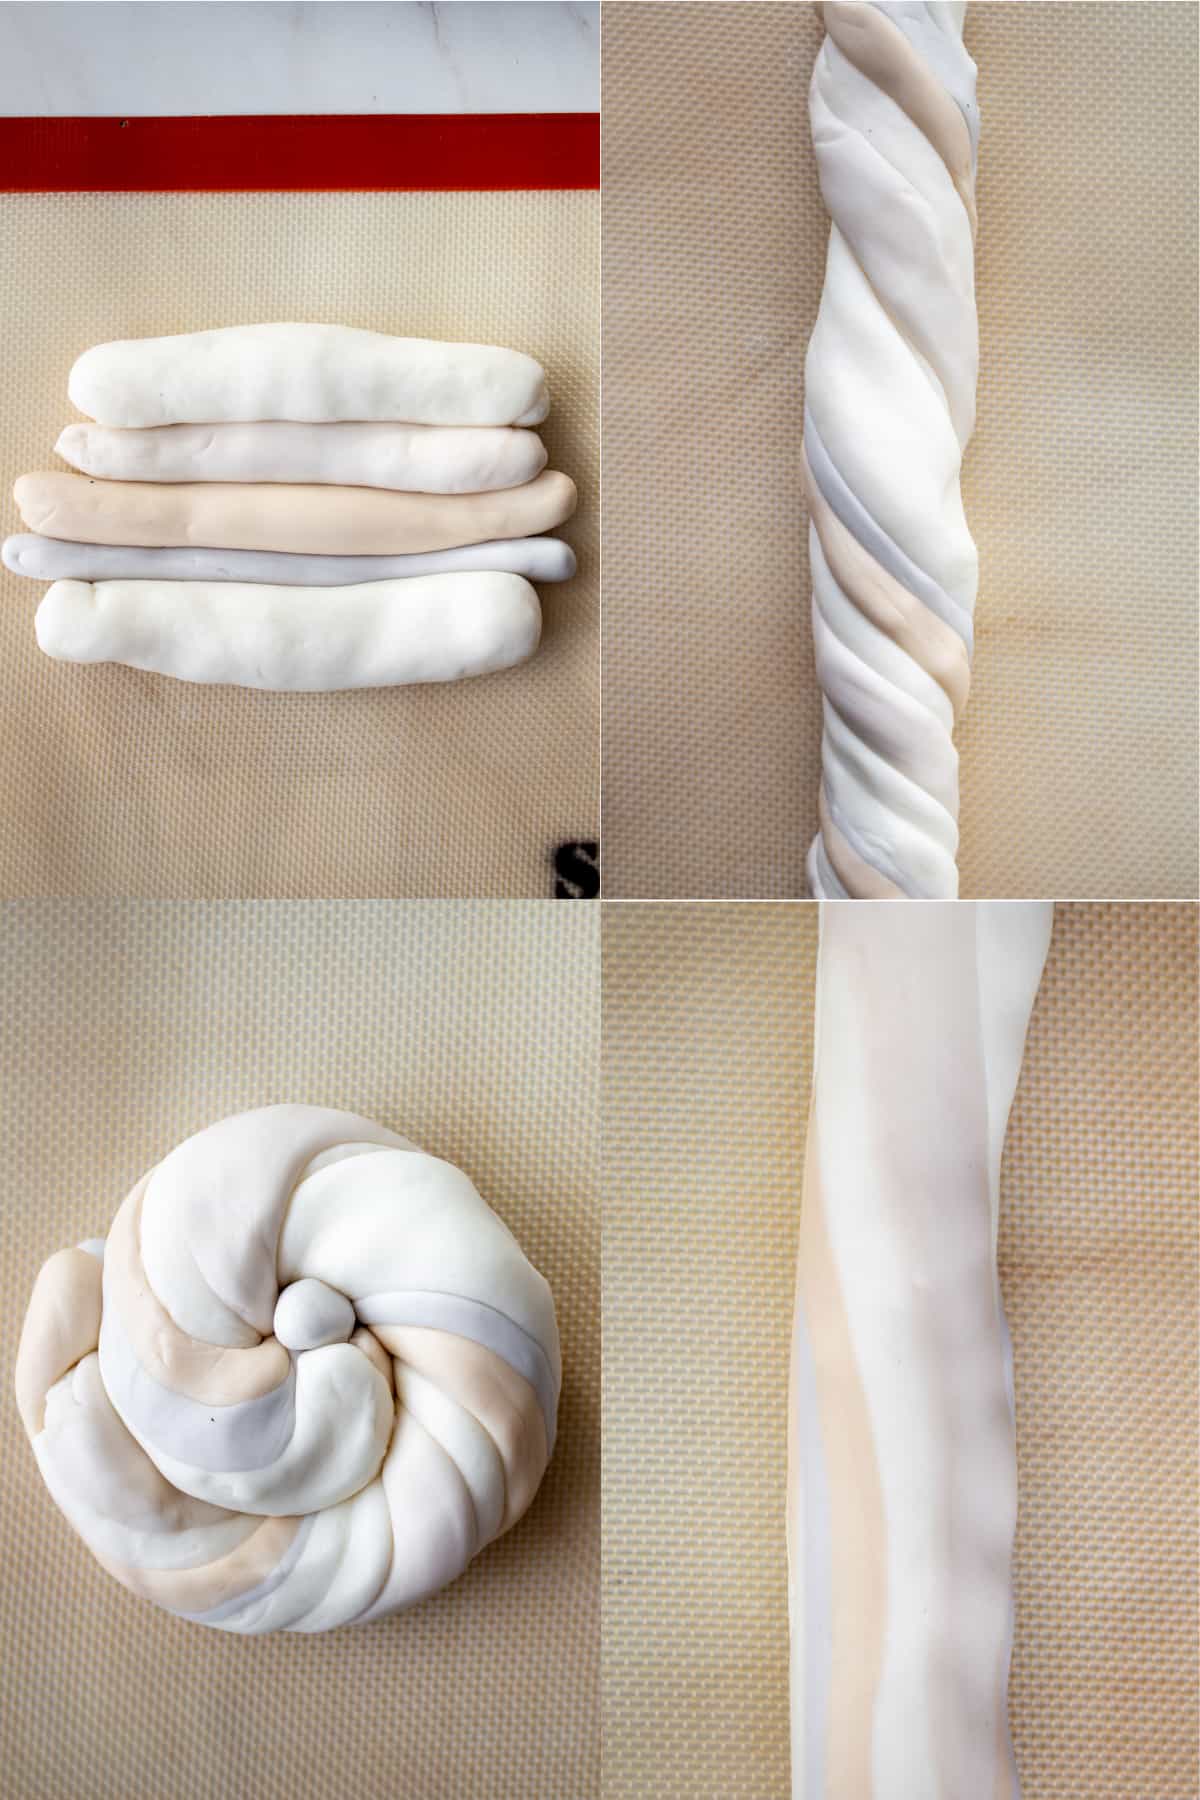
Marbled Fondant
This marbling technique is more of a linear marbling, where the marbling is stacked in lines rather than swirled randomly throughout. For this technique, I recommend you panel your cake. You can also fondant your cakes the traditional way of covering them if paneling is not your thing. The marbled fondant is to resemble sand and the beach.
If you choose to panel your cakes, will need to make a panel for the 6" tier and the 8" tier and also the rounds for tops of both tiers. If you're covering your cake with fondant the traditional way, you'll need about 18 oz for a 6" and 24 oz for an 8".
- Roll out each color into rope shapes and place them tightly together.
- Roll the fondant together to form a long, thick rope. Twist the rope to blend the colors.
- Roll the paste into a snail shape.
- Stretch and lengthen the snail shape and roll into another long, thick rope.
- Once again, roll the fondant into a snail shape.
- Roll the fondant out to fit a 6" panel. Panel the cake with the fondant, do not cut the excess paste off of the top yet. You'll do this after adding the top panel.
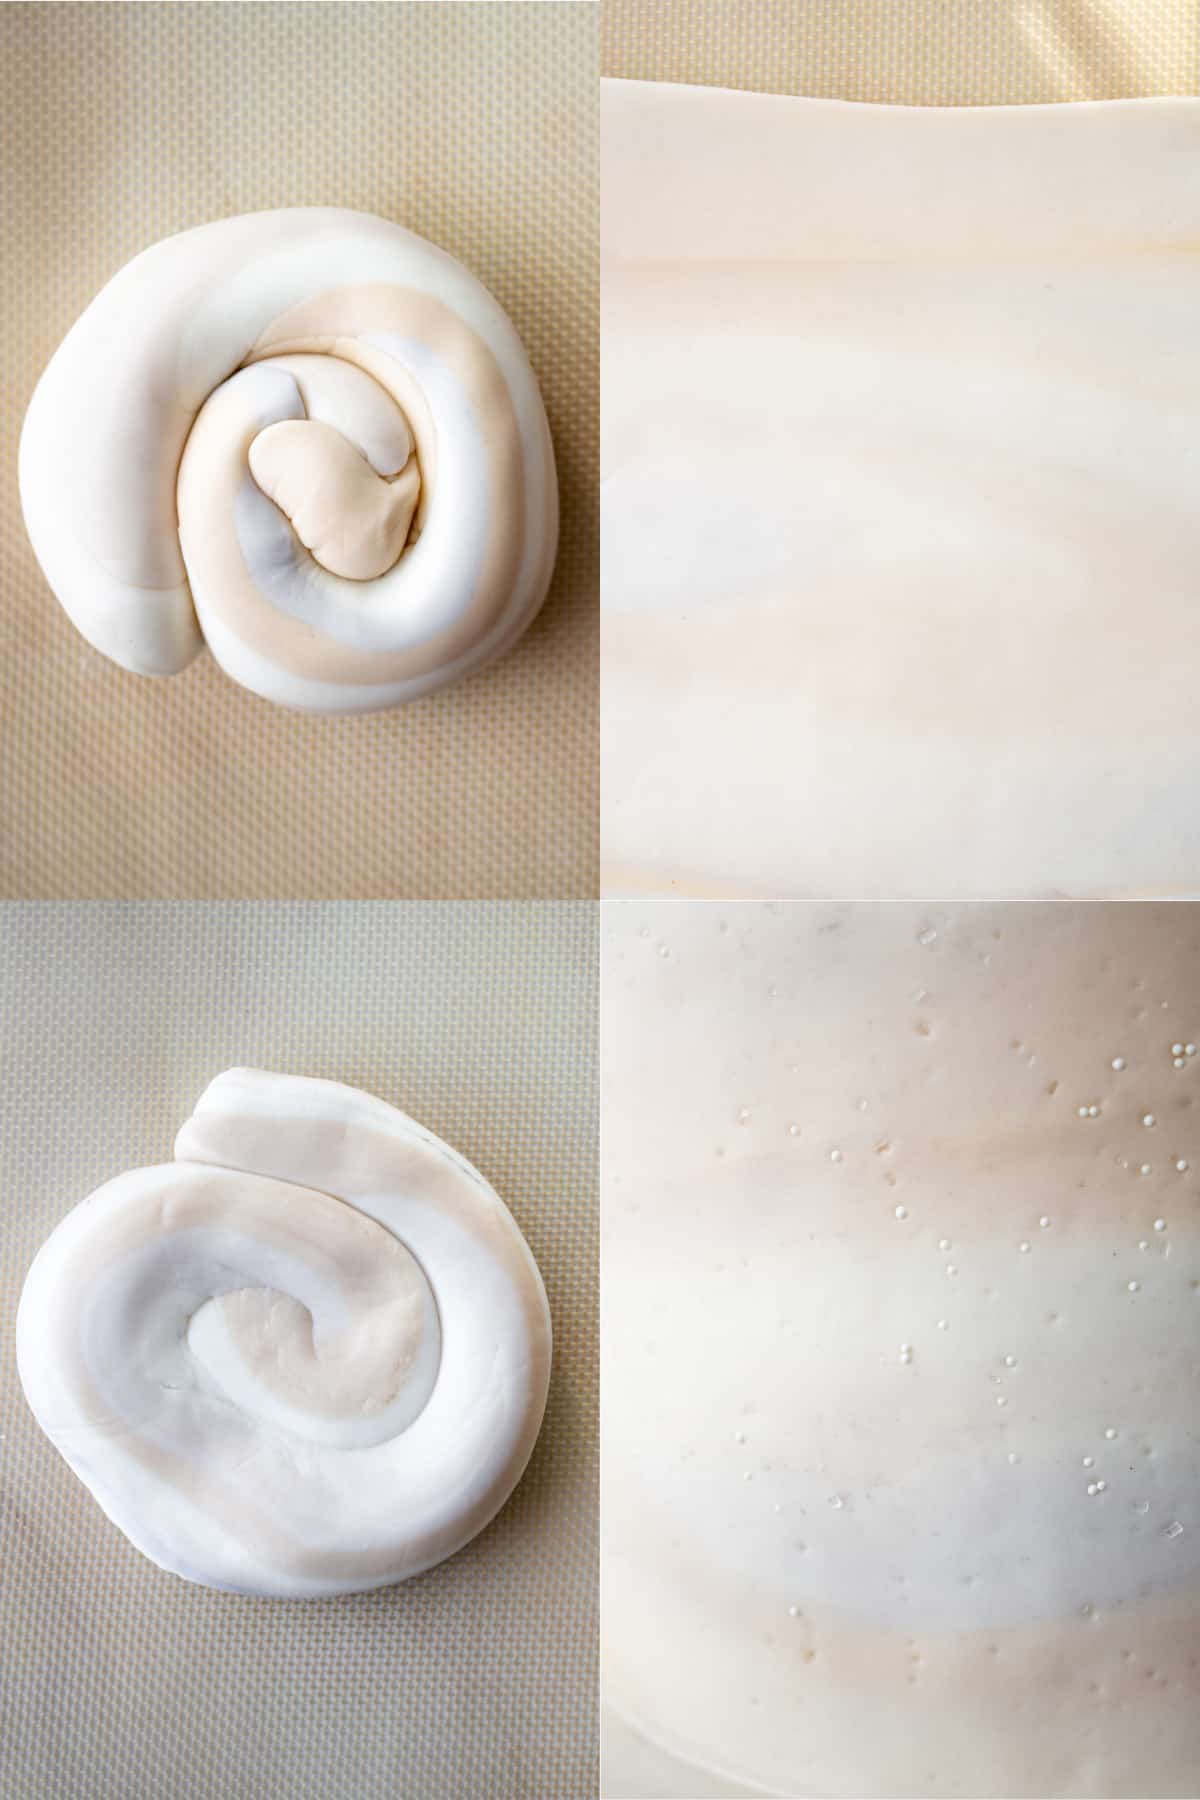
- With the leftover marbled fondant from this panel, roll into a rope shape, then into a snail shape.
- Flatten the snail shape and roll until about ¼". Cut out a 6" round for the top of the tier.
- Place the top panel of the cake. Cut off the excess paste and smooth the fondant and seams with a fondant smoother.
- Repeat the steps for the 8" tier and any remaining tiers.
- While the fondant is still pliable, press sanding sugar and white nonpareils into the the cake in random areas until you are satisfied with the results.
Rice Paper Waves
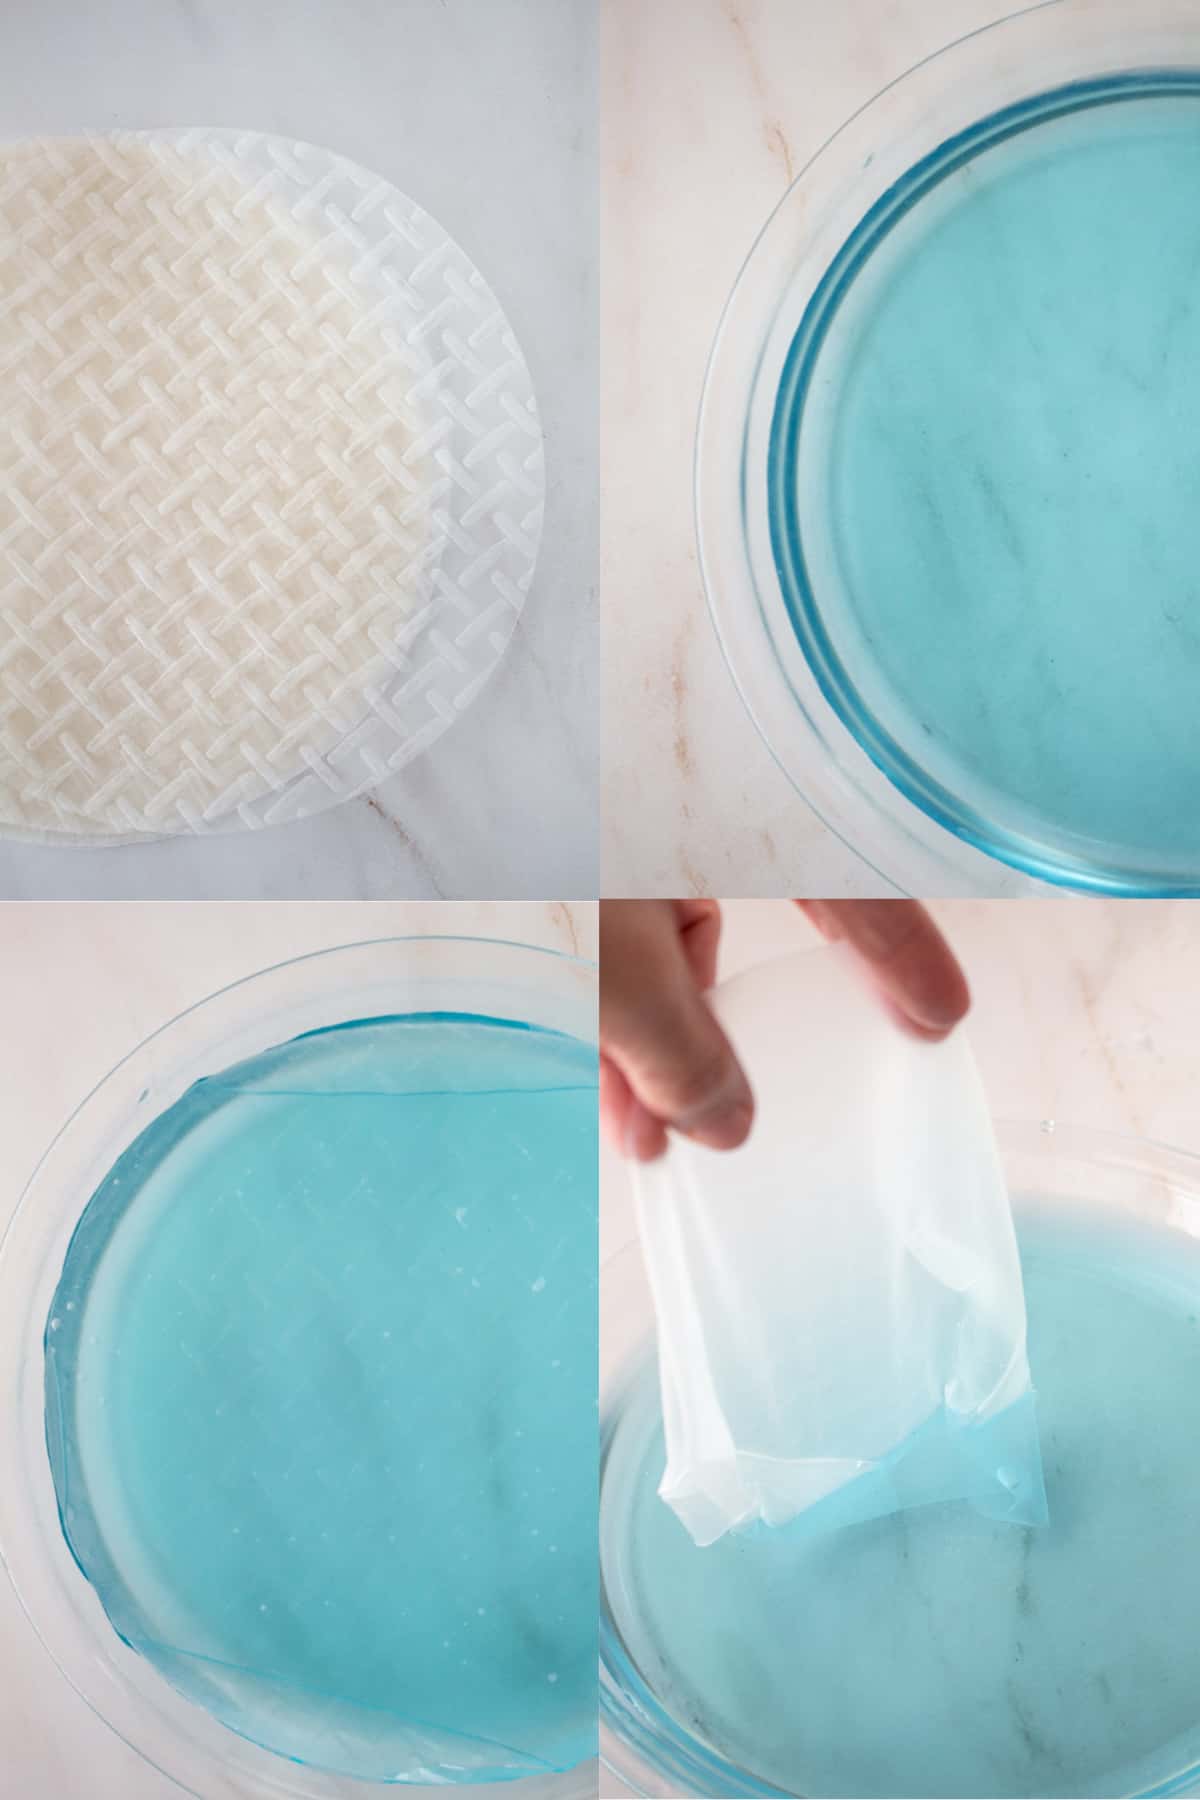
- Add a small amount of sky blue gel color to a pie pan filled with room temperature water. Only a small amount of color is absorbed into the rice paper, so color the water a shade or two darker than the shade you're aiming for.
I prepared the shaping forms for my rice paper by wrapping silicone mats around 6" and 8" fake dummy (or styrofoam) tiers. You can also use wax paper in place of silicone mats. If you don't have dummy cake tiers, you can wrap the waves around bowls, or pans. You want the waves to have a slight curve to the ends.
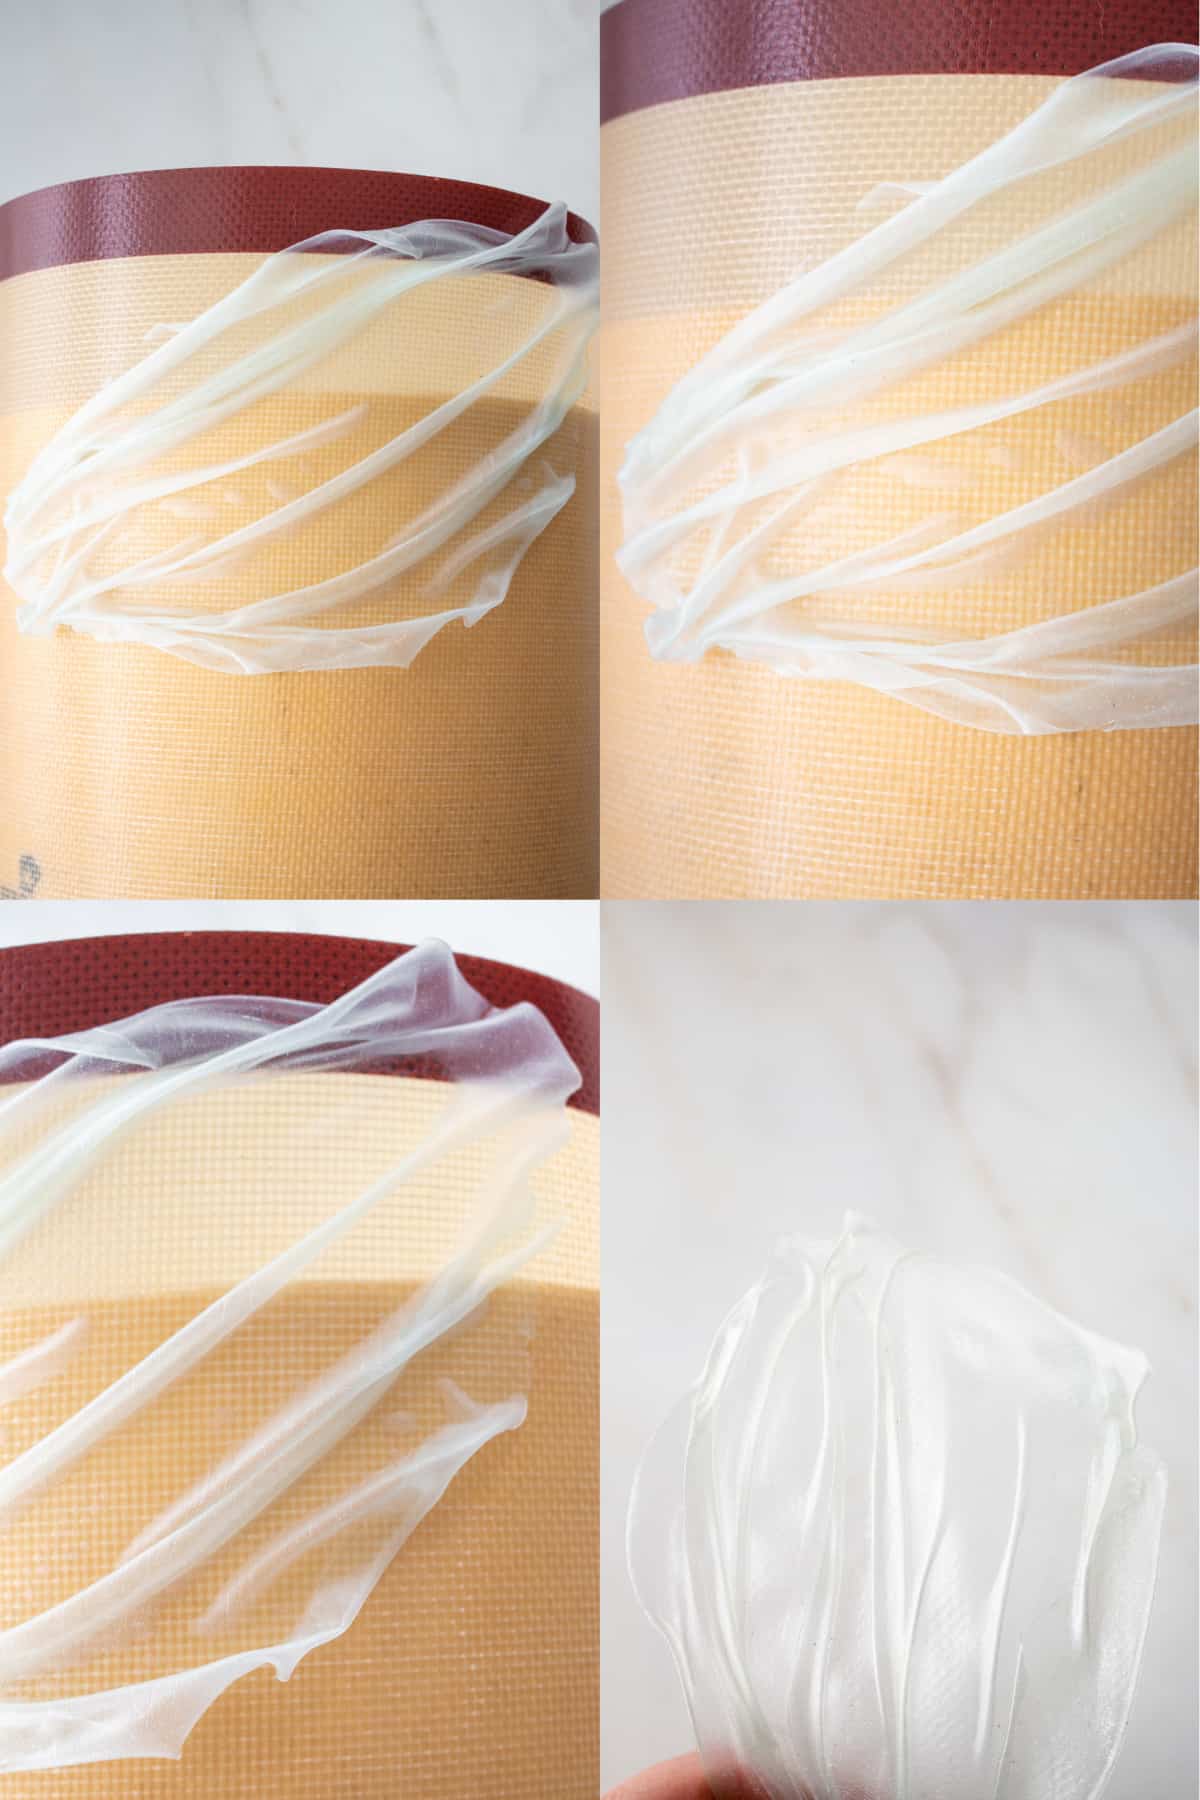
- Place a sheet of rice paper into the water, making sure it's fully submerged. Let the paper soak for 20 seconds. Flip the paper over and and let it soak until softened.
- Remove the rice paper from the water, letting the excess water drip off and form the rice paper on the silicone mat, leaving some creases and folds.
- Taper the end of the wave a bit. Twist the end of the wave onto a toothpick. This will be how the sails are attached to the cake. Alternatively they can be attached with the melted chocolate. Once you like the shape of the wave, leave to dry completely. I made 6 waves total. Reserve the remaining blue water for the wafer sea foam
- Once the waves are dry, use a dry paintbrush and dust the waves with pearl luster dust.
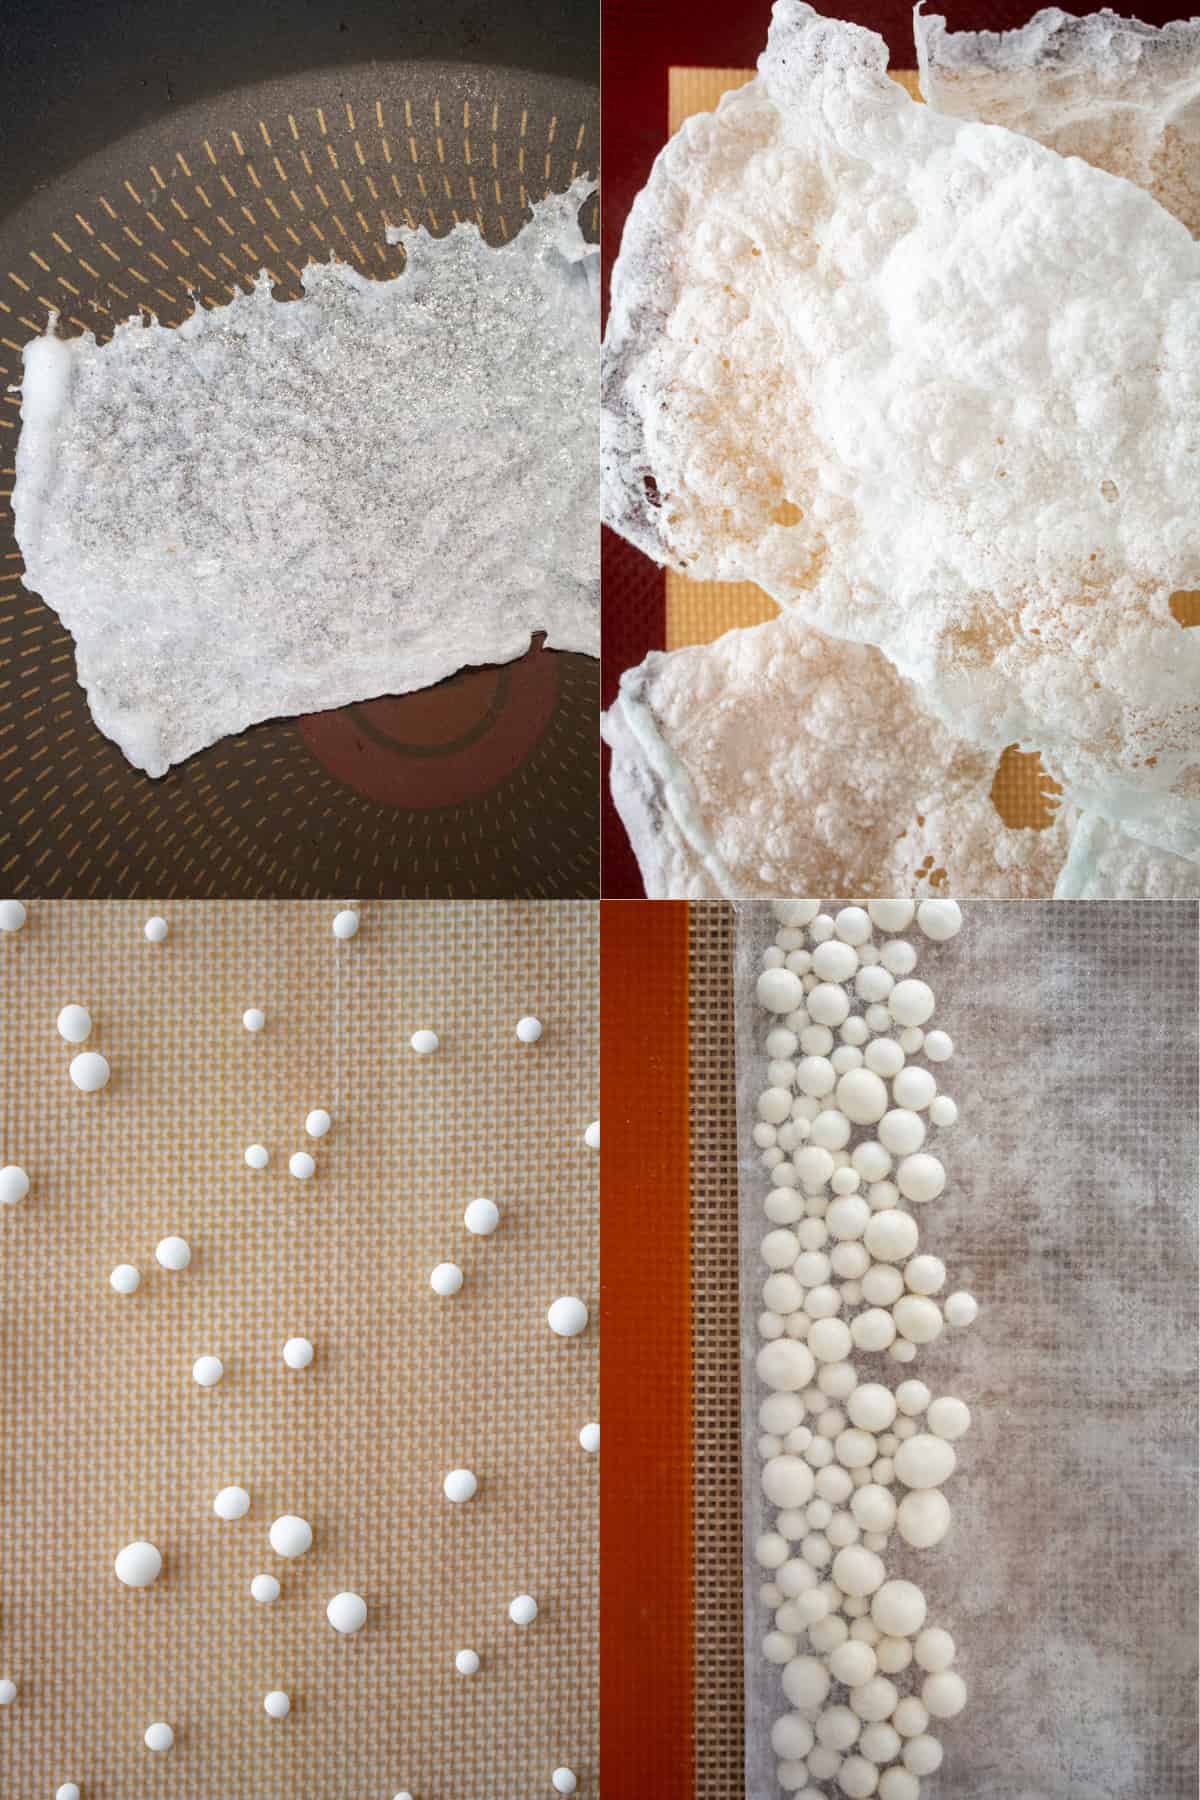
Wafer Paper Sea Foam
To make the sea foam, you will need to pan fry the wafer paper. This technique causes the wafer paper to bubble, giving it a foamy appearance.
- Heat a nonstick frying pan over medium heat.
- While the pan is heating, tear sheets of wafer paper into 4-6 pieces. I used 2 sheets to have a variety of shapes to choose from. You will also be able to shape the wafer paper to the desired size after it has cooled from frying.
- Quickly, like 1 second, dip the wafer into the reserved blue water and lay it flat into the frying pan. The paper will shrink and bubble. Watch closely to prevent any browning. Reduce the heat a bit if you're seeing any browning.
- Once the paper has bubbled and appears dry, remove the wafer and let it cool on a silicone mat or a piece of parchment paper. Repeat the steps for the remaining paper.
Sugar Pearls
- Make sugar pearls with white fondant by rolling different size small balls. They tend to look a bit unnatural on the cake if they're too big. I made about 20-30 pearls to have some extra on hand and let them dry overnight.
- When the pearls are dry, place them into a tiptop bag. Sprinkle a little bit of the luster dust into the bag and seal the top. Shake the bag to fully coat the pearls with luster dust.
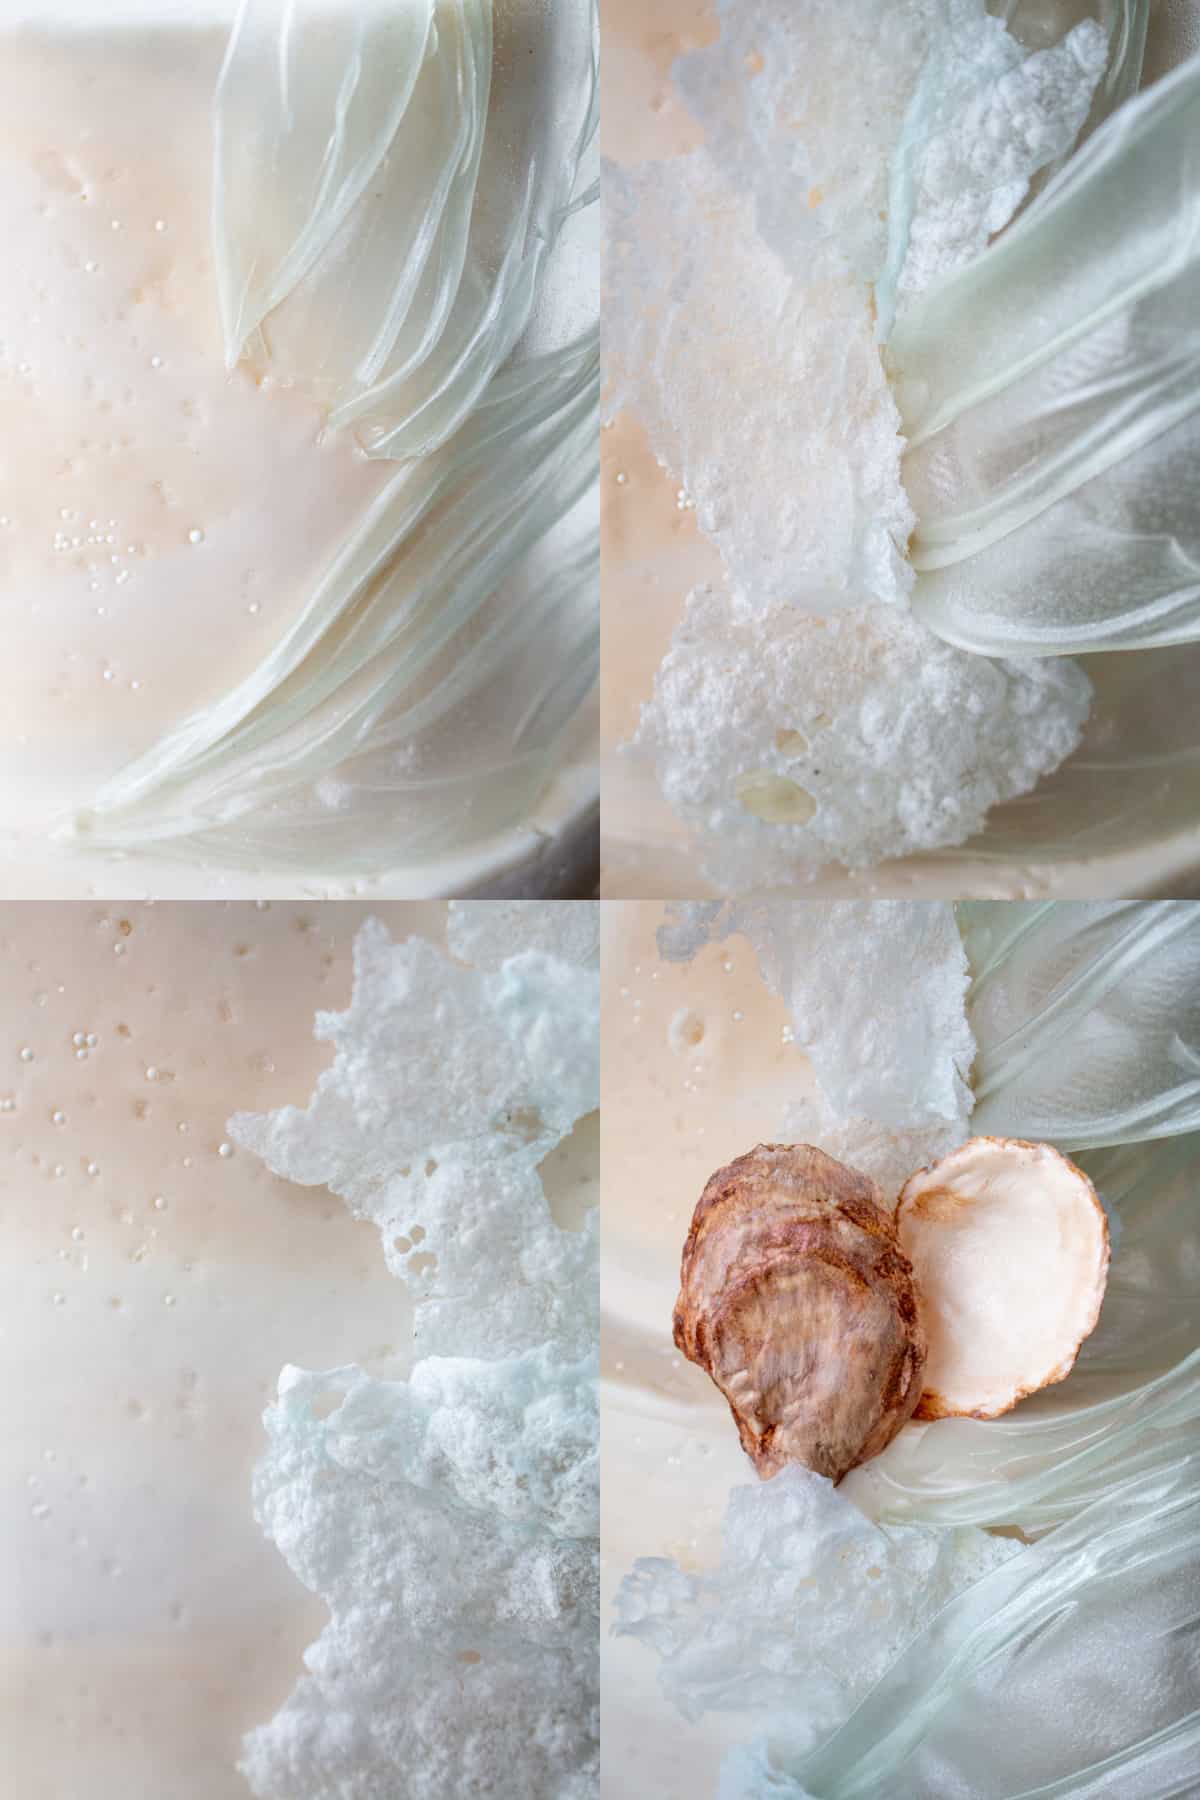
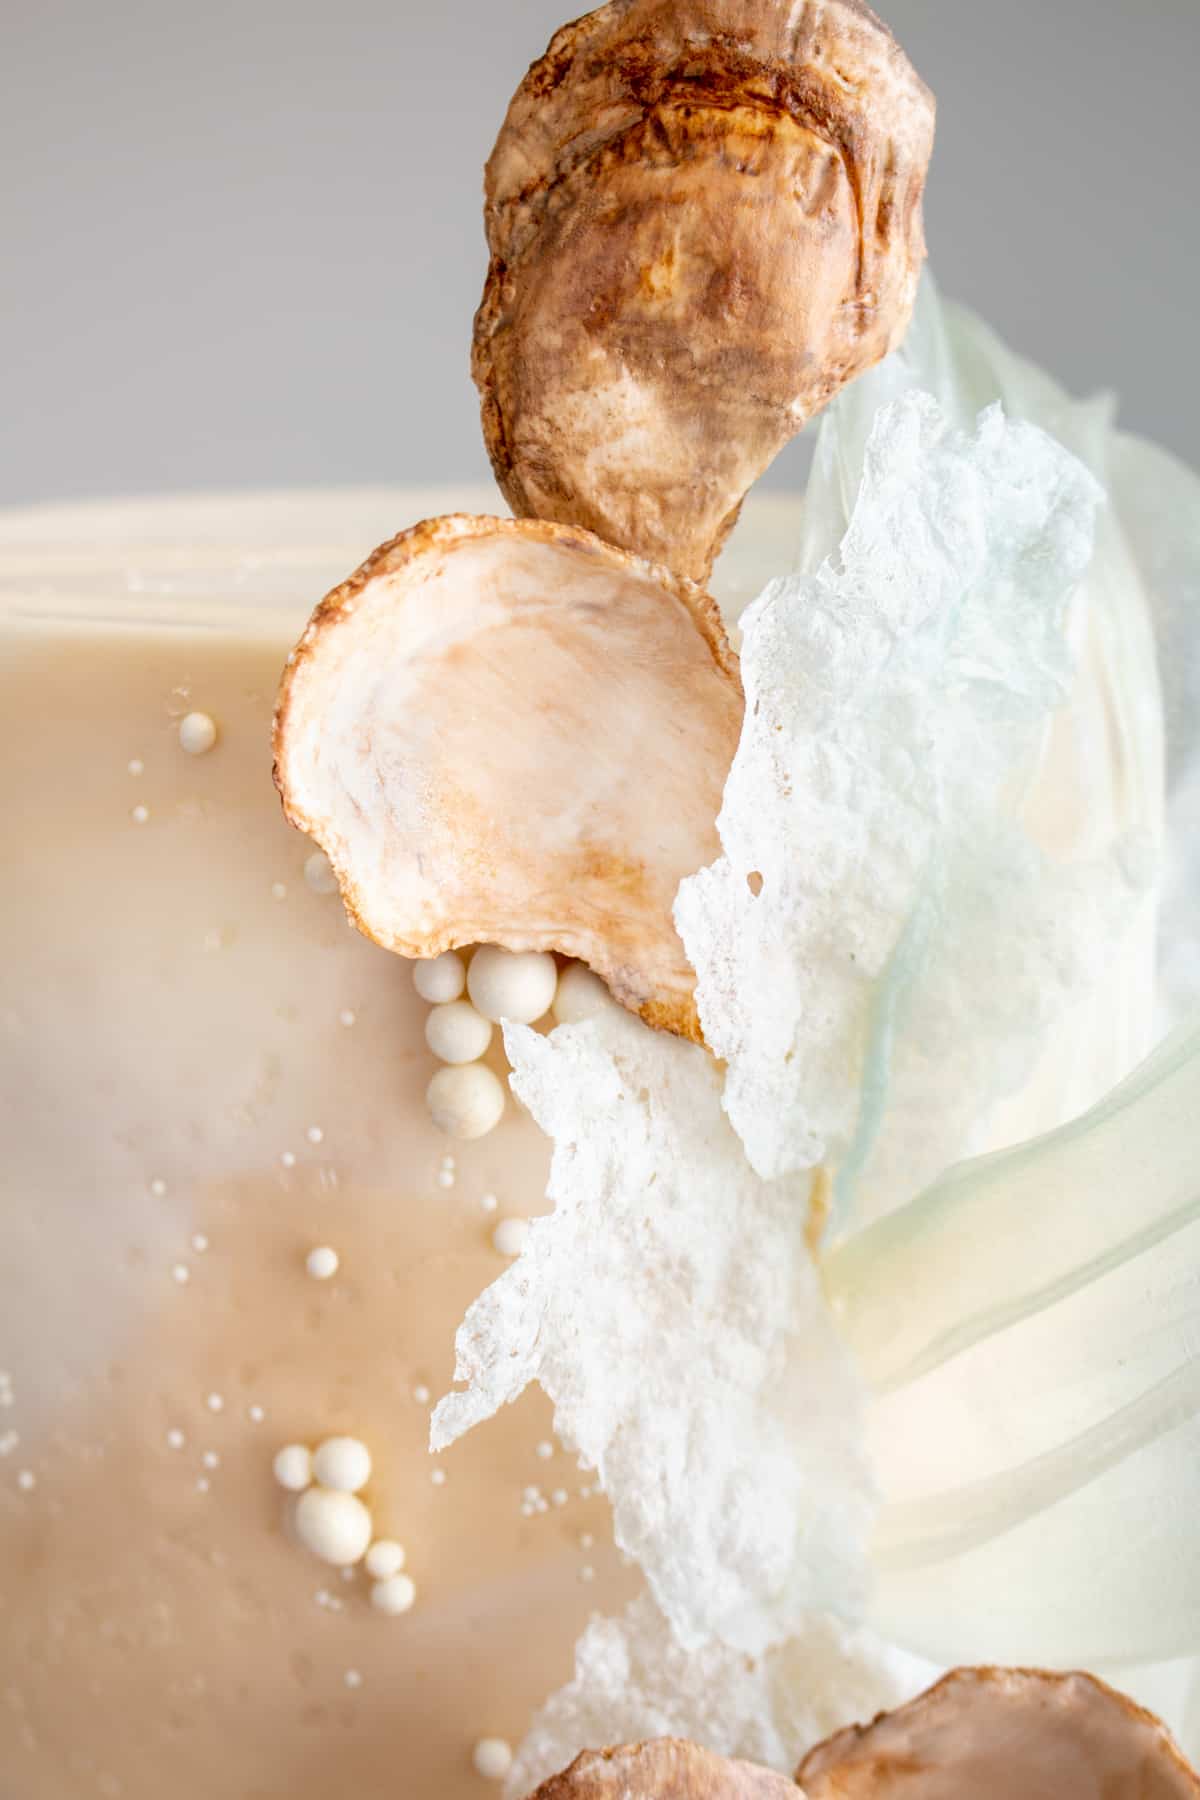
Oyster Shells
There is a full tutorial for these oyster shells here. There you will find the supplies used, how to make them, and a detailed step by step on how to paint them. Alternatively, you can use a sea shell mold found online or in a local craft store to make a variety of shells.
Assembling the Cake
The primary focus to this cake is off to the right hand side. The waves should come off and away from the cake. I used 3 waves per tier.
- Attach the waves to the cake first. Insert the waves into the cake. If you chose to not use toothpicks on the waves, the waves can be attached at the base with melted white chocolate. Freeze spray speeds up the process, and dries the chocolate instantly if you choose to use it. No slipping or falling waves.
- Tear or shape the wafer sea foam into mid size pieces. You can attach the foam with piping gel or white chocolate and (optional) freeze spray as mentioned above. Attach the foam at the bases of the waves. This will cover the ends of the rice waves but also keep the design a bit more seamless. Overlap the foam pieces so that they don't look too separated. Think of it as trying to keep the design as seamless as possible.
- Place the oyster shells onto the cake. Again, I used melted white chocolate to attach them to the cake. I placed the oyster shells along the bottom tier, along the bottom of the 6" tier and at the top of the 6" tier.
- With a set of craft tweezers, attach the sugar pearls with piping gel along the edge of the design in clusters, with a few random pearls being placed an inch or two away from the edge of the design.
FAQs
Measure across the top and both sides of your cake. Add two inches to that total and that will be the size of the circle of fondant to roll out.
Top+side+side+2=diameter of fondant circle
For example:
8+5+5+2 = 20
So I'd roll out my fondant to a 20" round.
Rice paper dries firm and will stay firm on buttercream or ganache.
Wafer sea foam can also be attached to buttercream or ganache.
Technically their edible, but they dry hard and feel plastic-like. They're also flavorless. So, yes, you could, but I wouldn't want to.
Wafer paper and humidity don't play nicely with each other. If the humidity is below 50%, you can refrigerate it. Hot and humid environments will result in lots of condensation, and melting wafer paper.
If you make a cake using any of the techniques within this beach cake tutorial, let me know! Drop a comment or tag me on Instagram. I love seeing your bakes and creations.
Enjoy!
Ash xx
Brianna Neuwirth says
Do you have a tutorial for how you panel your cake with photos?
Ashley says
I do not. Not yet. Check out Sugar Geek Show's panel method. https://sugargeekshow.com/basic-cake-tutorials/paneling-cake-fondant/
This is how I panel all of my cakes.